E12 tidy up.

Post Reply
pandemonium001
E21 Pro
Posts: 527
Joined: Sun Oct 07, 2012 1:19 pm
My E21(s): E12 535i T (ish)
Location: Scotland Ayrshire

Re: E12 tidy up.

Post by pandemonium001 »

BertjeConti wrote:i think you gonna need to beef up your seat brackets, those M6 bolts will snap-off when that turboed engine launches :shock

nice build, keep on going...
what ya trying to say?. :loll

Engine now fully stripped and ready for cleaning, dipping and inspection.
plastigauges ordered.

have been looking for a kirkey seat for ages but not many premium ones come up for my "cough" big bones.

looks like if the pistons are 91.80mm they are the Mahle ones, so makes sense why people are getting 600hp on std bottom end.

google m30 turbo bigred.


pandemonium001
E21 Pro
Posts: 527
Joined: Sun Oct 07, 2012 1:19 pm
My E21(s): E12 535i T (ish)
Location: Scotland Ayrshire

Re: E12 tidy up.

Post by pandemonium001 »

more piccys

Brand new turbo arrived today
Image

stripped
Image

first round with TFR and wire wheen on drill
Image
Image


future cleaning tank
Image

tank for dipping the block
Image

dried out the block with propane torch then started rubbing down with red scotch and little oil and hone to see where we are at.
Image

found this
Image

hmmm the worst corrosion
Image

came out not to bad cannot feel it with finger nail, and barely with index finger tip

Image

bearing seats have been oiled.

other cylinder shots

Image
Image

see the rust inside the water jacket
Image
Image

the whole block will be dipped in the Bilt hamber deox-c got another 2kg in the post,then on to clean up, rinse, dry, bore measured, honed again, then measured, think i will chance the 2 marks in the cylinder.

deck will be checked for flatness with a 12x1" slip then sanded with same slip with p320-p400
see chart for micron to Pvalue equivelent
http://www.fine-tools.com/G10019.html
User avatar
bmw e12 e21
E21 VIP
E21 VIP
Posts: 4531
Joined: Sat Nov 30, 2013 9:29 am
My E21(s): '82 323i Edition S man. + ´83 M315 man.
Location: Belgium - Limburg

Re: E12 tidy up.

Post by bmw e12 e21 »

Wow, nice work! the engine block seems to be in good condition. :thumbsup
grt Remy

BMW e21 M315 1983 75pk+ 110Nm+ Double WEBER DCOE 40
BMW e21 323i ED. S 1982 143pk 190Nm
BMW e12 M535i 1980 218pk 310Nm
BMW e91 318d 2009 190pk 411Nm
FORD Focus 1.8TDci 2010 115pk 300Nm
pandemonium001
E21 Pro
Posts: 527
Joined: Sun Oct 07, 2012 1:19 pm
My E21(s): E12 535i T (ish)
Location: Scotland Ayrshire

Re: E12 tidy up.

Post by pandemonium001 »

measured the bores
Image


haynes manual states 92.000 +/- 0.01mm
top edge of all 6 cylinders where there should be no wear ranged from 92.018mm to 92.024mm, i do believe that may be the factory size, unless previous worked honed it out a bit.
sizes as follows

Image
sizes are in mm, the " is habit, i work in imperial. top size was 20mm or so down from top deck

found a handy BMW tis in russian
http://tis.bmwcats.com/document/technic ... 00:w13004/

Tstsilindra a) 92.00 ± 0.01 mm
Bore - an intermediate size of a) 92.08 ± 0.01 mm
1 ) Repair and size ) 92.25 ± 0.01 mm
2 ) Repair and size ) 92.50 ± 0.01 mm
Permitted roundness and cylinder ) mm 0.01
Permissible taper and cylinder ) mm 0.01
The maximum permissible total wear clearance between piston and cylinder ( engine running) 0.15 mm
a) a new or processed

Bore taper i would say cylinder 3 &4 are on the limit
I presume the intermediate size is the maximum serviceable limit before rebore, so looks good. unless we start reboring an engine due to 3.9tenths of a thou wear.

next onto block de-rusting and then main line bearing checks, need to order the ARP stud h/w soon as well.
pandemonium001
E21 Pro
Posts: 527
Joined: Sun Oct 07, 2012 1:19 pm
My E21(s): E12 535i T (ish)
Location: Scotland Ayrshire

Re: E12 tidy up.

Post by pandemonium001 »

saw rod and joost E12 thread and realised i sold my e12 sump with the engine, crap, but then realised the e34 has the windage plates in it.

so will probably cut, winglet and baffle the E34 one to take advantage of the plates, i was looking at crank scrapers any way so this probably saved me $100
Image
Image
Image

just need to see if the oil pump clears o.k as well.
pandemonium001
E21 Pro
Posts: 527
Joined: Sun Oct 07, 2012 1:19 pm
My E21(s): E12 535i T (ish)
Location: Scotland Ayrshire

Re: E12 tidy up.

Post by pandemonium001 »

de rusted the block using bilt hamber deox-c, if you heat the solution it really works well.

poured in hot water and maintained the temp using a 1950w dishwasher immersion heater £11 from ebay
Image

you can see how clean the water jacket is
Image

the cossosion was so heavy it could be scrapped with a screwdriver
Image

some flash rust after removal

block painted
Image
Image

top deck was given a little rub with p600 and a straight edge
Image

end float check
Image

not within spec, 0.19mm so 0.02mm outwith spec.
thought i might as well check one of the clearances as well

Image

0.05mm is the upper end of the clearances, or 8 thou in old money.

I should have greased one side for a better reading but its close enough to confirm the engine is just worn to the upper limits through mileage.

Image

ARP head studs are on the way.

Athena coopering head gasket has arrived.

Hastings Moly piston rings are on the way.

now on the search for main bearings

acl or kings bearings look good.

I think the s52b32 bearings are the same:
Material Tri-metal
Min Std Shaft Size 2.3611in / 59.971mm
Max Std Shaft Size 2.3618in / 59.990mm
Min Std Tunnel Size 2.5591in / 65.000mm
Max Std Tunnel Size 2.5598in / 65.019mm
Max Wall at Crown 0.0980in / 2.490mm 0.0930in / 2.478mm
Max Overall Length
0.787in / 20.00mm - 1538H
0.982in / 24.94mm - 1539H
Notes Set contains 6 pairs of 1538H upper/lower shells for positions 1,2,3,4,5 & 7, and one pair of 1539H upper/lower flange shells for position 6.

taken from the ACL website, so time to get the vernier out again.
pandemonium001
E21 Pro
Posts: 527
Joined: Sun Oct 07, 2012 1:19 pm
My E21(s): E12 535i T (ish)
Location: Scotland Ayrshire

Re: E12 tidy up.

Post by pandemonium001 »

Well, bearings removed and where stamped Glyco items, dated 89, so no one has been in the bottom end.

got this stuff for gaskets
Image

painted and installed dip stick
Image

cleaned and degrease, new glyco std bearings arrived from germany.
Image
Image

though i would try some DFL therapy
Image

Image

look on Molykote website search for D321-r

Image

Image

Image

Athena Coopering 0.078" headgasket arrived from italy as well.

Image

started cleaning pistons in prep for thermal barrier top coat and DFL on the skirts
Image

Image

Image

cleaned and keyed new filter housing lid for paint
Image

Image

degraesed and washer out, ready to install
Image
Image
Image

Image

Image
Image

just need to make a AN10 adapter for the cooler.

installed with
Image
good for semi permenent bolts

Image

chased out block threads

all cleaned up ready for end float check
Image
Image

in-out-in-out shake it all about
Image
first install was to tight 0.002mm, back out rub on flat surface with p2000 and now sitting nice at 0.01mm.

all in for gap checks
Image

all caps removed where even and all under the 0.05mm max indicator, so i am judging its around the 0.04mm range.

Image

permenant locktight for the final install of the ARP main studs
Image
Image

use some of this
Image

torqued to sequence....again... and looks like it did 1hr before
Image

but with a little more ARP Torque lube on it.

ARP head studs and piston rings should be here this week.

But ARP rod bolts wont be here till 2nd of October, so can crack on with other bits first.
User avatar
uwbuurman
E21 VIP
E21 VIP
Posts: 18664
Joined: Fri Jun 12, 2009 4:49 pm
My E21(s): 1978 type 1 323i 5speed dogleg Polaris
Location: Ljouwert

Re: E12 tidy up.

Post by uwbuurman »

Man, I envy your skills! Looks great!
It's the man next door!

1978 BMW 323i
1980 BMW 528i maior restitutio
1987 BMW 325iA cabriolet
2006 BMW 320d touring High Executive
2015 BMW 320dA touring xDrive High Executive ///Msport
User avatar
Peter V.
E21 VIP
E21 VIP
Posts: 11992
Joined: Sun Mar 30, 2008 12:42 pm
My E21(s): '82 320/6
Location: Breda, Nederland

Re: E12 tidy up.

Post by Peter V. »

That would be your next chapter Koos! Read and learn.

Nice work.
Gr Peter V.

.Some say he eats nuts and bolts for breakfast, all we know is he is called the carburetorman.

BMW E21, 1981 320/6 Ascot Grau.
BMW E85, 2004 Z4 2.5i Sterling Grau.
BMW F31, 2017 320dA EDE Luxuryline Mineral Grau.
pandemonium001
E21 Pro
Posts: 527
Joined: Sun Oct 07, 2012 1:19 pm
My E21(s): E12 535i T (ish)
Location: Scotland Ayrshire

Re: E12 tidy up.

Post by pandemonium001 »

Thanks folks, more to come soon. just waiting for parts.
User avatar
Jeroen
Site Admin
Posts: 29247
Joined: Tue Sep 14, 2004 12:23 pm
My E21(s): '81 323i Baur
Location: The Netherlands
Contact:

Re: E12 tidy up.

Post by Jeroen »

Doing a brilliant job mate!!!
Regards/groeten, Jeroen
pandemonium001
E21 Pro
Posts: 527
Joined: Sun Oct 07, 2012 1:19 pm
My E21(s): E12 535i T (ish)
Location: Scotland Ayrshire

Re: E12 tidy up.

Post by pandemonium001 »

Oil pump facts:
oil supply is only 50% filtered
Image

http://www.mye28.com/viewtopic.php?p=954115

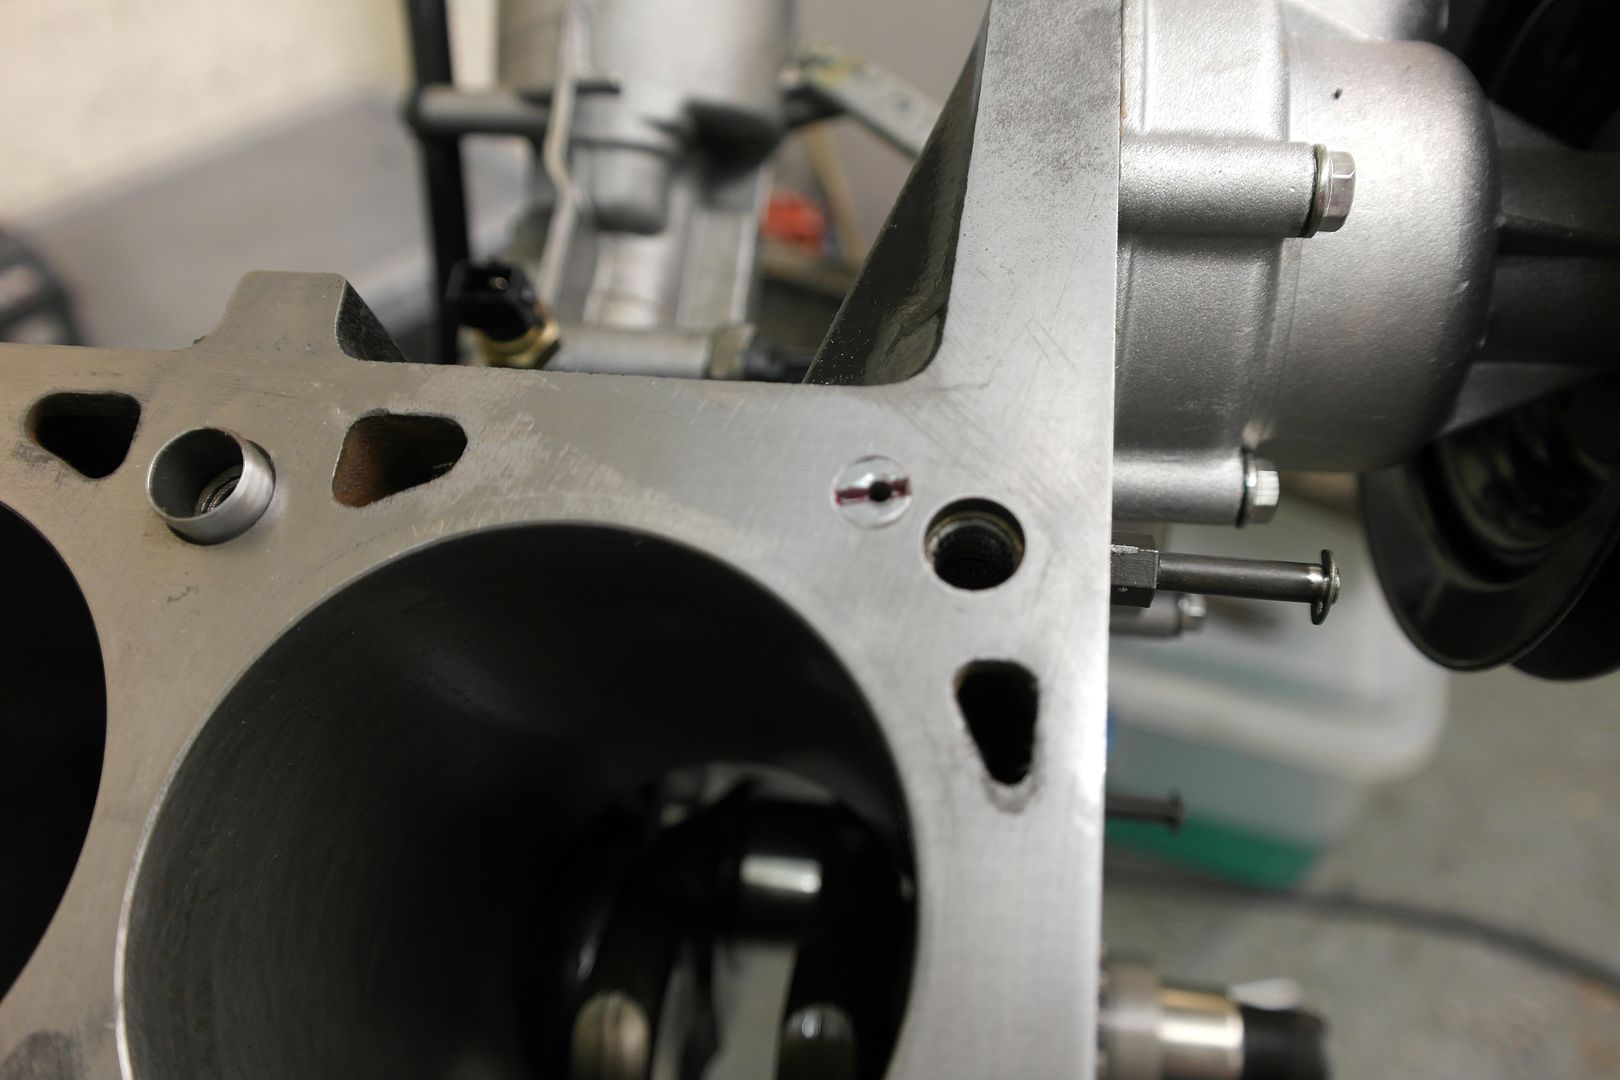
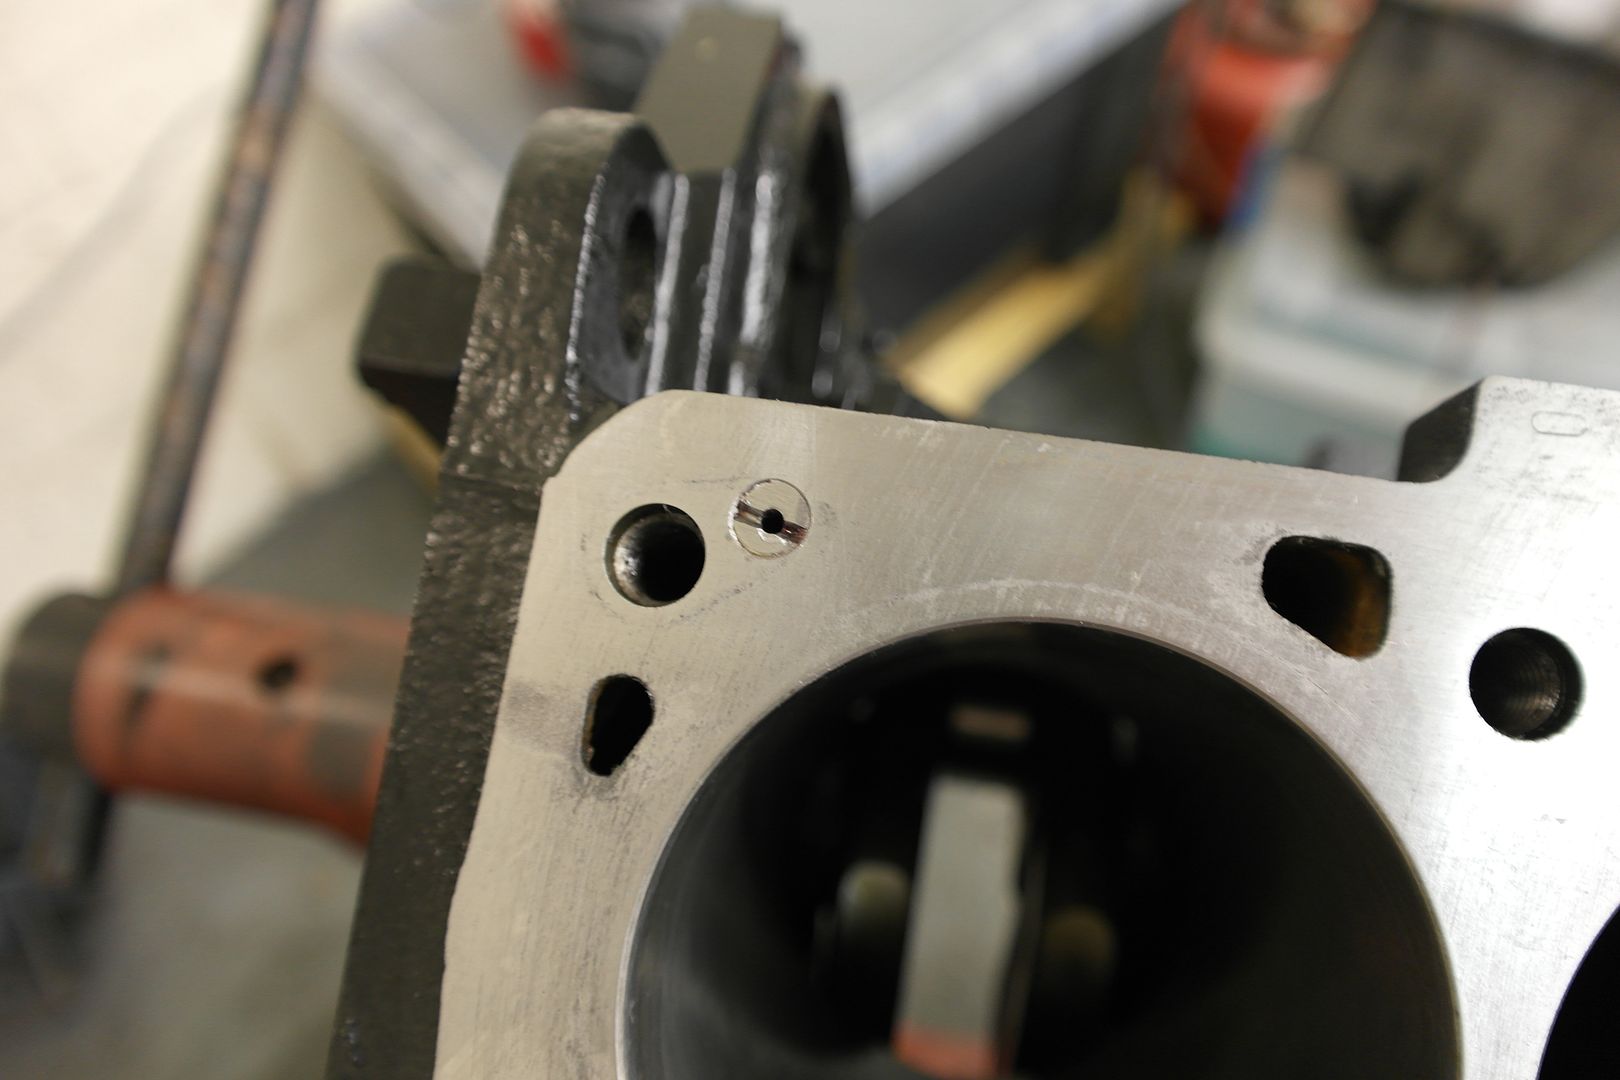
see above regarding oil deck restrictors.

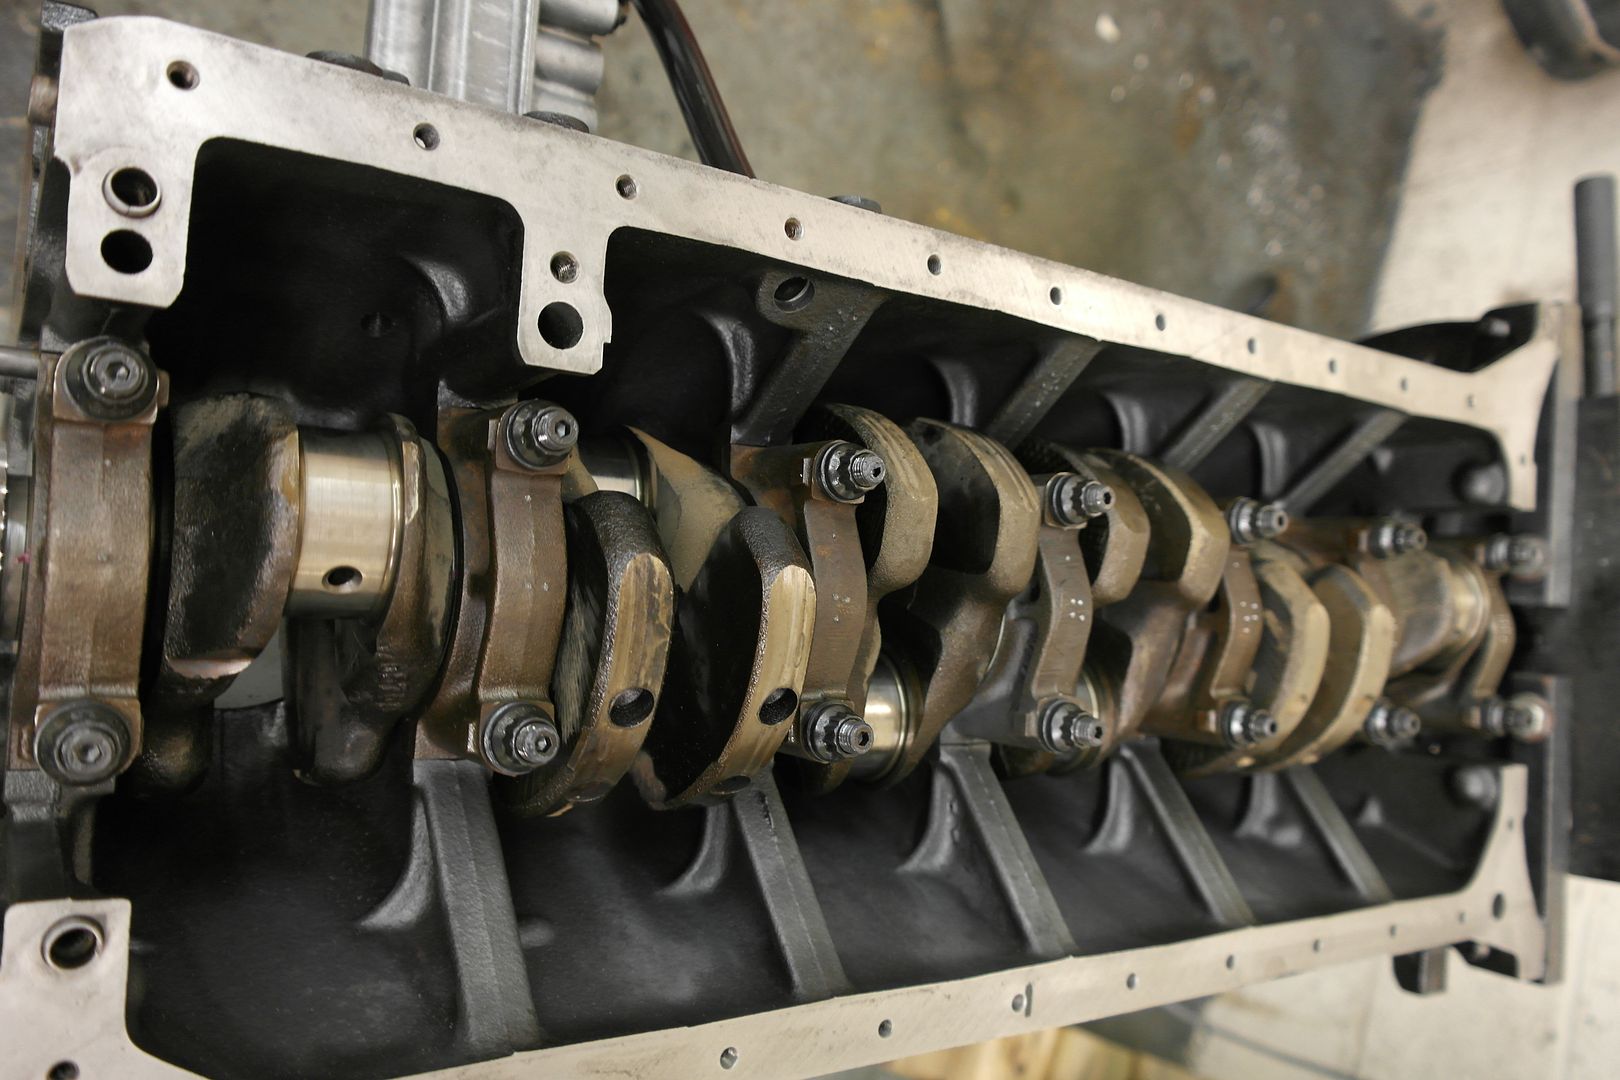
Fwd supply hole supplies direct to engine, aft supply hole is straight to the filter housing via the check valve in the canister.

Put the air line on it to check.
Image

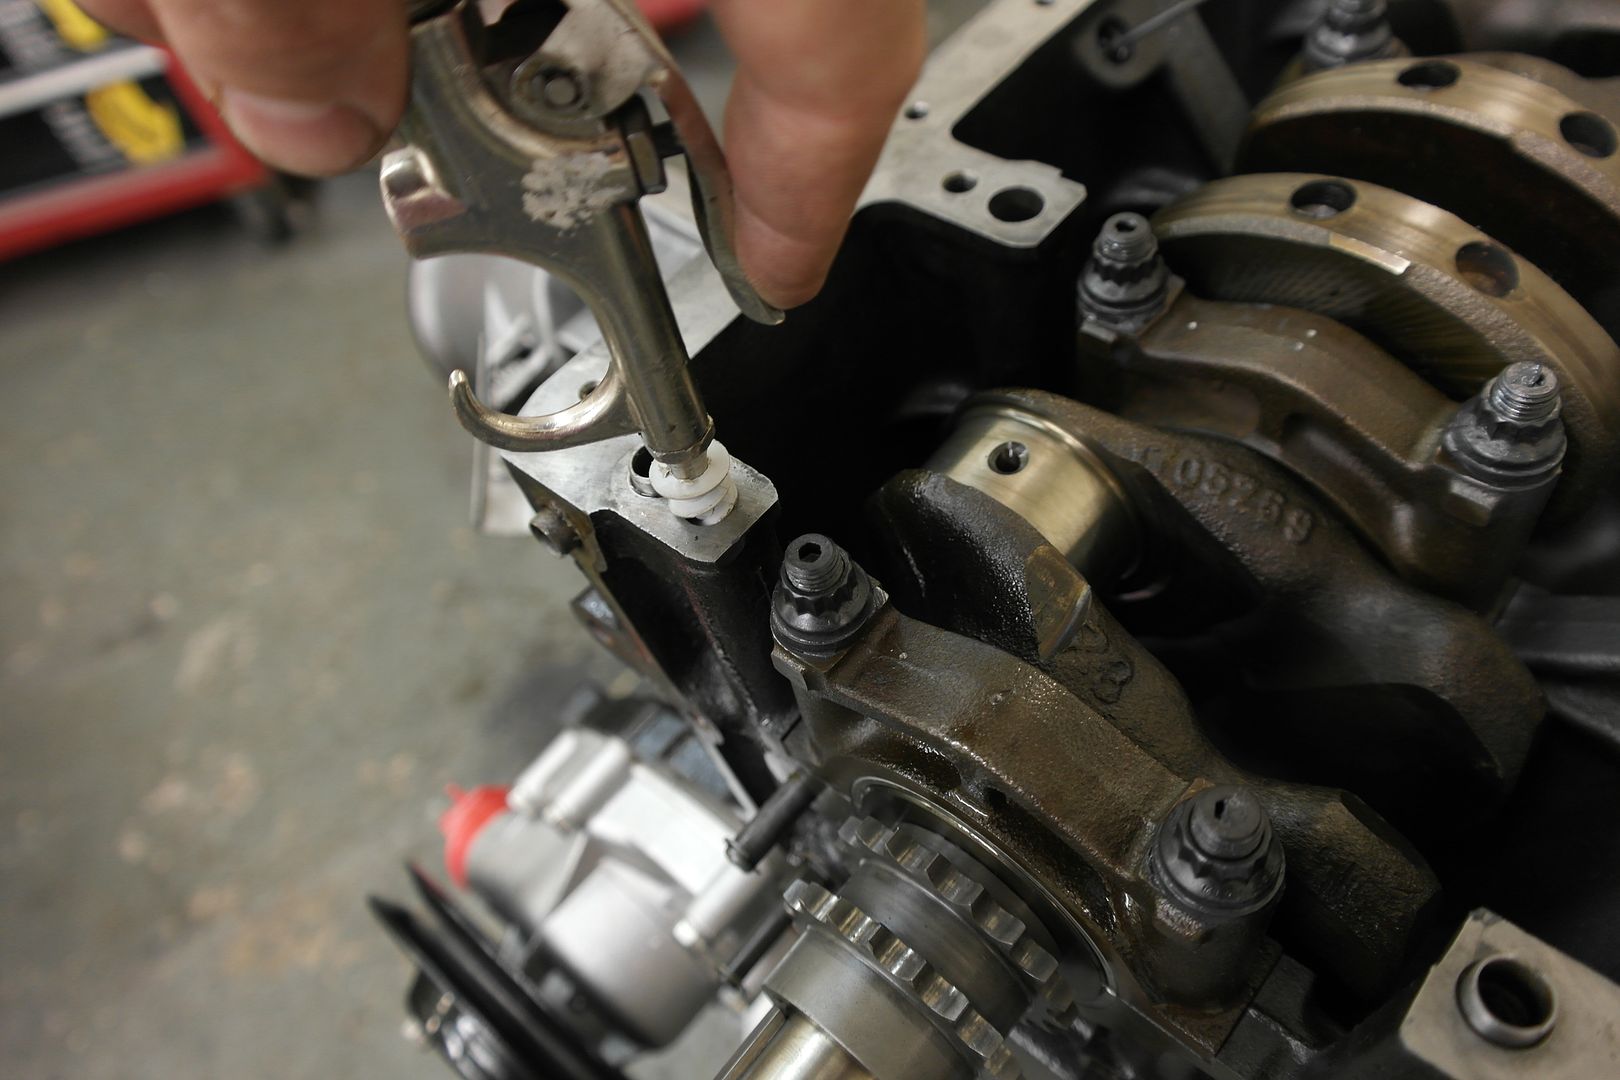
Both head supplies where filled with heavy grease, drilled to 8.5mm and tapped m10x1.5
rotate block, fill supply line with ATF and blown through to clear any debris.

Yes I didn't know about this before I installed the crank hence the heavy grease.

drill 3mm hole and slot for install
Image
Image

I can see the merits of this mod, and i do like to drive engine hard, now and then.

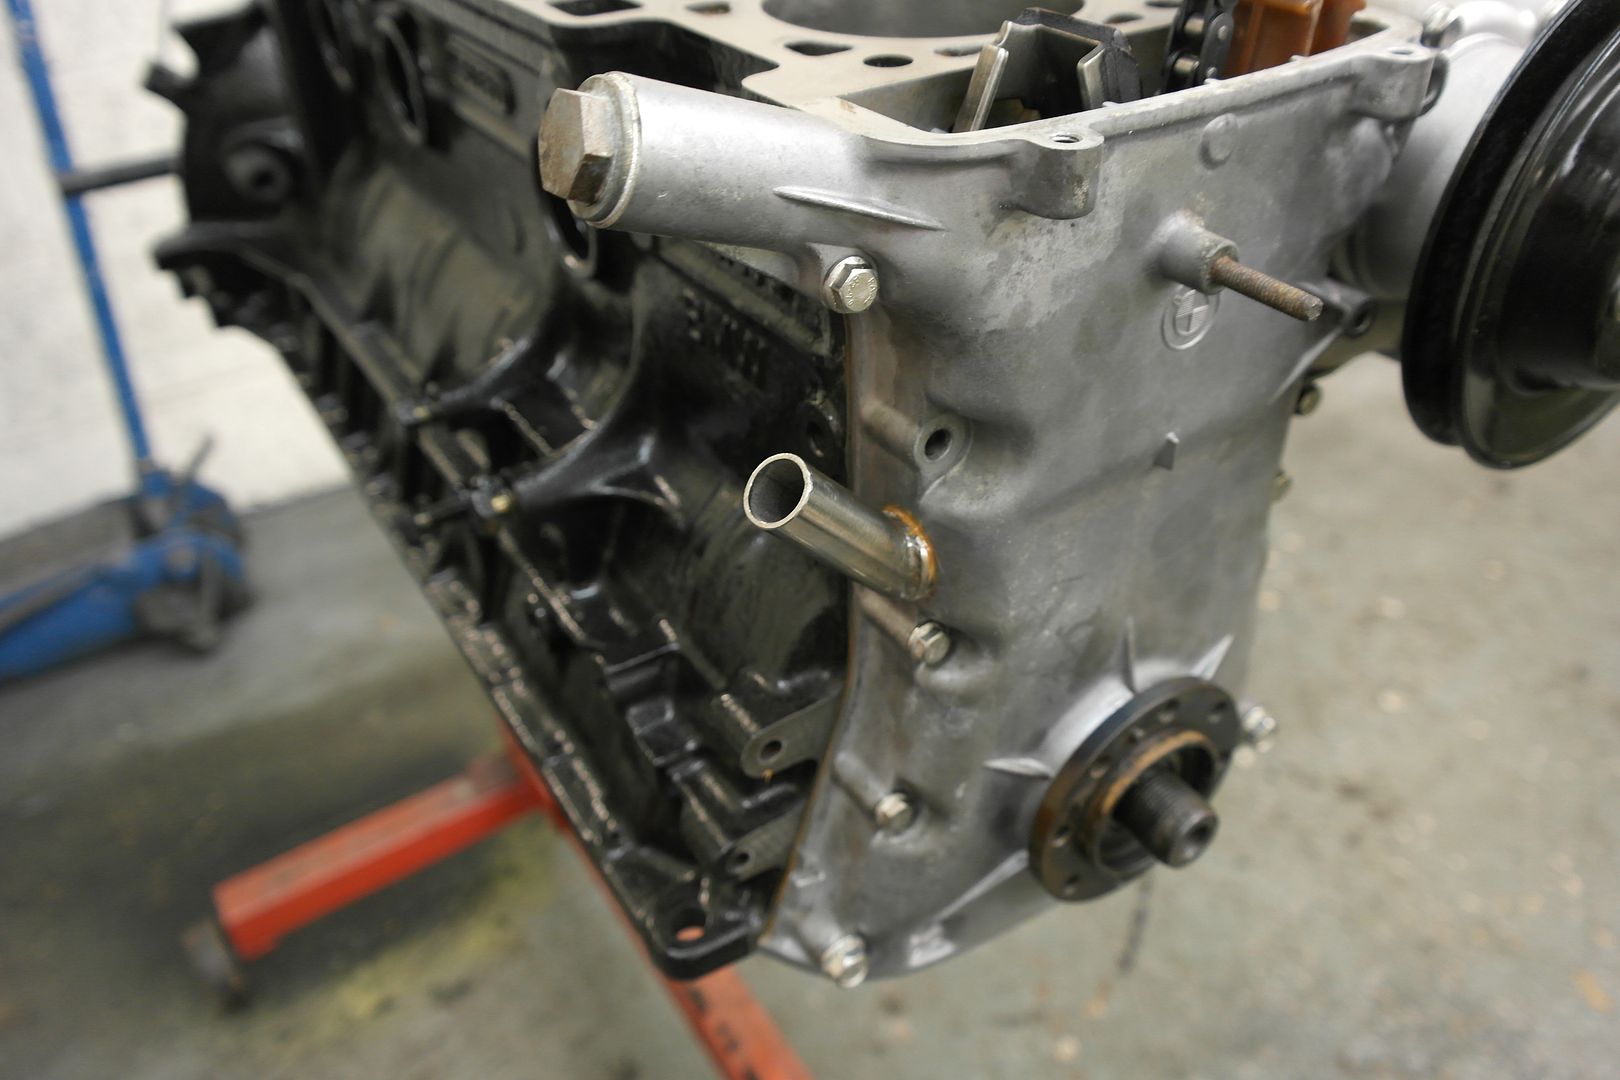
installing aft end cap
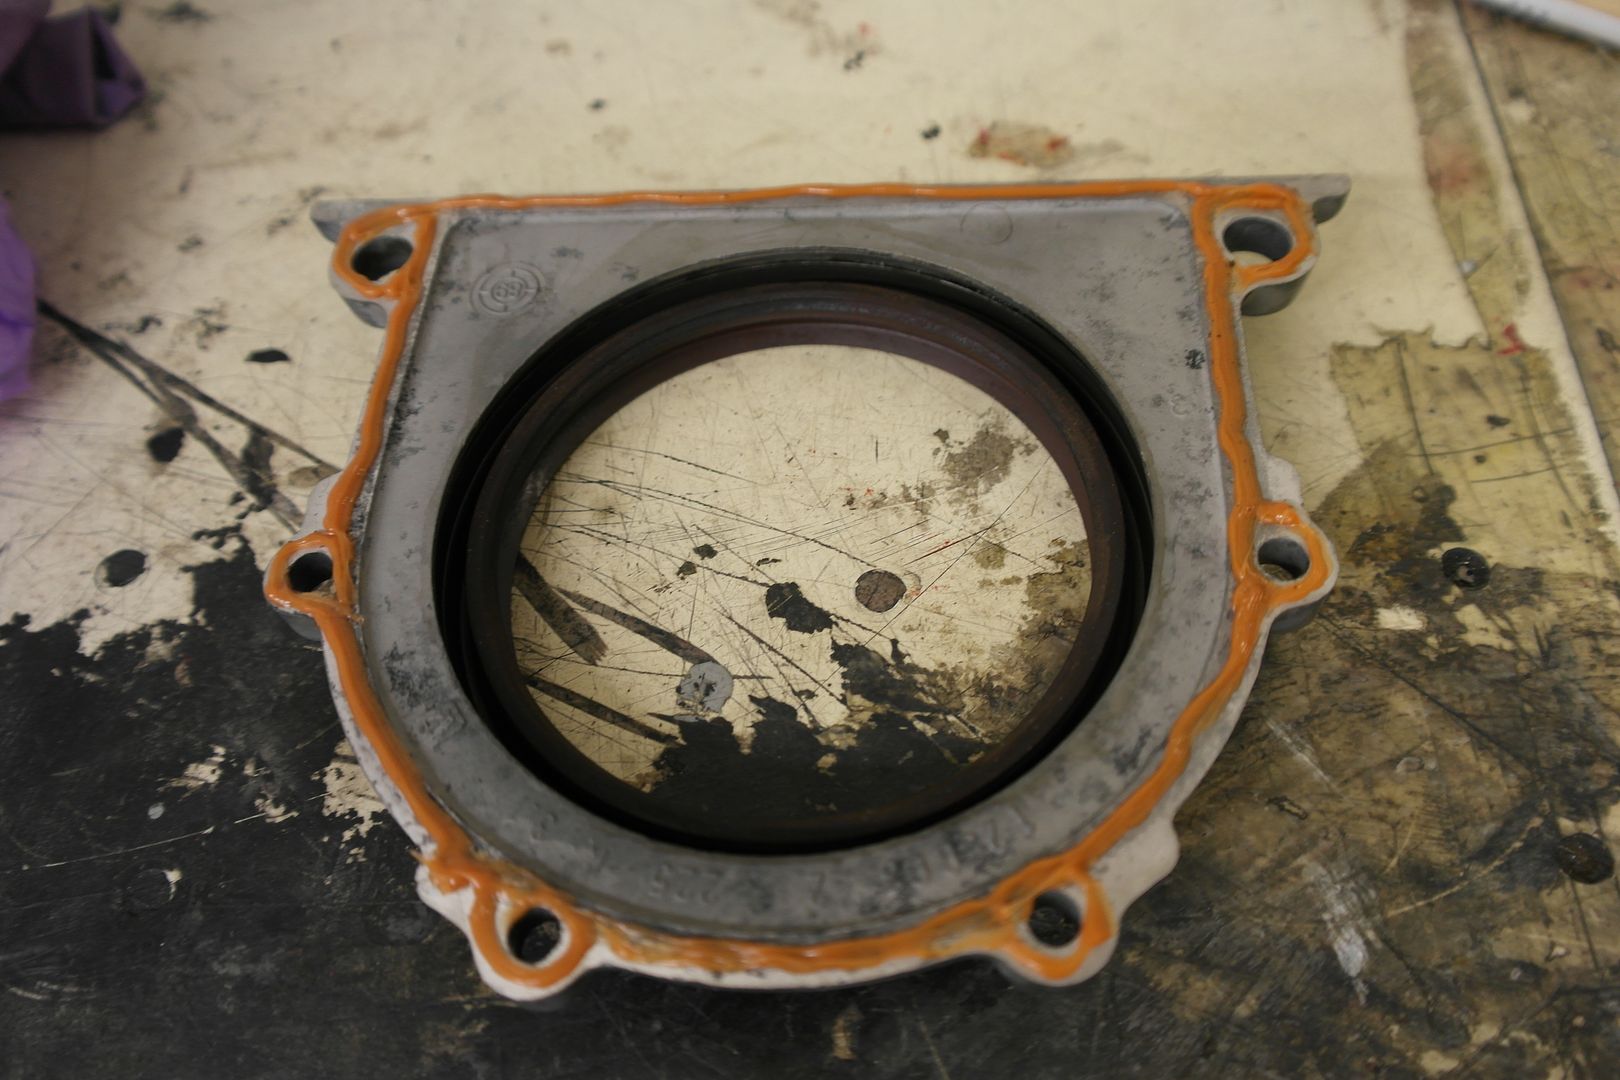
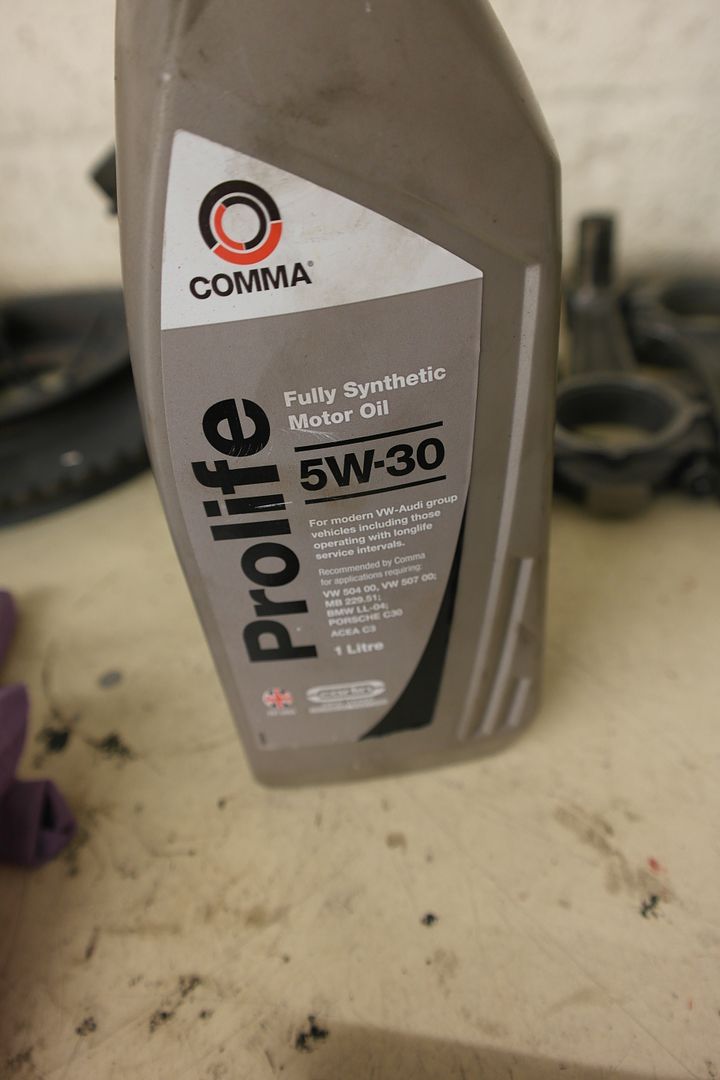
Image

and lubed with this
Image

just bought all A2 stainless bolts, they arent that expensive and look good.

all internal parts get RED locktight, all external gets Blue/green locktight.

Image

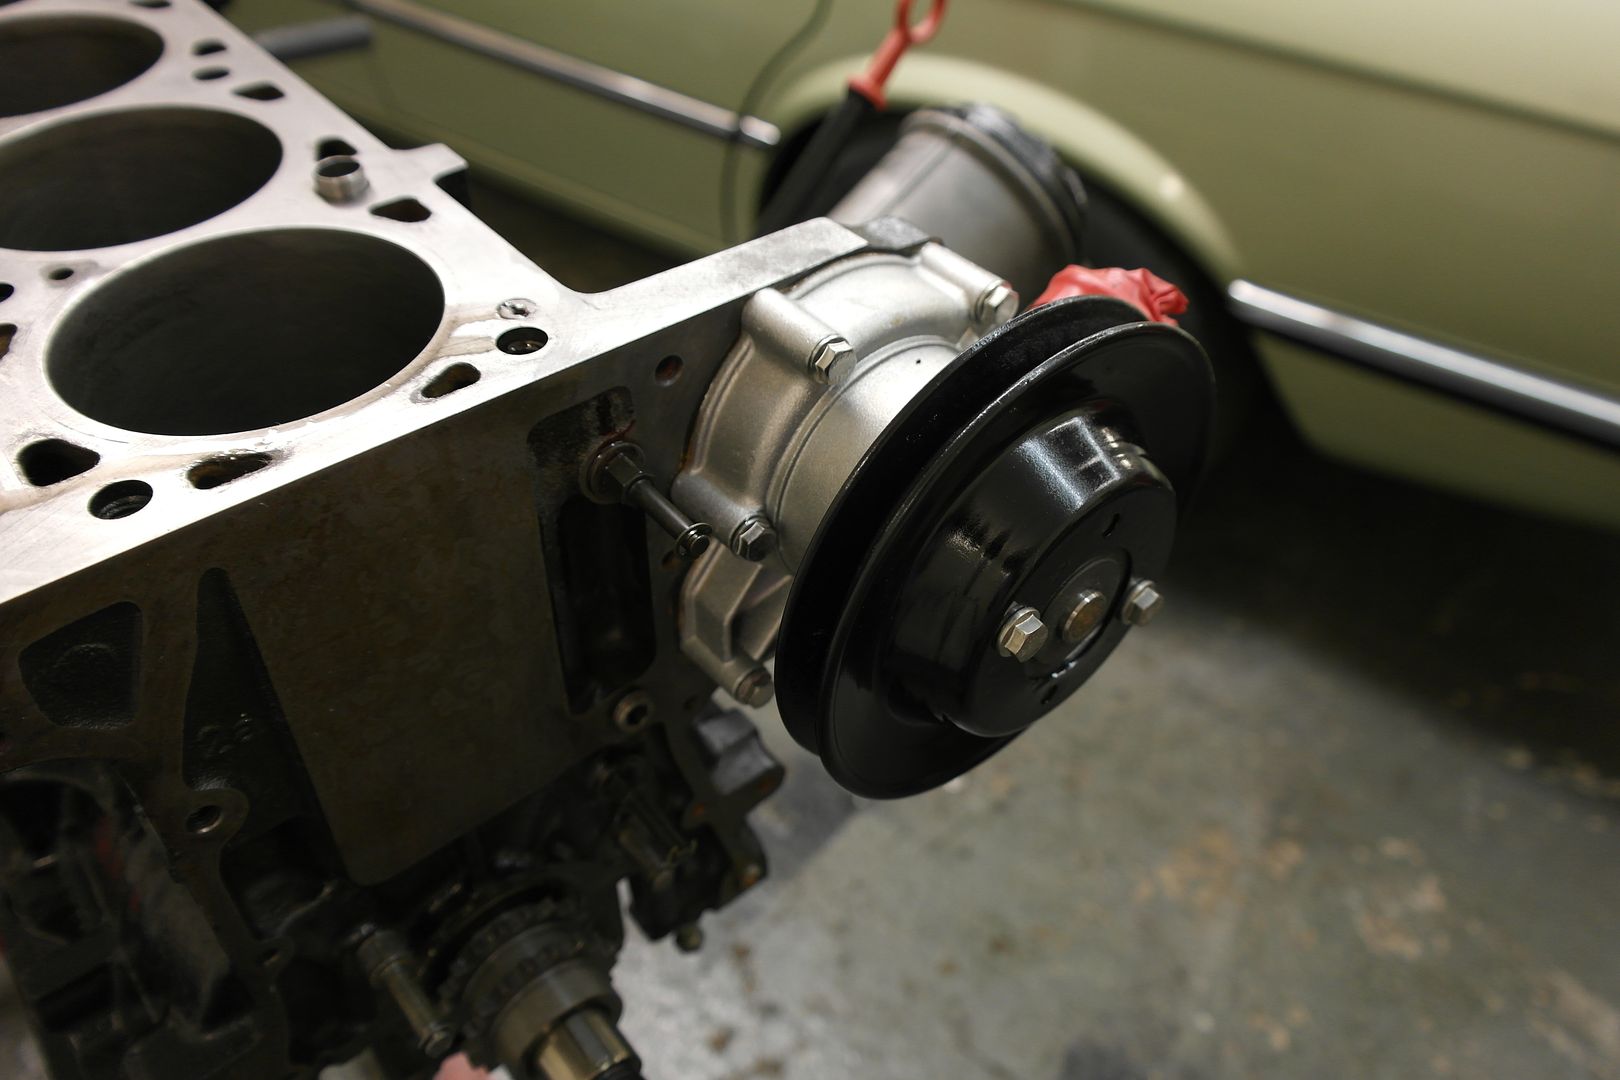
new water pump and refreshed pulley
Image

was going to start balancing the rods
Image

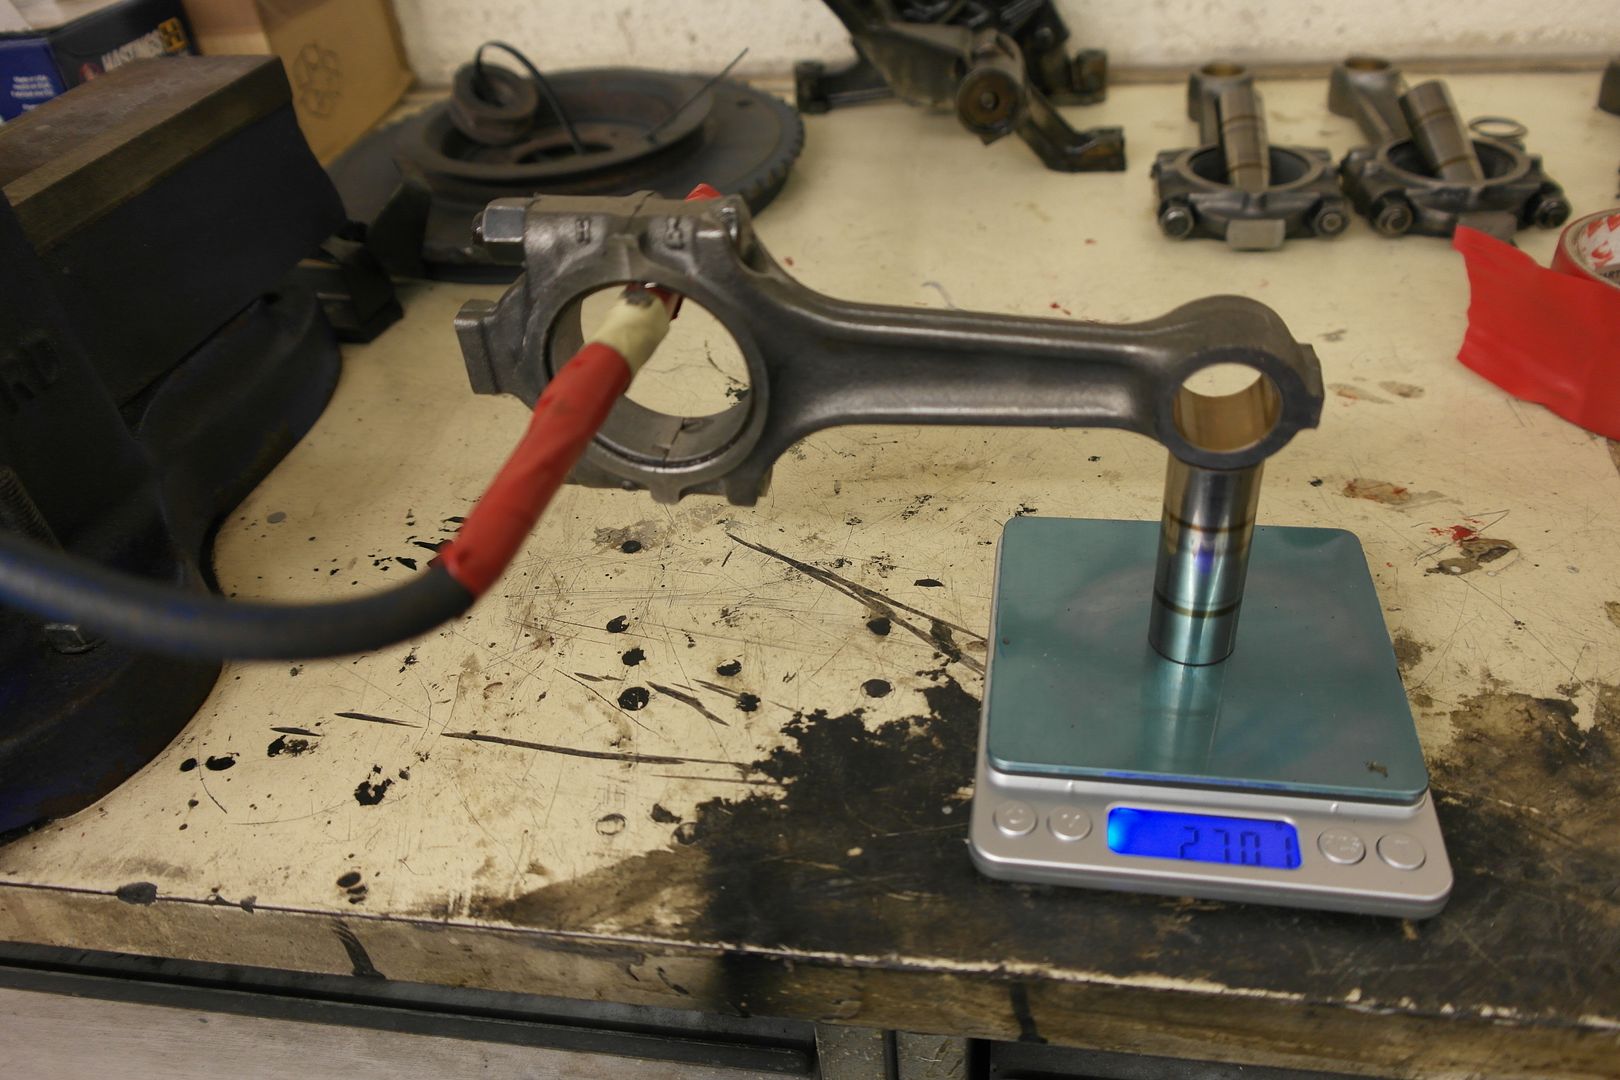
but couldnt get repetitions of weight even within 5g using method above. I though crappy ebay scales, so checked all wrist pins and full rods, each repeated within 0.1g each time, so must be my method. will need to look into it.

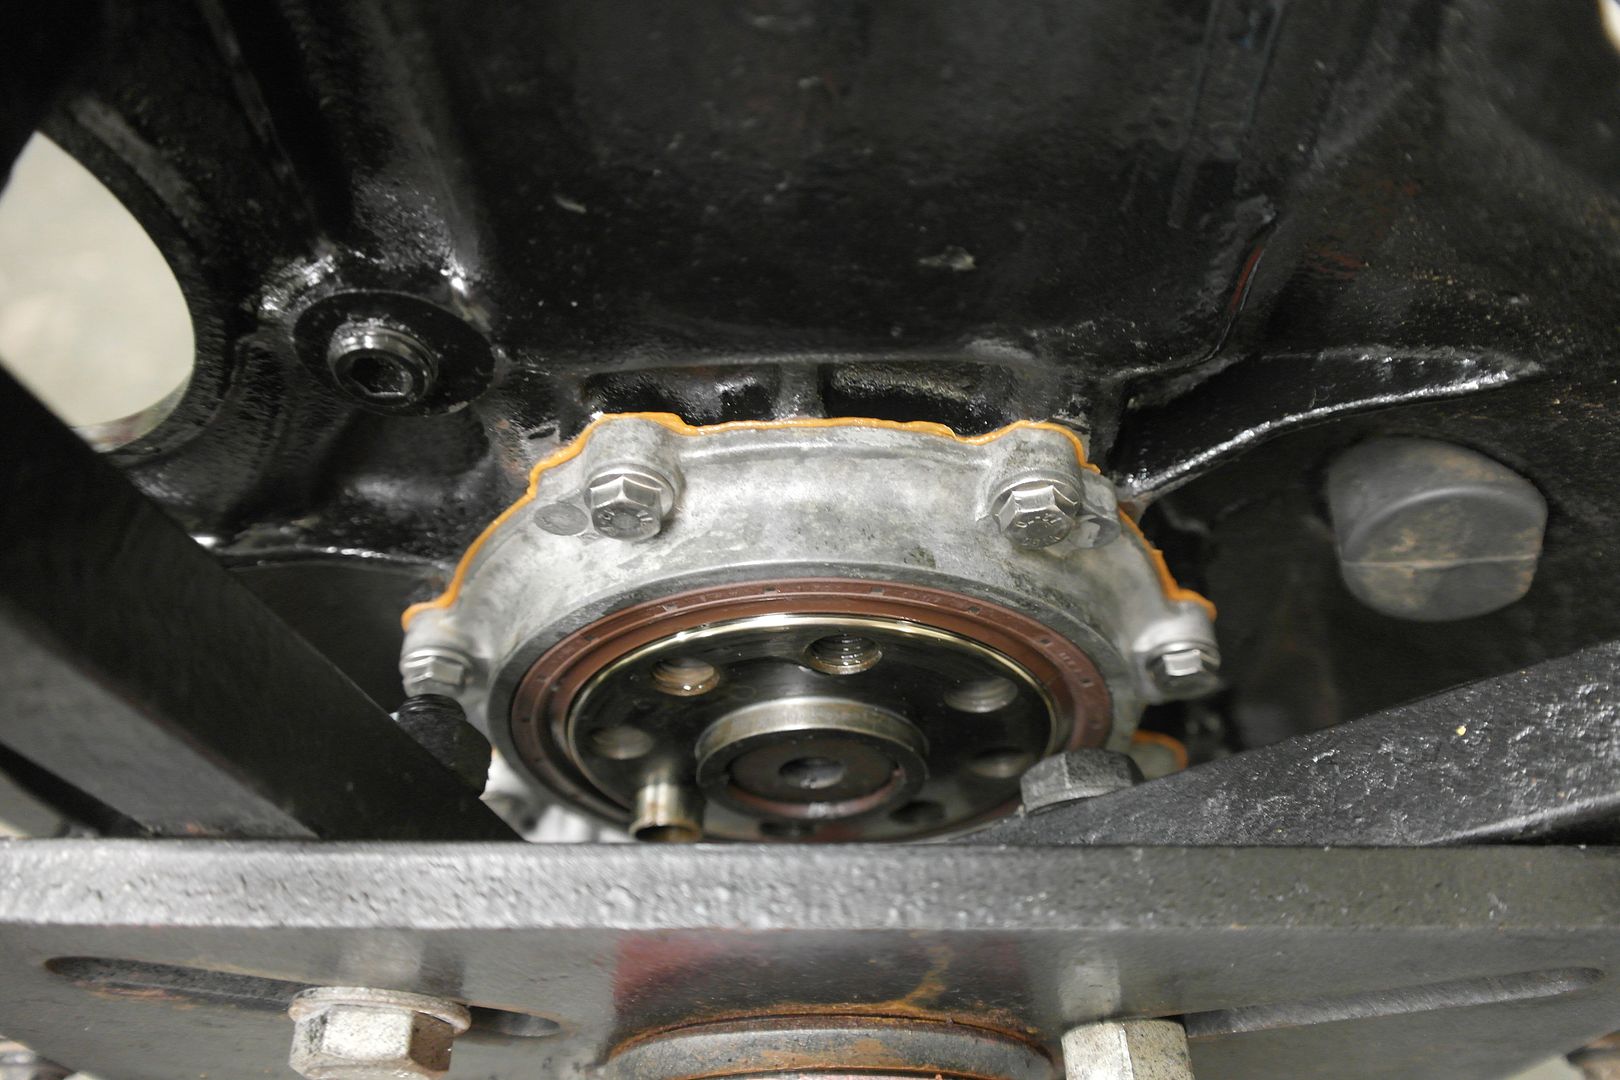
installed other end cap, turbo drain & chain and tensioner/guides
Image

6mm dowel keys
Image

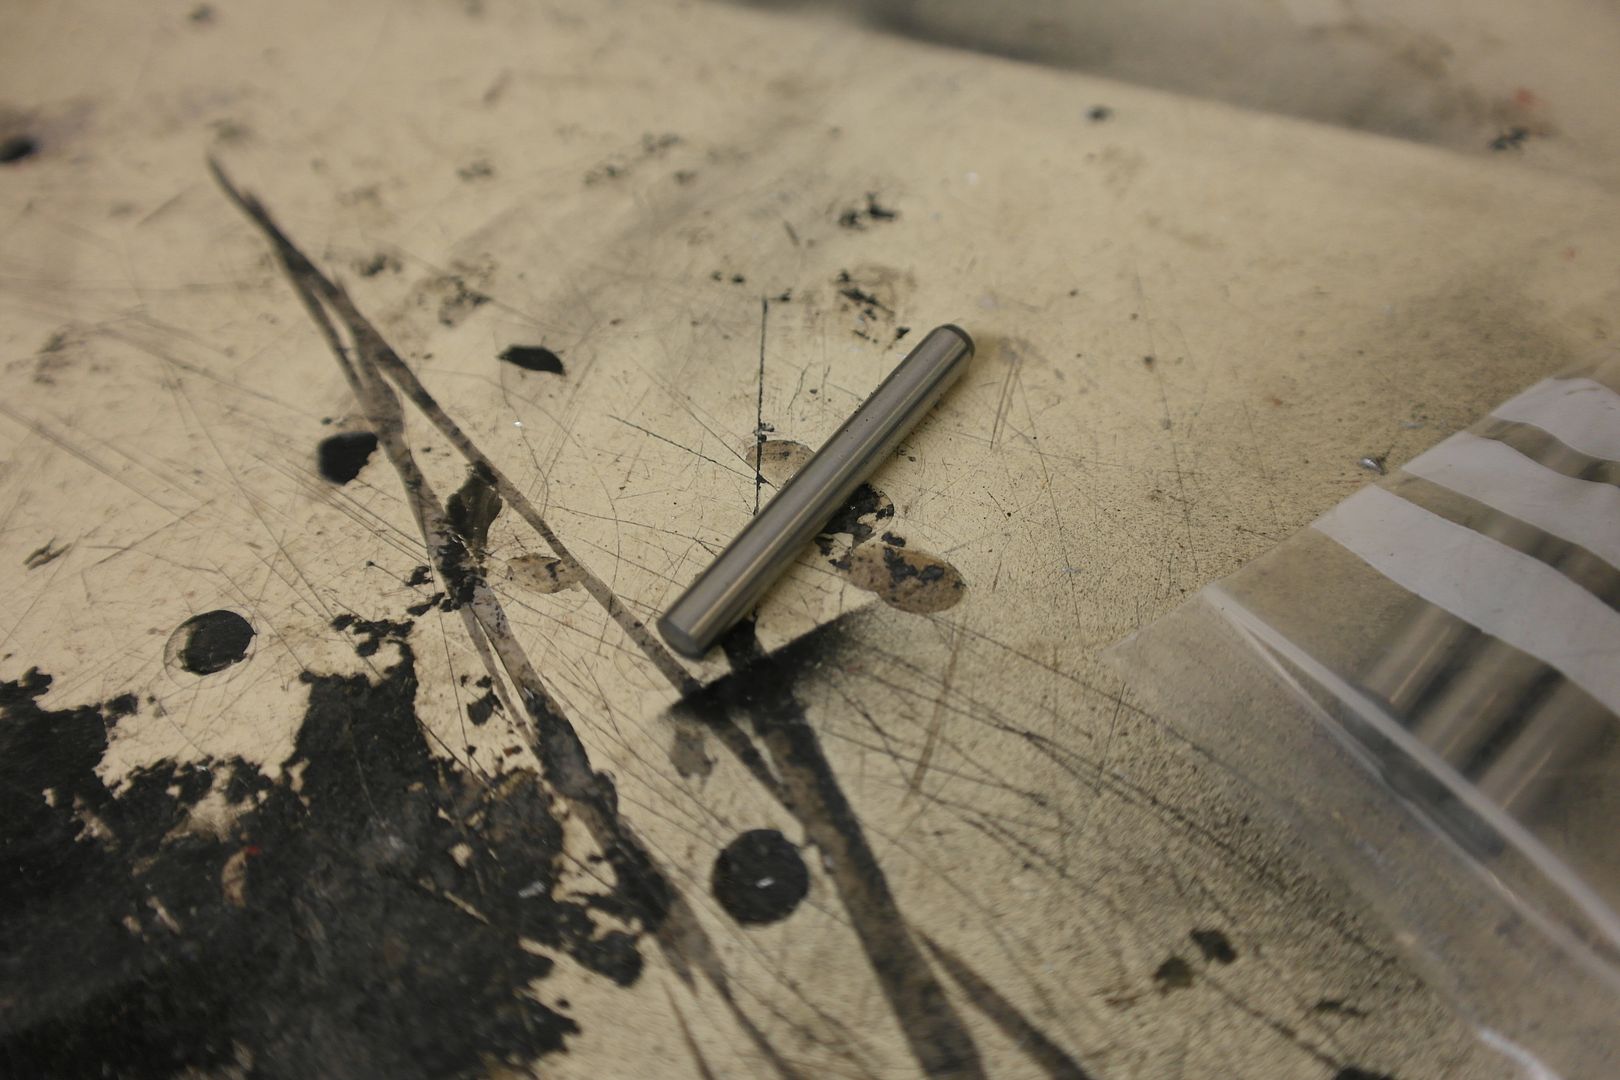
drilled Crank and pulley 19mm deep

Image

Image

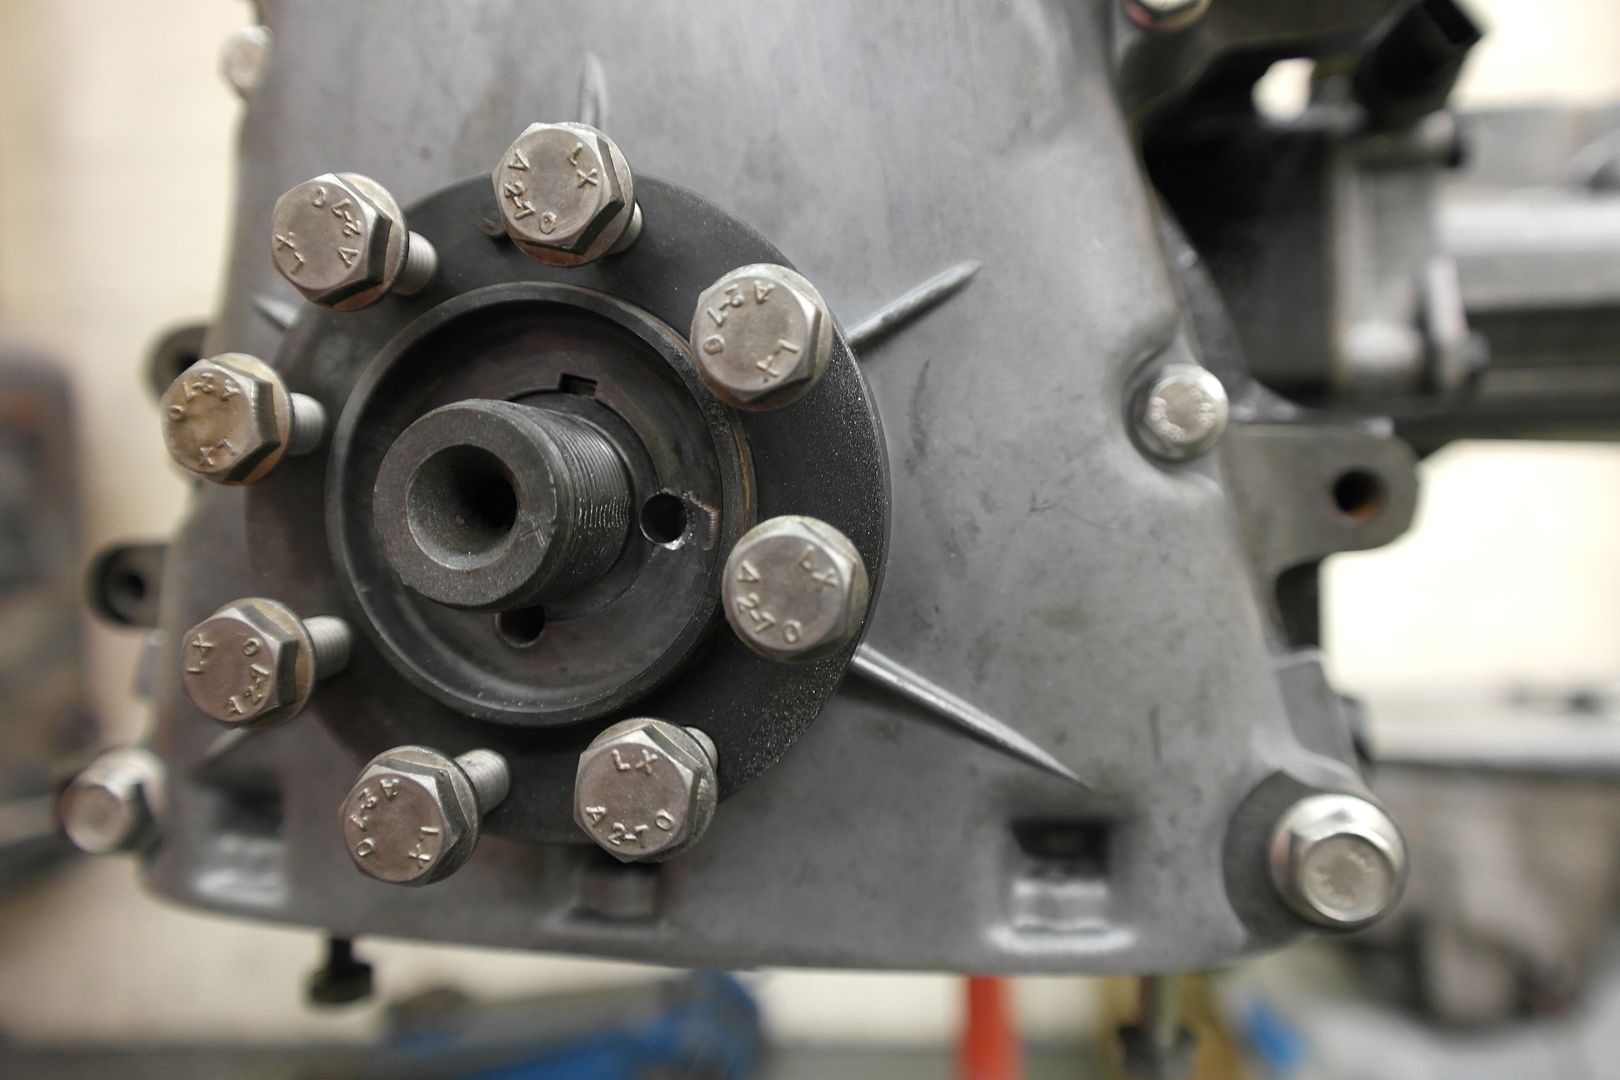
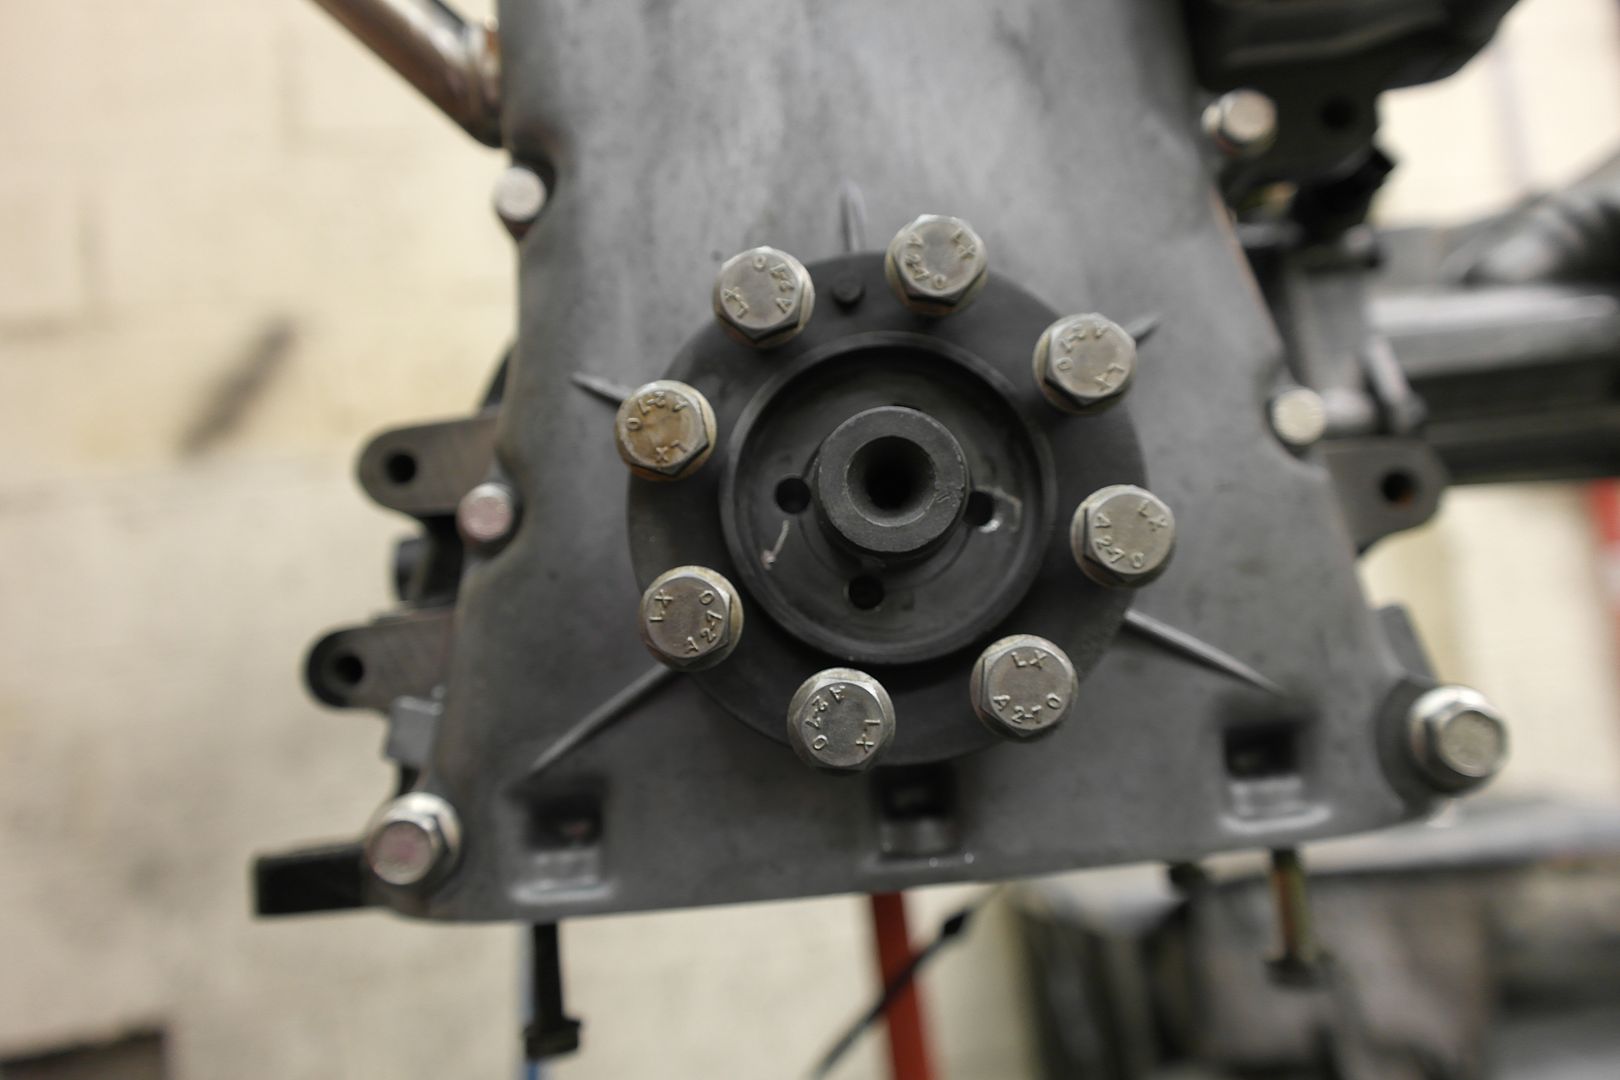
installed dowels to length
Image

Image

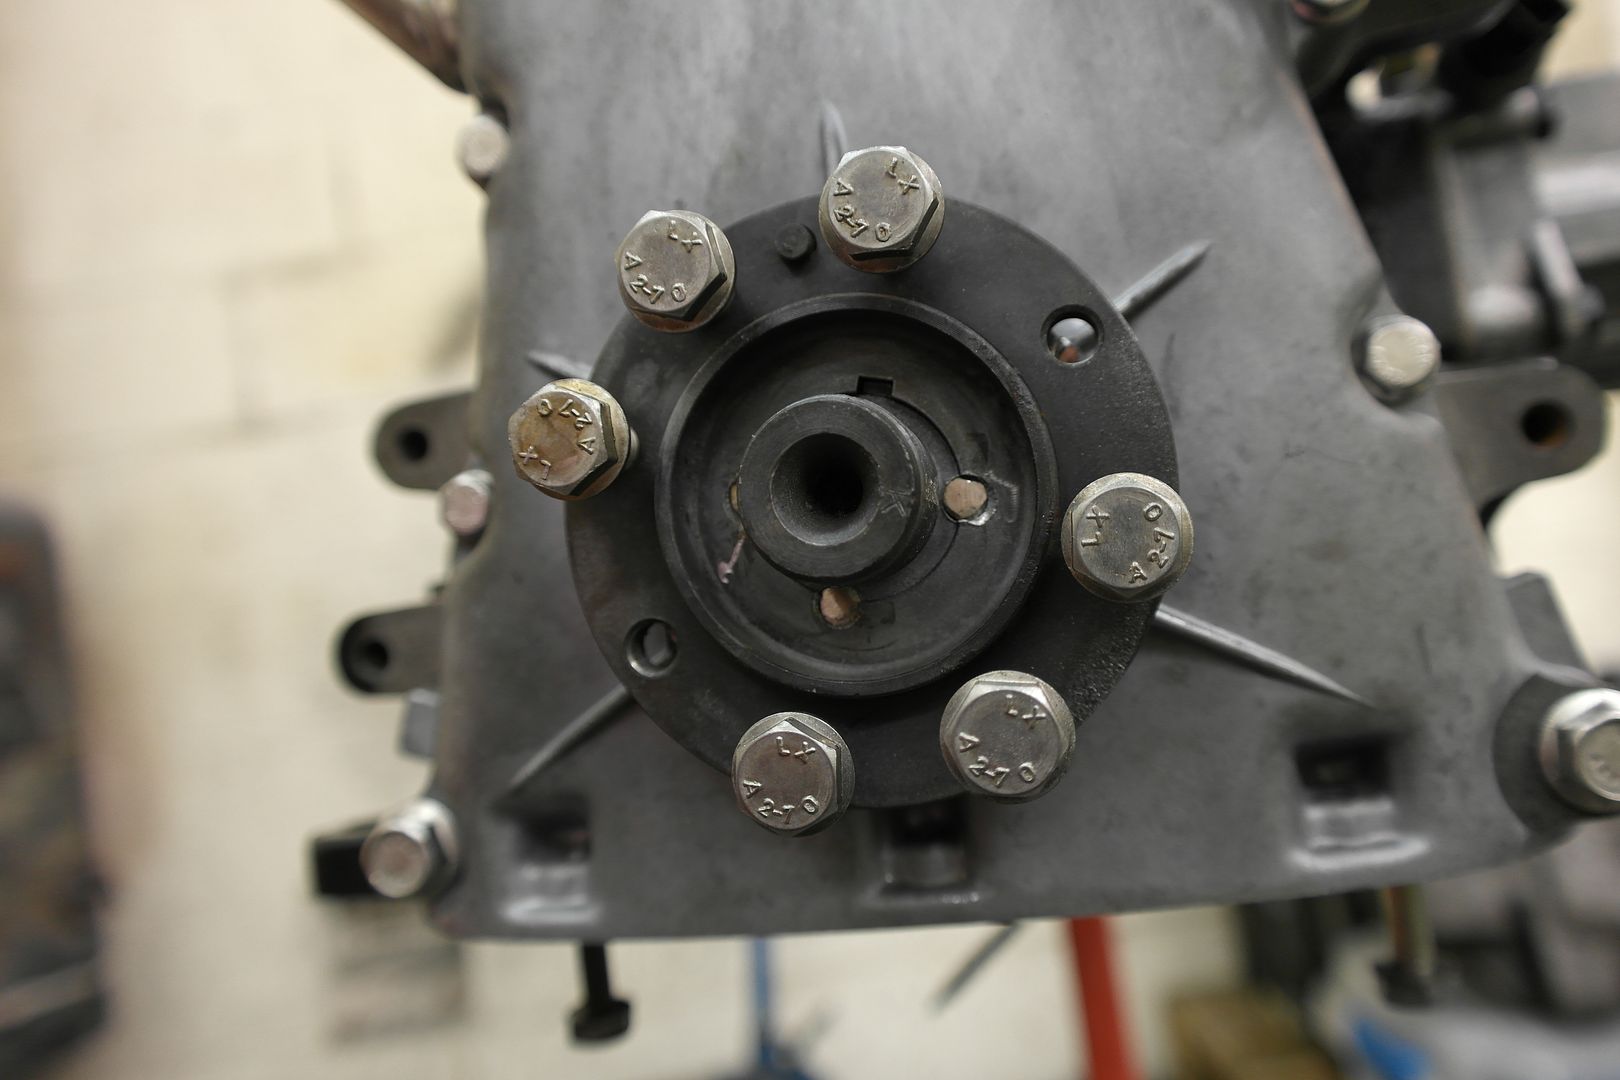
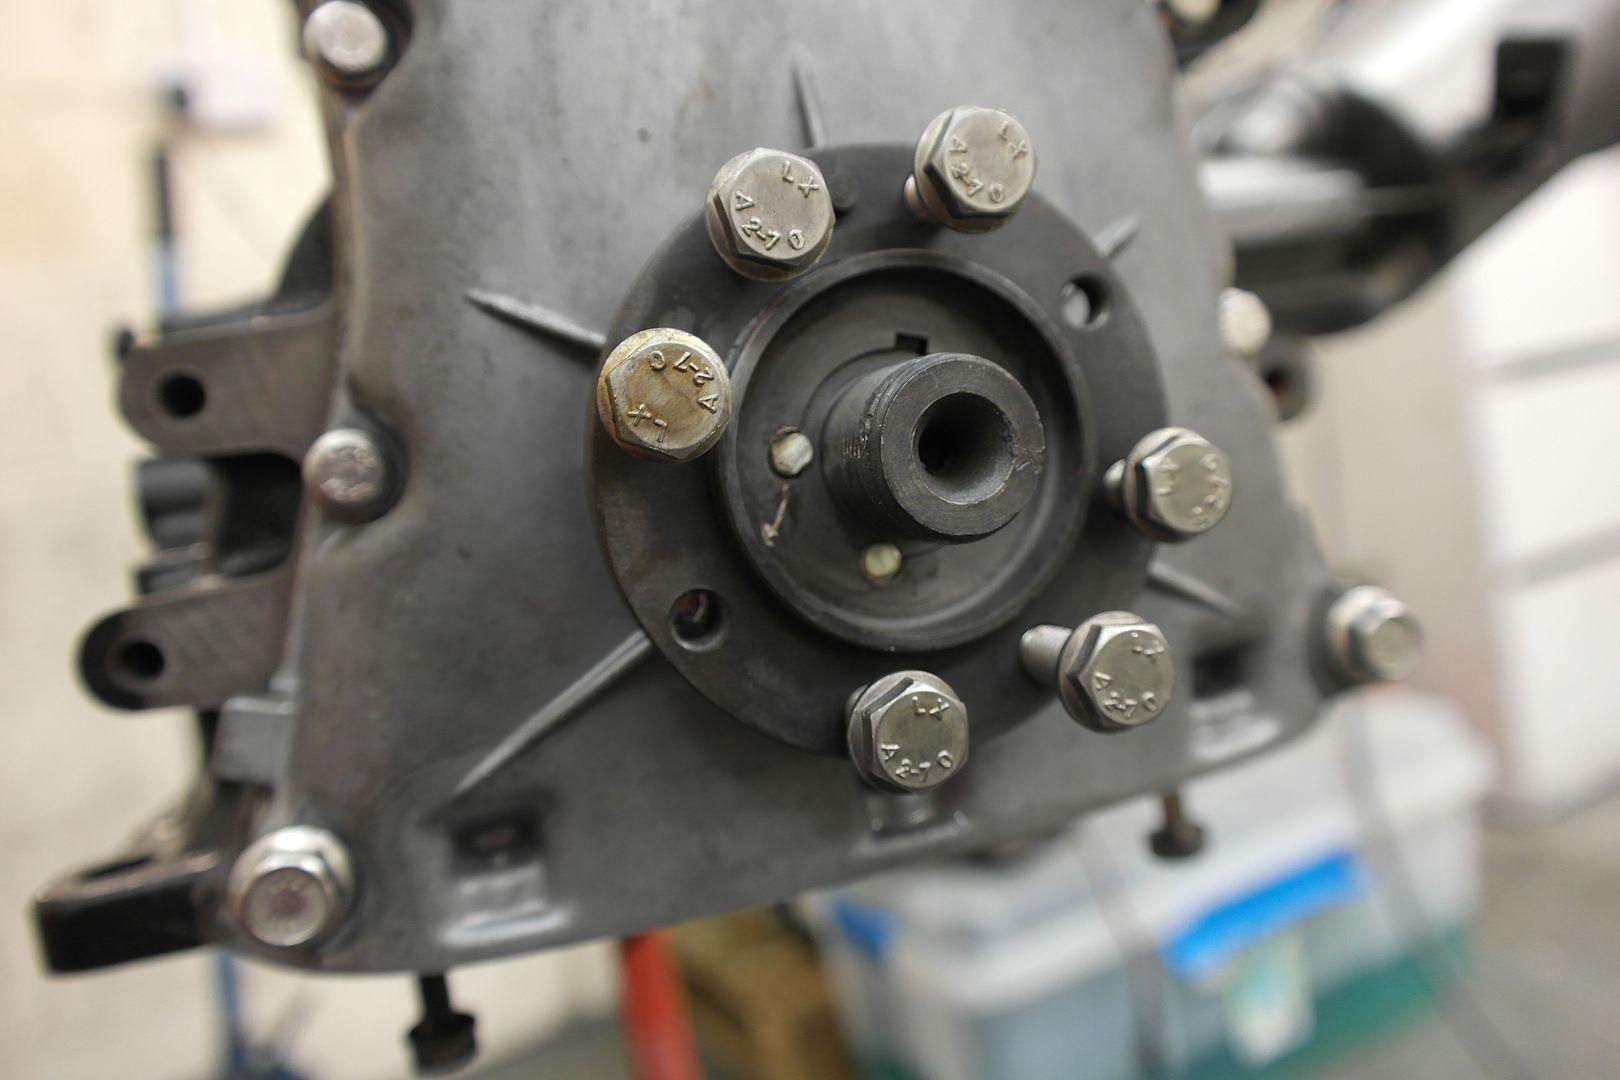
this seams to be a common mod on the PPF Forum as a must for any engine build. Normally 1 dowel is enough, but i though 3 is better.
No locktight used as i may want to remove in the future, plus all torque is radial so the B&%$£$D nut is enough to hold the non tapered shaft in place.

Another reason is the 26 year old oil pump is now NLA or silly money if available, the Gears are all sold out, so options are, run the old pump, or try my hand at Dry sump conversion.

A Weaver 4 stage pump is on its way. :thumbsup

3 scavange 1 supply, plan is a billet adapter to oem oil supply, that will tie in the oem filter canister and thermostat oil cooler.
pandemonium001
E21 Pro
Posts: 527
Joined: Sun Oct 07, 2012 1:19 pm
My E21(s): E12 535i T (ish)
Location: Scotland Ayrshire

Re: E12 tidy up.

Post by pandemonium001 »

still waiting on the ARP rod bolts before i can balance properly, plus have some plans for the OEM pistons that I can be working on.
pandemonium001
E21 Pro
Posts: 527
Joined: Sun Oct 07, 2012 1:19 pm
My E21(s): E12 535i T (ish)
Location: Scotland Ayrshire

Re: E12 tidy up.

Post by pandemonium001 »

pistons got some love,

Image

5 thou bond layer 7 thou Yttria-stabilized zirconia

by the time i coat the valves and combustion chanber compression should be around 9.5-1

something else i have always wanted to do

Image

weaver 4 stage
pandemonium001
E21 Pro
Posts: 527
Joined: Sun Oct 07, 2012 1:19 pm
My E21(s): E12 535i T (ish)
Location: Scotland Ayrshire

Re: E12 tidy up.

Post by pandemonium001 »

ARP rod bolts have been despatched so eta 2-8 working days.
Post Reply