Welcome to the E21 resource, the worldwide owners gallery, and get your answers, fast! ____ Scroll naar beneden voor het Nederlandse forum! https://www.bmwe21.net/forum/
Thegs wrote:Great work Bert! Please set the privacy settings of the movie to public so we can see the test aswell
Thanks..
Sorry, i didn't realise the video access was still private. now its public.
Have fun with it...
Re: M20B20 to MegaSquirt build
Posted: Mon Apr 14, 2014 5:57 pm
by BertjeConti
steed wrote:this level of detail during bench testing pre-fitment is phenominal! most impressive work
Yesss, i want to know for shure all the components i throw under the bonnet are reliable, good working and within specs. Good testing and step by step install saves lots of time and energy afterwards.
The car is a dayly driver, mostly driven by my wife, so i cannot permit any errors or problems
Thanks,
Rob
Re: M20B20 to MegaSquirt build
Posted: Tue Apr 29, 2014 11:23 pm
by BertjeConti
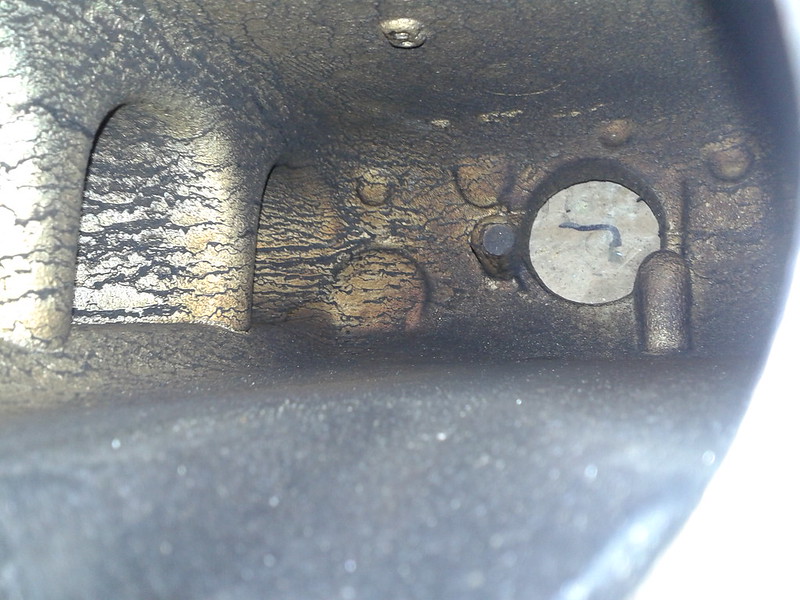
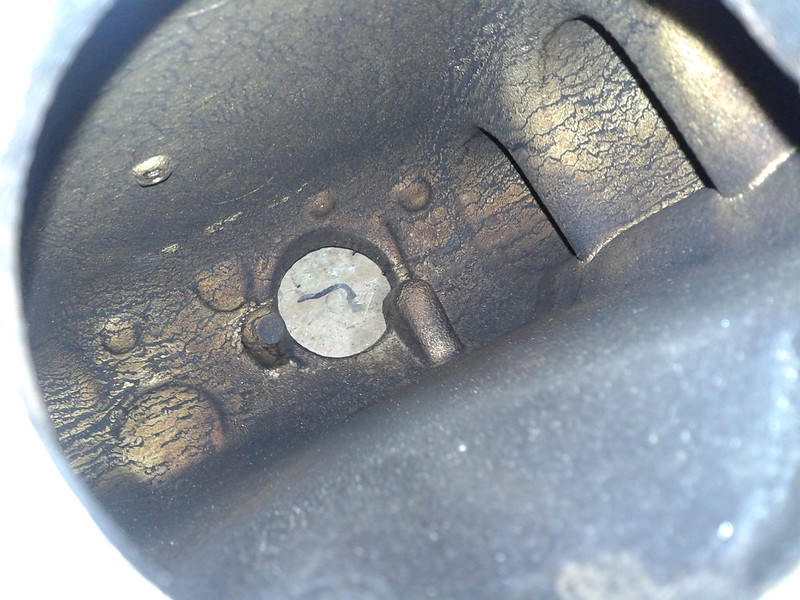
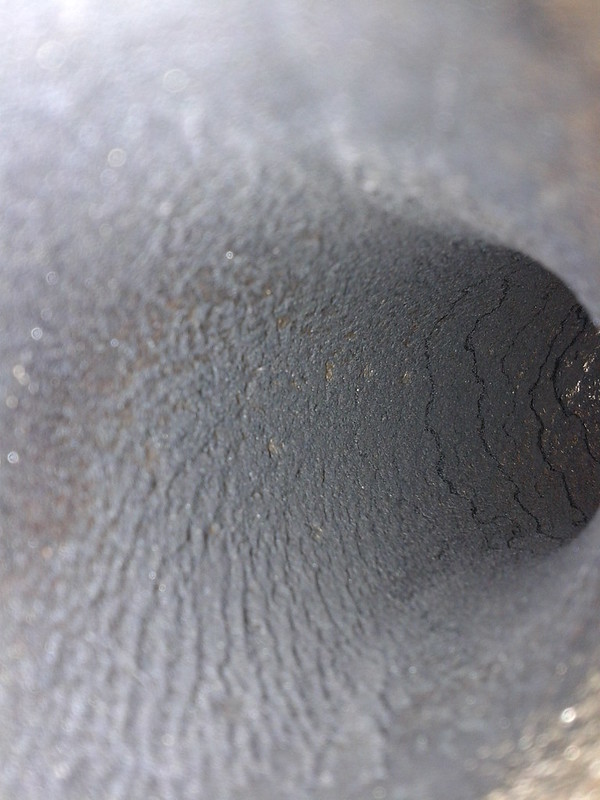
Cleaning out the intake manifolt
The spare engine was probably badly worn and a oil burner, because the inside of the intake manifolt looked like this:
After a decent cleaning job with degreaser it looked much better.
Re: M20B20 to MegaSquirt build
Posted: Tue Apr 29, 2014 11:46 pm
by BertjeConti
MAP vacuum connection and MAT connection
The MAP sensor needs a decent vacuum connection to the intake manifolt. Ofcource the best place to connect the MAP sensor is the plenum area.
In my opinion the best place is the same location as the vacuum hose for the pressure regulator.
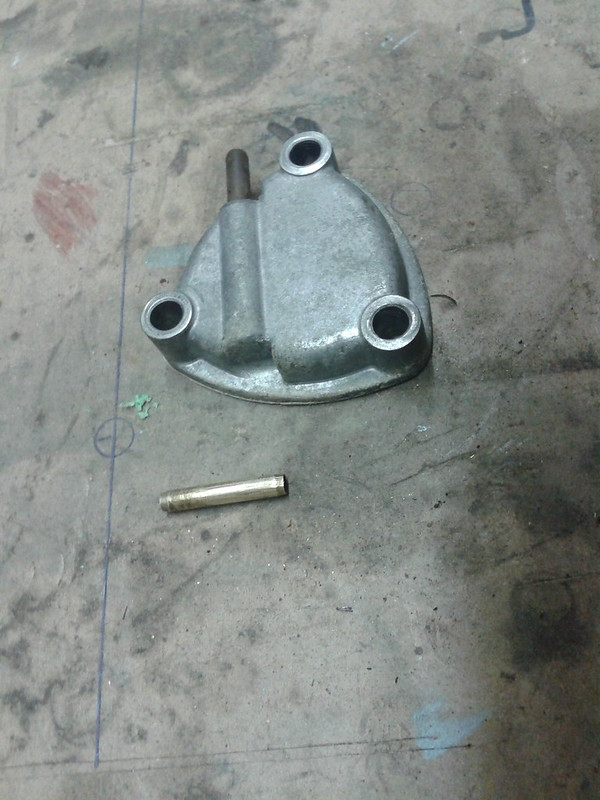
The simplest solution is a T piece in the hose to the pressure regulator, but after a good look at the lid where the vacuum connection is situated, i thought this is the best place to make a second vacuum connection for the MAP sensor.
This location in the lid/plenum is best protected for any dirt/oil getting into the vacuum hoses.
So i pulled a vacuum hose connector pipe out of a old carburettor which i had laying around. this is a 4mm brass pipe
Drilled a second hole in the lid, 3,5mm through, and then drilled again with a 4mm dril, almost through
Then the brass pipe fittet perfectly in the lid.
As always, a picture tells so much more:
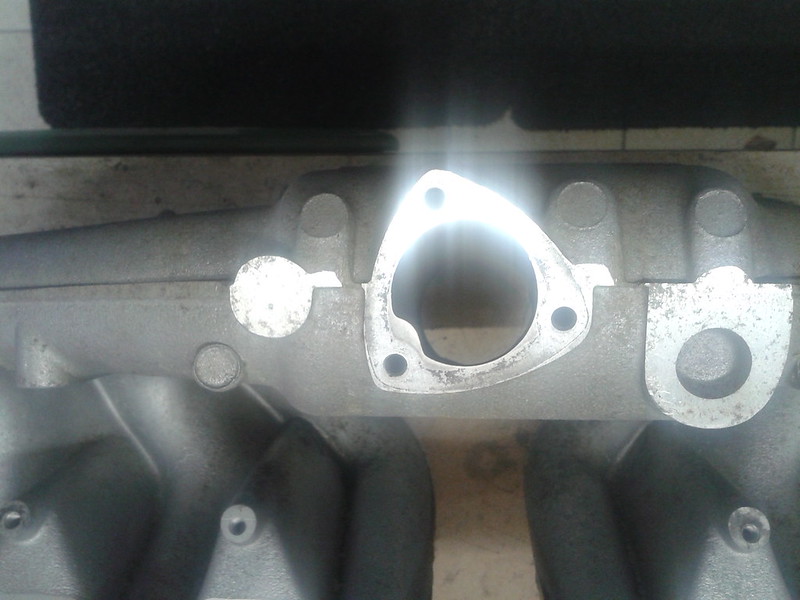
For the MAT sensor i drilled another hole in the intake manifolt, near the vacuum connections, and Threaded it.
before:
and after:
stay tuned
Re: M20B20 to MegaSquirt build
Posted: Wed Apr 30, 2014 1:29 pm
by steed
simple yet ingenious and no doubt effective place to draw the MAP from,looks almost factory!
Re: M20B20 to MegaSquirt build
Posted: Wed Apr 30, 2014 5:02 pm
by Jeroen
Re: M20B20 to MegaSquirt build
Posted: Mon May 05, 2014 11:12 pm
by BertjeConti
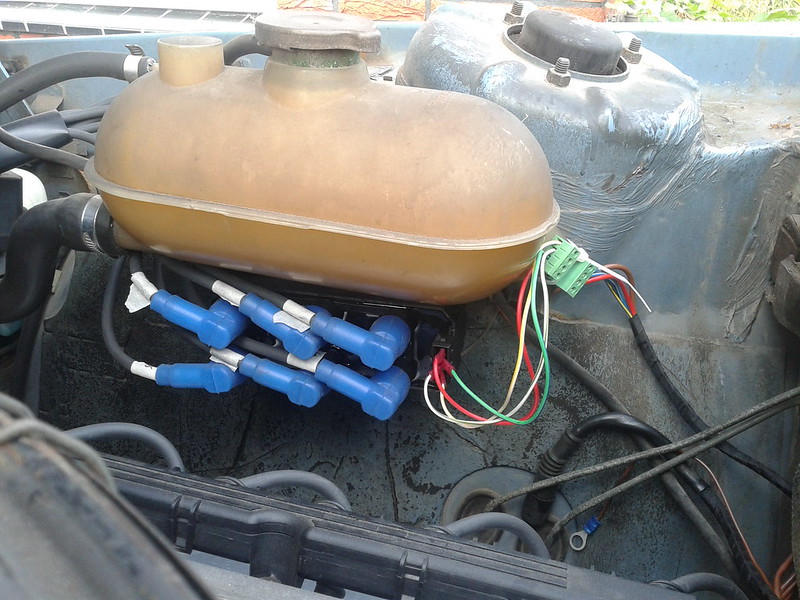
Coilpack final wiring
Today my 4-pin "AMP Timer connector" arrived, so i could clean up the temporary wiring to the coilpack:
before and after pictures:
i've tried to fit in a aircleaner box from a E30, but the power steering reservoir is in the way, this means another job added to the list:
relocation of the power steering reservoir.
Re: M20B20 to MegaSquirt build
Posted: Thu May 08, 2014 11:51 pm
by BertjeConti
Cleaning the Injectors
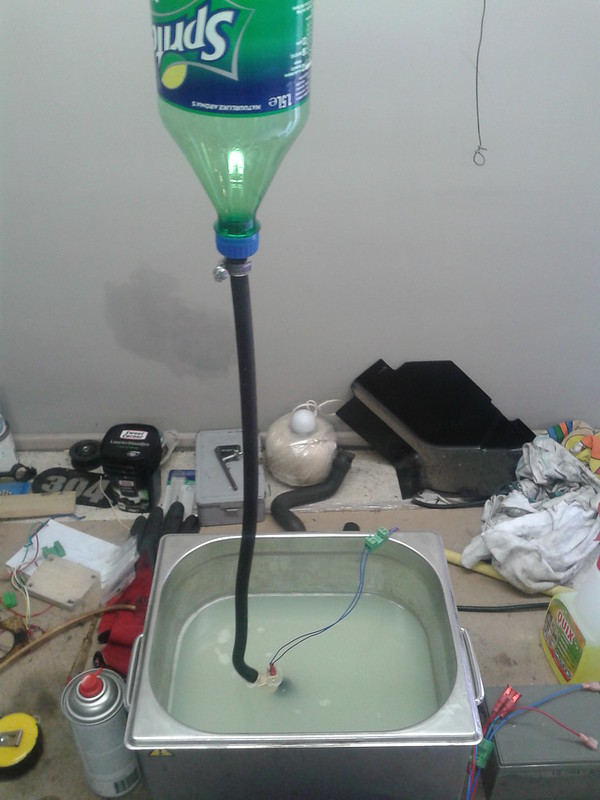
I've cleaned the injectors in a Ultrasonic cleaner bath, and at the same time squirting brake cleaner fluid through them.
In the ultrasonic cleaner bath i've used a water based detergent. the injector is connected to a 2 bar air pressurized cannistor (soda bottle) which holds a few CC brake cleaner. While haning in the ultrasonic bath, once and a while i activated the injector for a short time so a little brake cleaner flows through it.
This is my setup:
After cleanining the injectors i did a new bench test:
Bench testing the injectors
My second bench test setup is a little different from the first, this time i've used clear beerbottles, an hooked up a scope to inspect the injector output voltage and the flyback clamping cirquit.
Here are some pictures and a very explaining video of the bench test:
ECU with stimulator, laptop and scope hooked up:
Fuelpump and injectors with fuelrail:
Scope signal,
Yellow = output voltage over injectors, clamped at 39.5 volts
Blue = voltage over flyback clamping cirquit (base of transistor)
And here the video with explenaition in it:
After the test all bottles are equaly filled:
Results:
injector......weight bruto....weight bottle.....weight netto (squirted fuel in test run)
..1.................424..................205..................219
..2.................426..................205..................221
..3.................425..................205..................220
..4.................426..................204..................222
..5.................428..................205..................223
..6.................424..................204..................220
Not bad, no more than 2% difference in flow rate between the six injectors.
Stay tuned
Re: M20B20 to MegaSquirt build
Posted: Tue May 13, 2014 11:39 pm
by BertjeConti
O2 sensor
The last sensor is in the car now
Today i've welded in a bung for the O2 sensor in the exhaust and mounted the O2 sensor.
I've got a new O2 sensor (narrow band to start with) from ebay for only € 14,05 include shipment and a O2 sensor bung for € 2,97 include shipment
I had planned to weld the bung in the front exhaust pipe coming from the front manifold (cil 1-3) so i could place the O2 sensor 50cm downstream from the manifold. Unfortunaly the bolts would not come lose, and i did not wat to break a bolt.
This forced me to take out the second exhaust down pipe (cil 4-6) , luckily these bolts came lose. Now the bung for the O2 sensor is welded in the downpipe only a few centimeters away from the manifold. Hopefuly the hot exhaust gases won't destroy the O2 sensor.
When the whole setup is working well i'll throw in a wideband O2 sensor, but they don't come cheap from china
Here some pics:
Bung welded and O2 sensor test fit:
O2 sensor in place:
I've done a test drive (still running the 4A1 carburetor), and the "AFR" sensor in tunerstudio goes wild from 0,1 volts to 0,9 volts and back. Most of the time 0.9 volts which means "running rich". Sensor seems to do the job.
The exhaust system needs replacement soon, then i'll weld in a bung on the right (best) location.
next job = relocation power steering reservoir
Stay tuned...
Re: M20B20 to MegaSquirt build
Posted: Fri Jun 13, 2014 10:05 pm
by BertjeConti
A update :
After a few weekse holiday in spain it is now time to make the conversion complete.
The power steering reservoir is relocated,
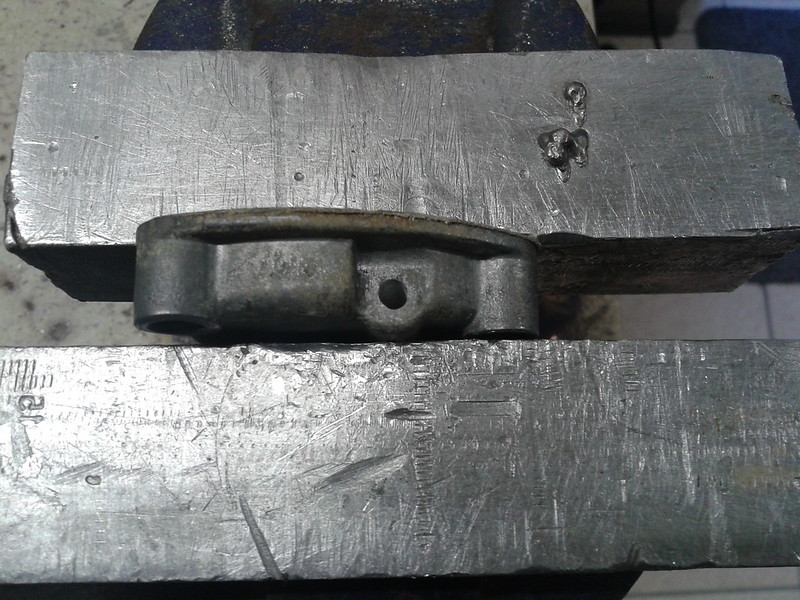
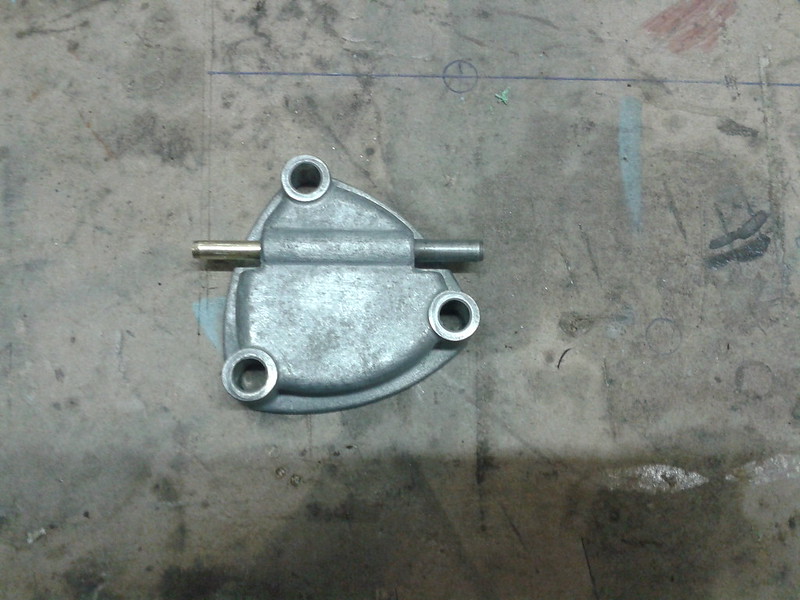
The distributor is swapped for a gear only assembly to drive the oilpump.
The fuelpump is mounted under the car.
The thermostat housing is swapped.
So this weekend the 4A1 carburettor goes out and the injection manifold goes in. After that the tuning can be done.
Stay tuned
Re: M20B20 to MegaSquirt build
Posted: Sat Jun 14, 2014 2:46 am
by Peter V.
Great story so far.
Re: M20B20 to MegaSquirt build
Posted: Sat Jun 14, 2014 10:24 am
by BertjeConti
It's started to rain, and the car is on the driveway. so a little time for a update, and a cup of coffee
You cannot attach a fully assembled intake manifolt to the engine, when the thermostat housing is already mounted. the fuelrail interferes with the bleeding notch on the thermostat housing. not a big issue.
I've encountered 2 minor problems:
The oil dipstick is right in front of the air intake, is there a way to unmount the dipstick assembly from the engine?
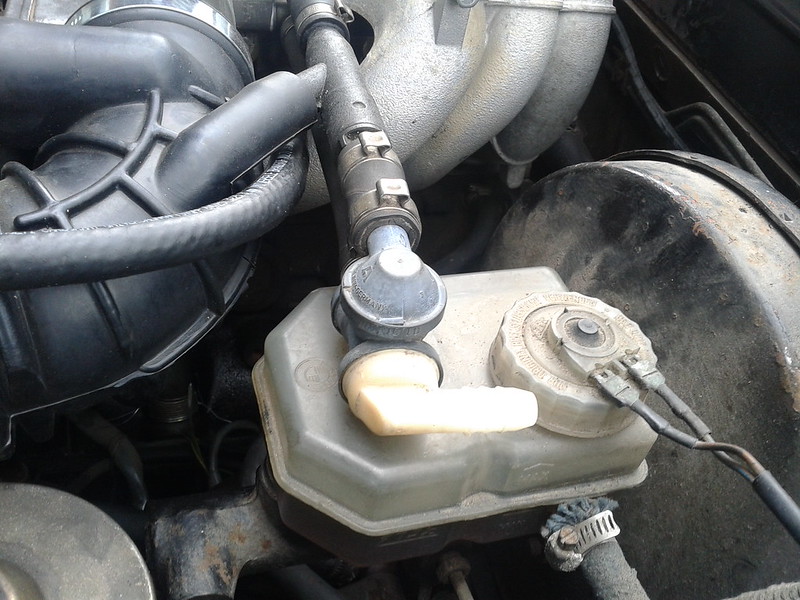
And the vacuum assembly on the throttle housing interferes with the brakefluid container:
Re: M20B20 to MegaSquirt build
Posted: Sat Jun 14, 2014 12:45 pm
by BertjeConti
BIG PROBLEM !!!!!
Fuel line would not hold the pressie and leaks now. The metal fuelline is a little bit rusty at the end and sprays a fine dust of fuel when the pump is running. Approx 10 cm at the end.
Have to sort that out first
Re: M20B20 to MegaSquirt build
Posted: Sat Jun 14, 2014 3:26 pm
by BertjeConti
Good and bad news !
Bad news first : the thermostat housing is leaking coolant, so i'd to drain the system again to fix the problem.
Second, the fuel line problem is fixed for now but the lines need to be renewed for the next MOT.
Good news: engine started right away and has a good throttle responce.
Now fixing the leaky thermostat. Want to make a testdrive.
Stay tuned
Re: M20B20 to MegaSquirt build
Posted: Sat Jun 14, 2014 8:12 pm
by BertjeConti
Thermostat housing holds the coolant now.
Made a first testtrip, ran good cold but when engine warmed up throttle responce went bad.
Fixed it by turning of the "wall wetting algorithem". After that the engine ran good , had steady idle at 1000 rpm, and proper throttle responce.
Made a 50km trip without any problems, no misfires , good accelleration, and more torque at low rpm.
Did some flatout sprints during the testdrive, the engine runs much better at high revving.
Seems that my initial fueltable is almost spot on.
Only thing that i saw on the computer is that the automatic fuel correction wasnt working properly. It corrected each time to a lean mixture and stayed lean. I'm running a narrow band o2sensor. Wide band is a prefered option.
Still lots to do:
- Fabricating a bracket to hold the airfilter box
- cleaning up the old wiring (dizzy and carb )
- and tuning ofcourse (thats the goal and fun factor)