Page 3 of 7
Re: Project E3 is Go! 2014
Posted: Wed Oct 15, 2014 12:20 pm
by Grewham
Any updates on this, looking forward to reading it all

Re: Project E3 is Go! 2014
Posted: Wed Oct 15, 2014 2:37 pm
by nas80
HI well. I haven't updated the thread because theres mostly been research happening.
Stuff we need to be on top of such as
rubber seals, (they are completely knackered)
custom wiring (including what to do with the dash clocks)
air suspension fitting (this is possibly the easiest bit)
interior design
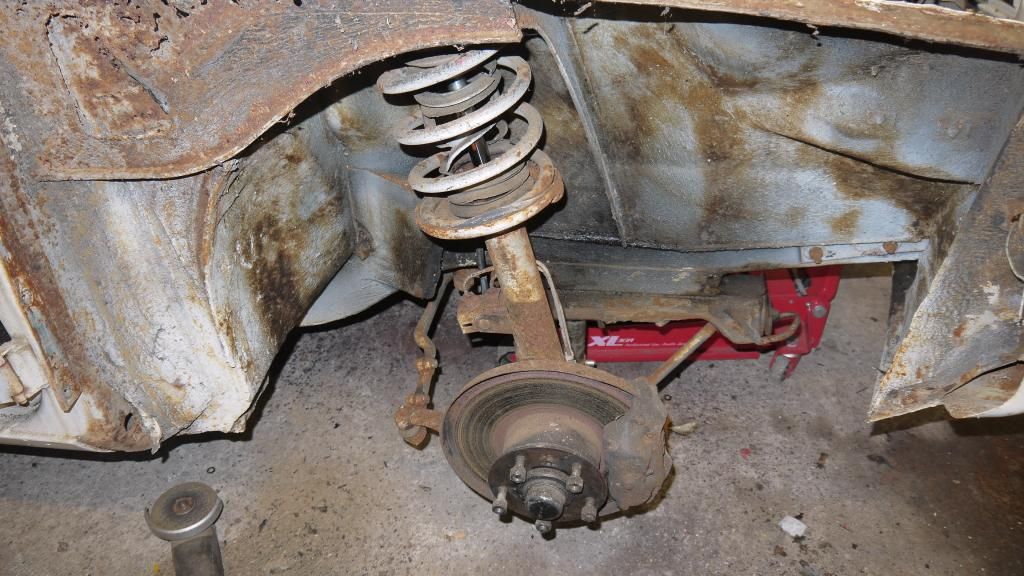
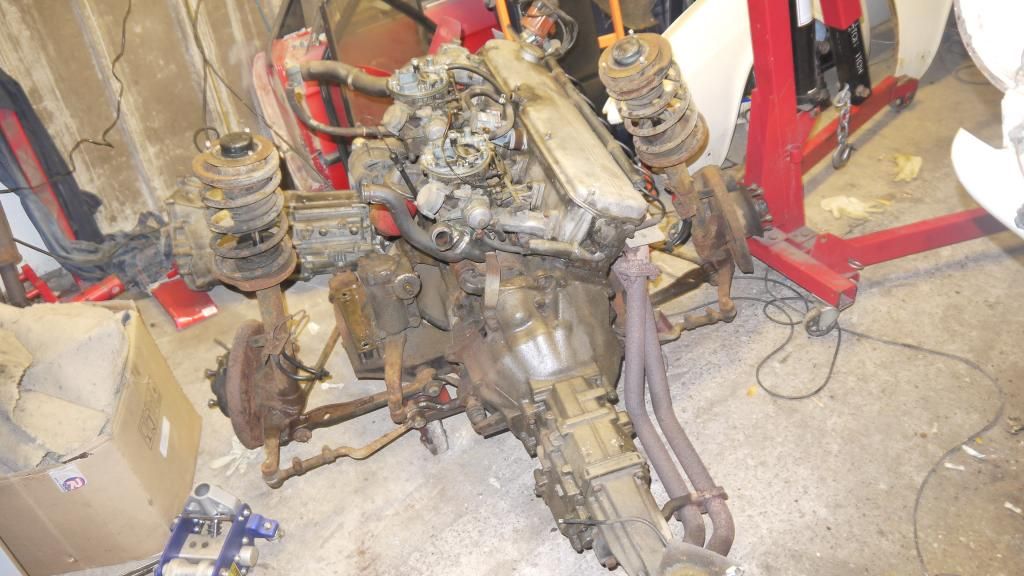
I have done some mechanical stuff - I took apart the spare subframe, turns out some e28 / e12 parts will fit because they haven't changed the design since the e3.
Also turns out that the e28 rear axle bolts straight in (near enough) too. which is good because we might have a better chance of getting a slipper and also allows a wider range of ratio which will be good for when we fit the 6 speed manual box.
Next week if all goes well ill be starting the tear down. that's always the best bit.
Re: Project E3 is Go! 2014
Posted: Thu Oct 16, 2014 7:51 pm
by Grewham
This is going to be a cool family car

Re: Project E3 is Go! 2014
Posted: Sun Oct 19, 2014 7:47 pm
by pandemonium001
If you want better front brakes check out my e12 front setup, cost very little an deasy to do. all oem parts
Re: Project E3 is Go! 2014
Posted: Mon Nov 03, 2014 12:01 pm
by nas80
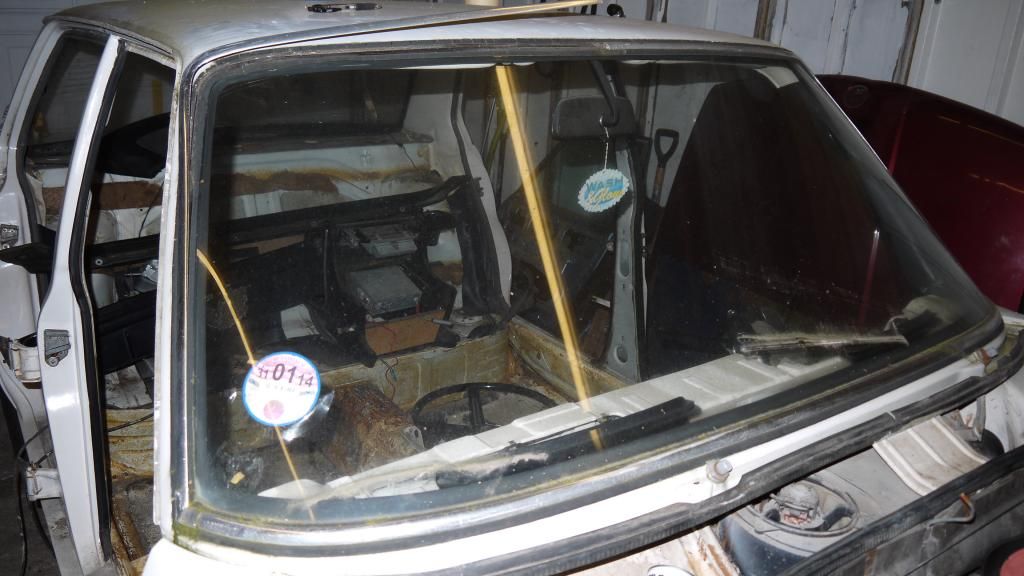
so this weekend managed to get started on the tear down, as this is an unfamiliar car I have been putting screws and little bits into individual freezer bags and tagging them with meaningful names such as "interior clips / screws off the seats n stuff" and "rear bumper / fuel tank and boot area" etc.
I am also tagging wires even though im not reusing the loom, this is so that I can work out which way the loom went when it is outside the car.
This adds time now but then when you go to put the car back together there is so much time saved I know I will thank myself later.
The car has been nice to me and coming apart fairly easily with no snapping bolts or nuts yet, the doors were a little bit of a pain cos the check strap pins are bent,
I took the windscreens out (not uploaded that yet) and found a tiny hole under the front screen and one under the rear, but they are nothing serious and in a nice easy to fix area, I can sort these out pretty easy, other then that I have not found any rust whatsoever yet.
Heres a link to a slideshow gallery, theres about 90 odd pics so far (some of them are for reference in case I need to put any wires back) I'll be updating the photostream as and when.
http://s13.photobucket.com/user/nasbuck ... shads%20e3
By the end of next weekend I'm aiming to remove the drivetrain and then I will have a completely stripped down shell and on the spit ready for engine mock up.
Re: Project E3 is Go! 2014
Posted: Mon Nov 03, 2014 12:23 pm
by rob0r
yes yes yes! Go Nas! Looking forward to more updates
Re: Project E3 is Go! 2014
Posted: Mon Nov 03, 2014 1:09 pm
by Jeroen
Nice, and thorough approach... will defo make your life easier later!
Re: Project E3 is Go! 2014
Posted: Mon Nov 03, 2014 2:54 pm
by Peter V.
Good work.That must become a fine E3.
Re: Project E3 is Go! 2014
Posted: Sun Nov 09, 2014 8:18 pm
by nas80
Thanks for the positive comments, the strip down is going well, although now im running out of space to put all the stuff!
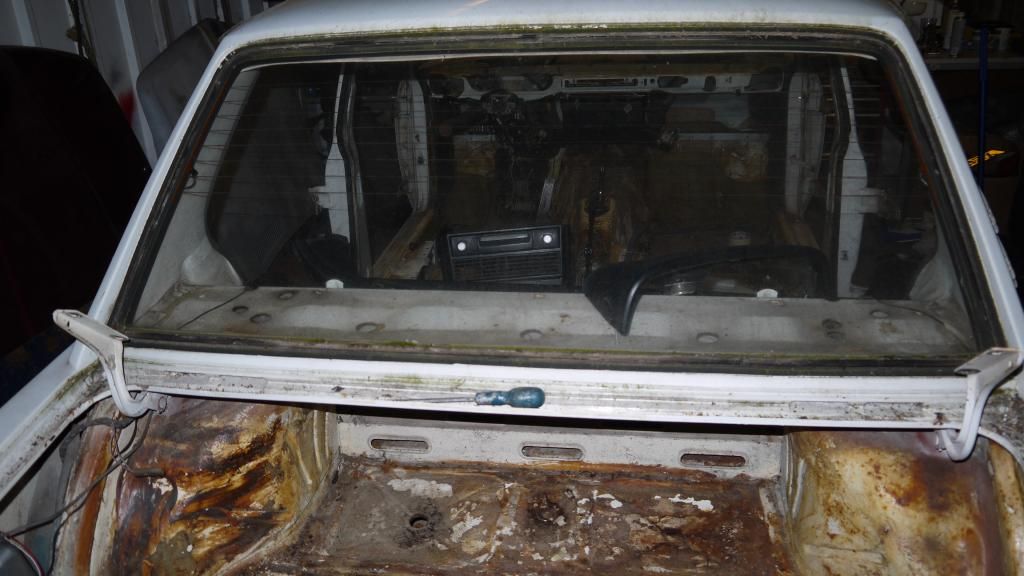
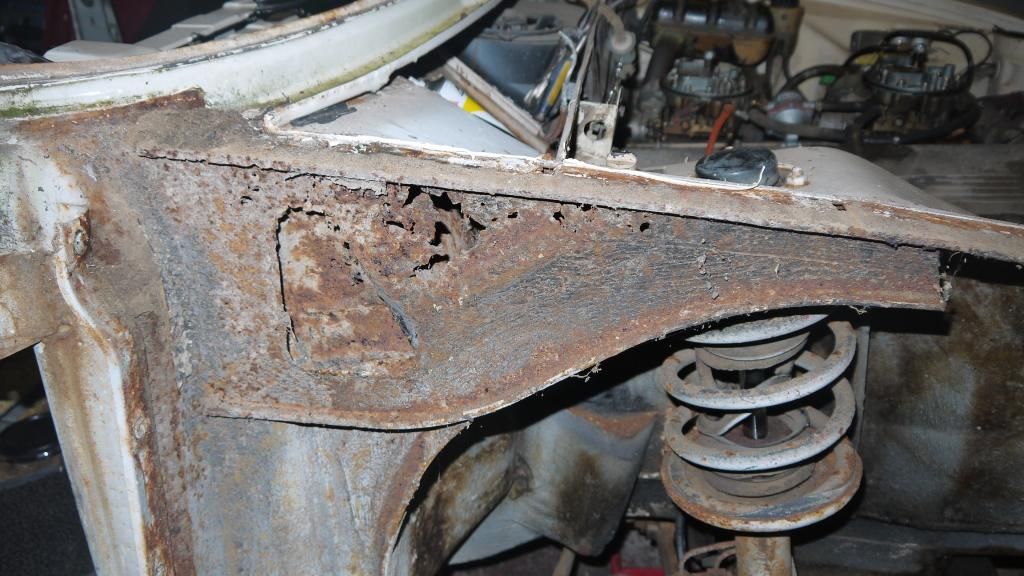
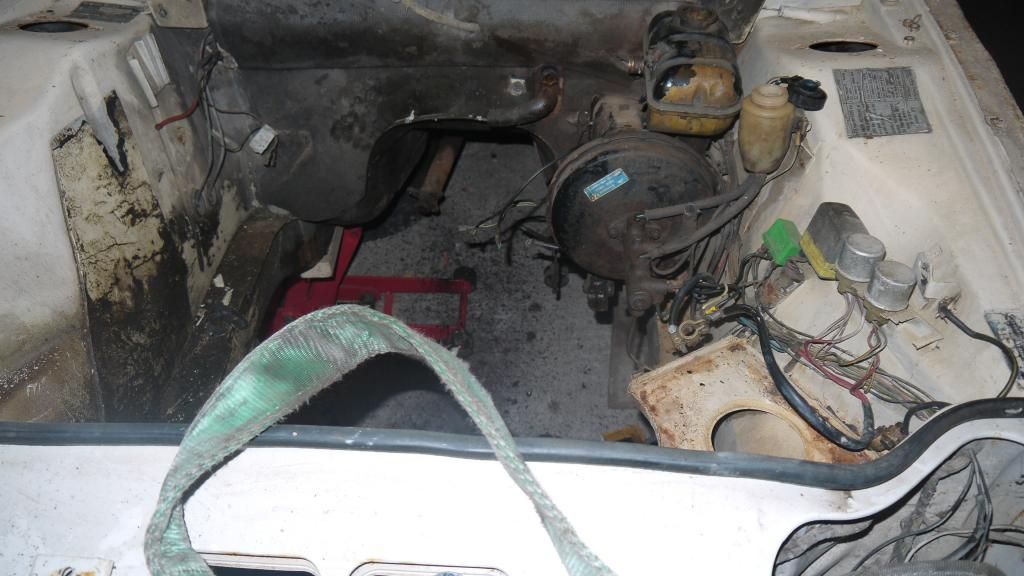
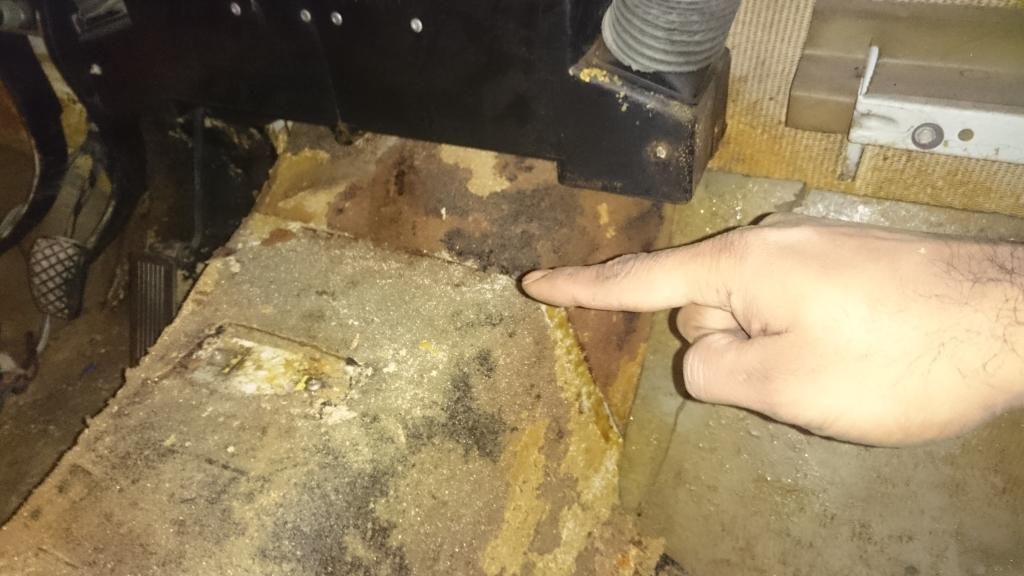
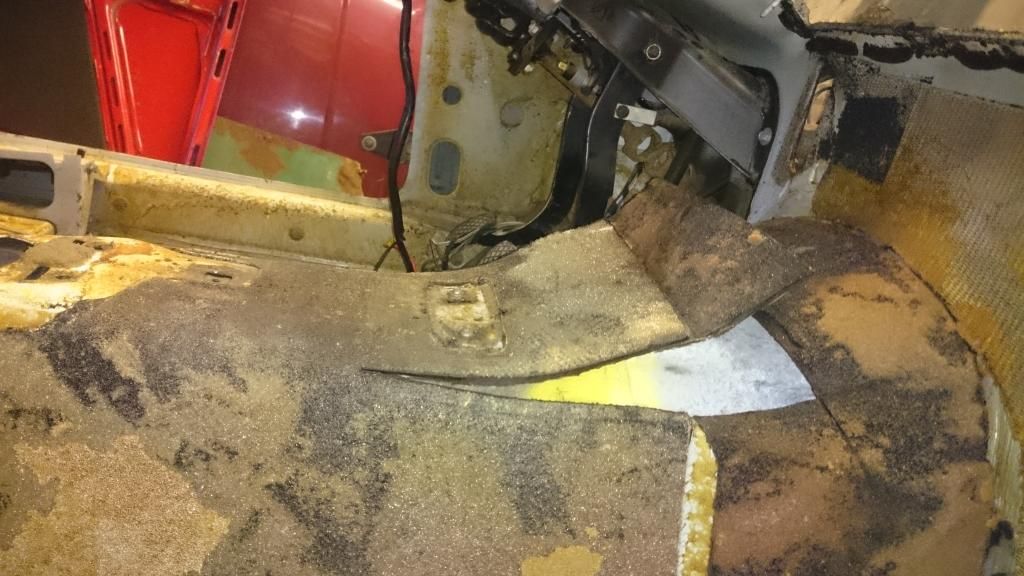
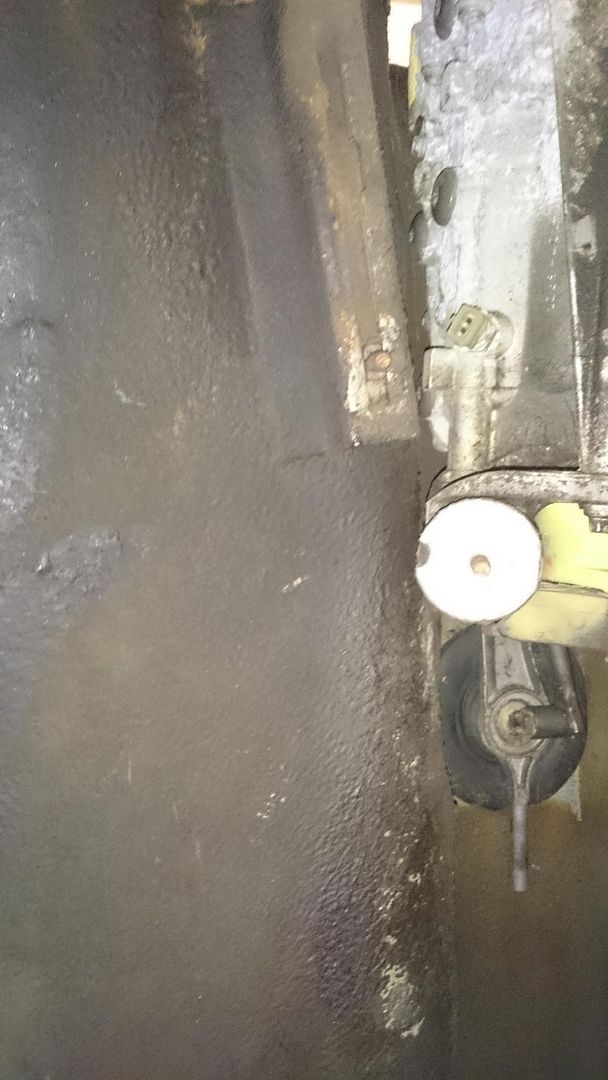
Took the glass out, the front one had a hole, this has been there some time and as a result has caused a bit of rust underneath the dash, its not too bad though
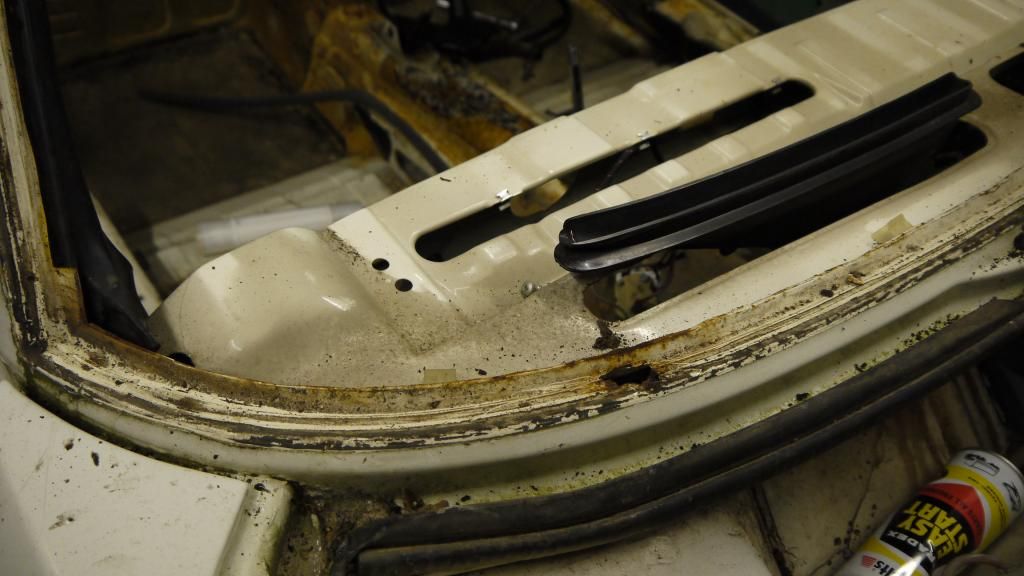
Theres a bit in the boot gutter, again not to serious.
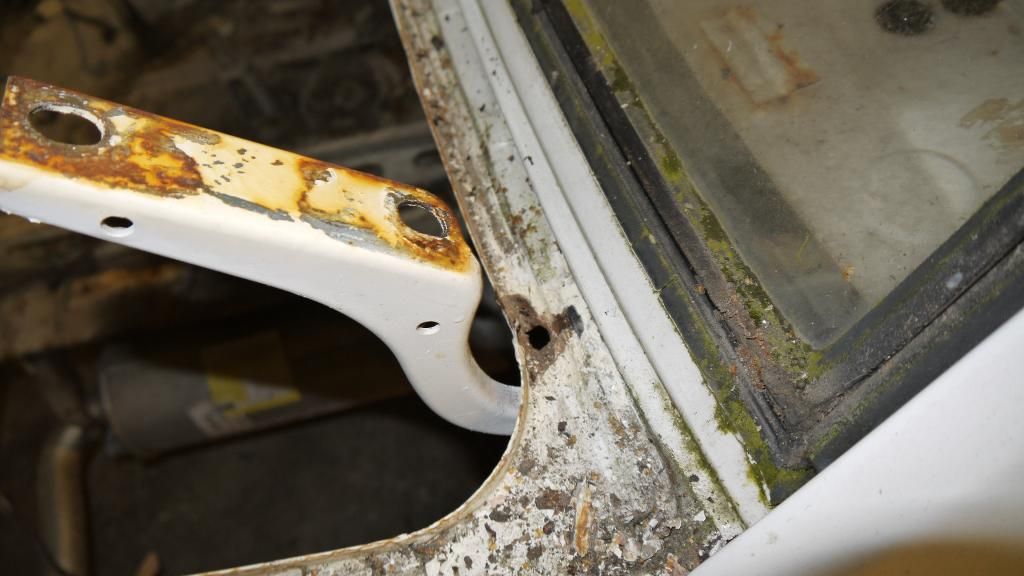
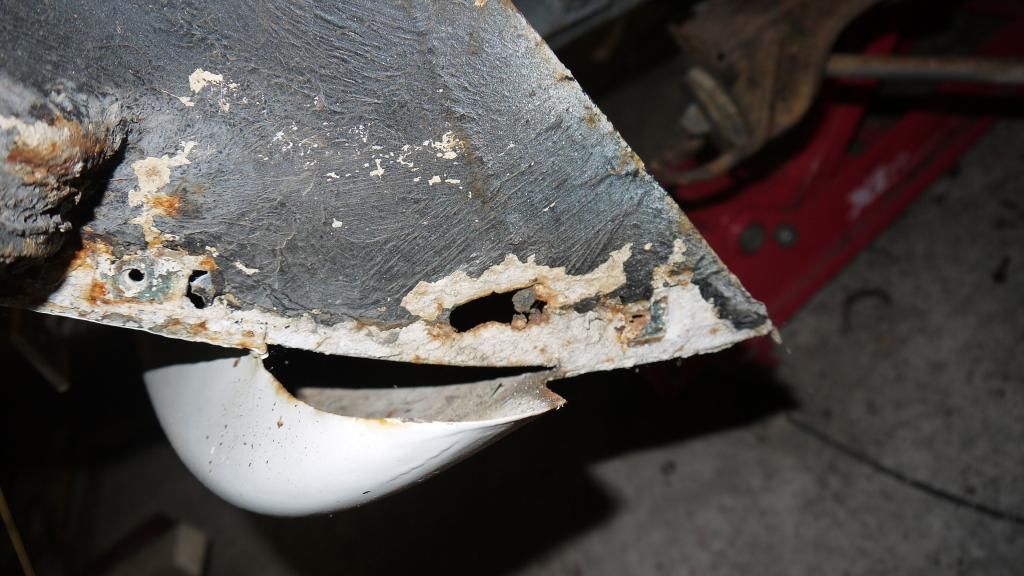
Decided on taking the wings off because as we all know this is where rot loves to hide,
found this under the passenger side
other then that seems alright under here
drivers side seems solid and nothing to worry about
apart from this bit
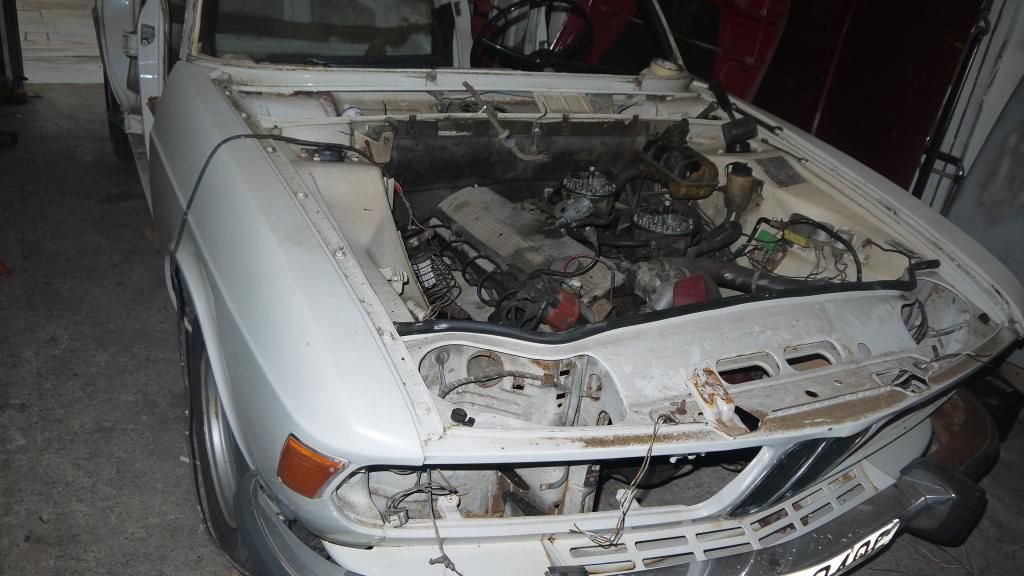
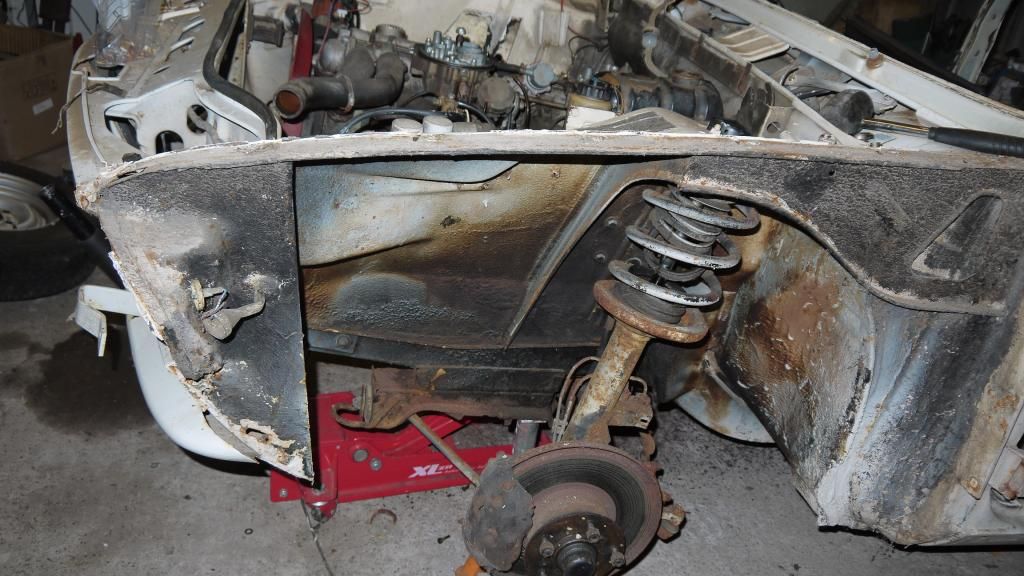
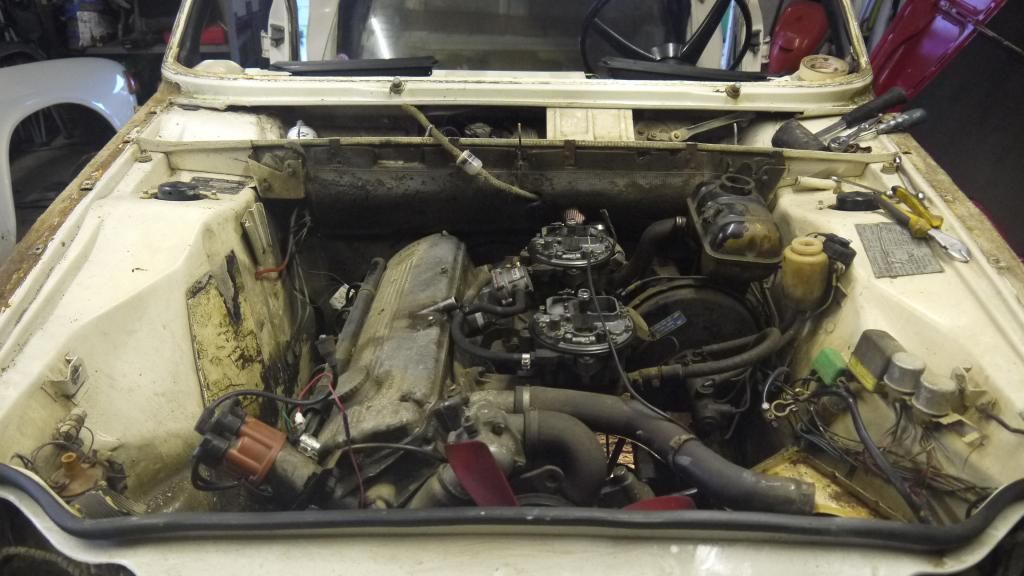
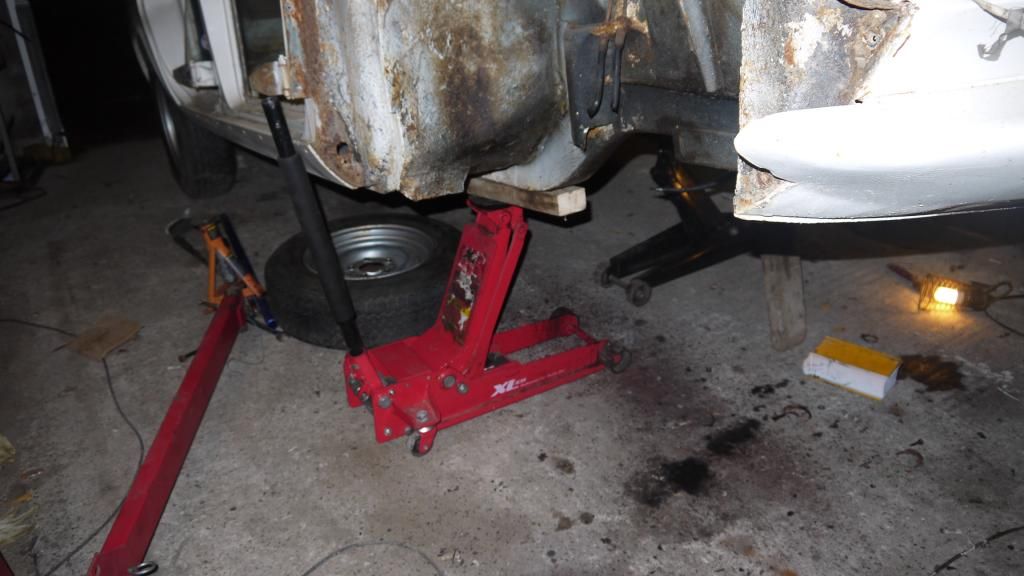
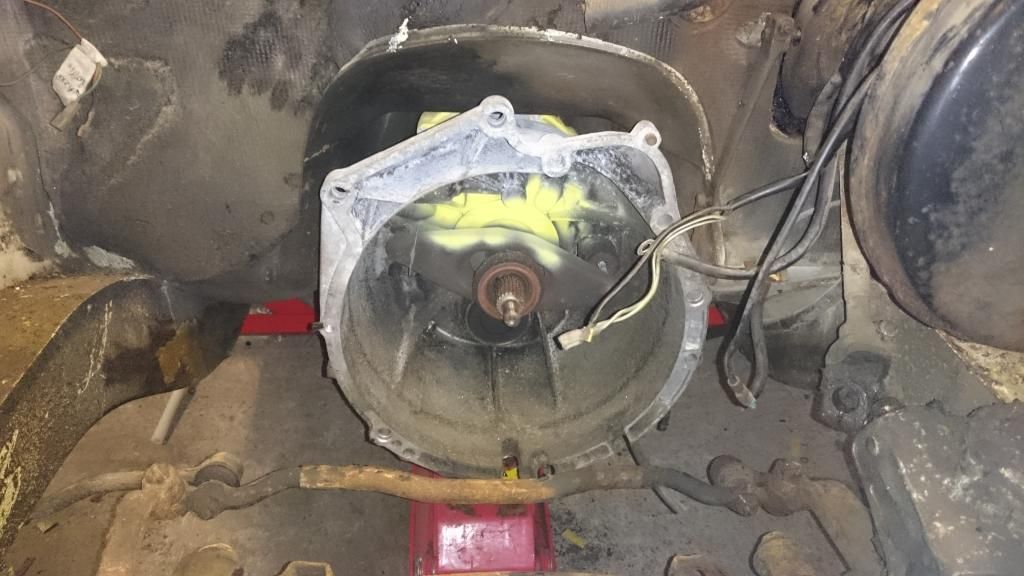
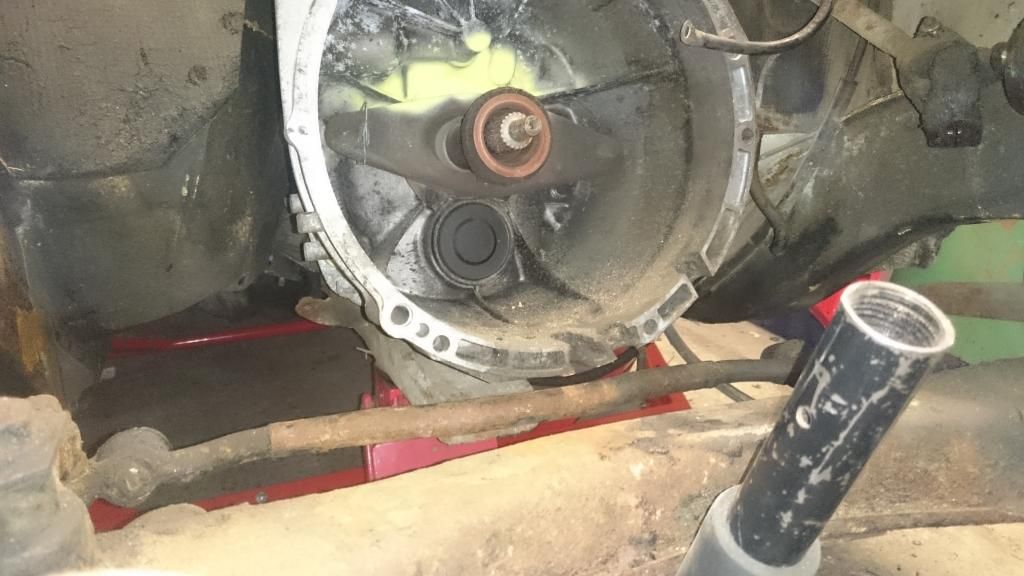
so I made a start on taking out the donk. I undid everything and then took the wheels off and sat the front down on the wheeled trolley, there is no easy way of getting it out the top, also the m30 engine this car came with is a big old boat anchor.
i had to jack the car up very high and maxed out the jack, luckily there was just enough room to get the engine out underneath, I didn't get many pics of this process as its pretty precarious and I was on my own.
That's the fun part over now so now I have to start planning and measuring everything.
I have got my measuring tape out, and although I don't think there's going to be a problem getting the engine in I think that the main issues are going to be the gearbox tunnel, the standard gearbox is puny and the 330i 6 speed box I have here is a much bigger (5" bigger diameter) ill probably end up having to cut the tunnel.
stay tuned.
Re: Project E3 is Go! 2014
Posted: Sun Nov 09, 2014 9:13 pm
by Grewham
The fun begins but a great start Nas

Re: Project E3 is Go! 2014
Posted: Sun Nov 09, 2014 11:10 pm
by Jeroen
Nice progress and rust wise it isn't too bad at all!
Re: Project E3 is Go! 2014
Posted: Mon Nov 10, 2014 12:55 pm
by uwbuurman
Re: Project E3 is Go! 2014
Posted: Wed Dec 10, 2014 6:52 pm
by theneek
very nice.
Re: Project E3 is Go! 2014
Posted: Wed Dec 10, 2014 10:07 pm
by nas80
I should update this.
I have all the bits n bobs I need to make a start on fabrication of the engine .
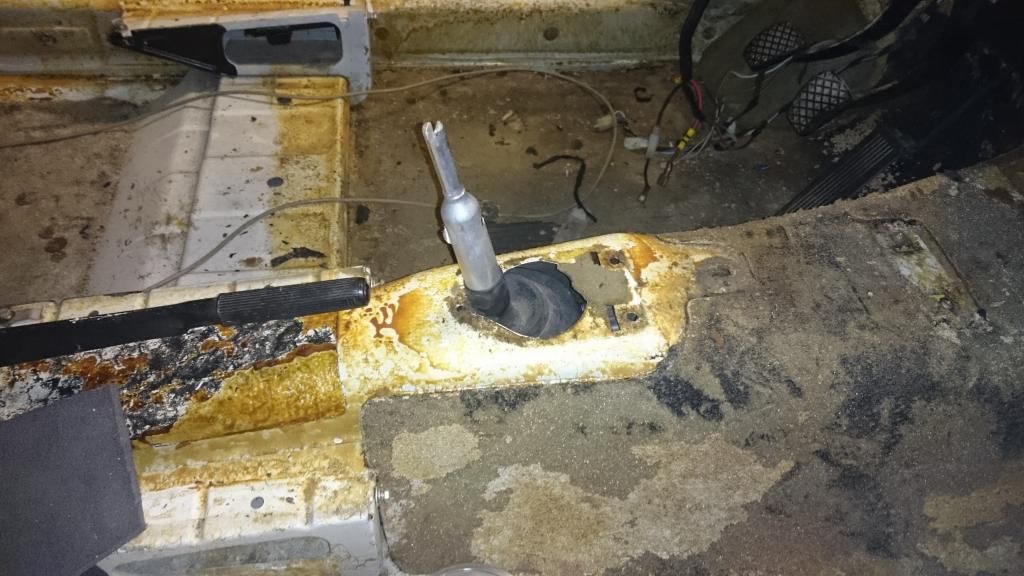
Think the transmission tunnel is going to need slicing up though.
Re: Project E3 is Go! 2014
Posted: Mon Feb 23, 2015 5:36 pm
by nas80
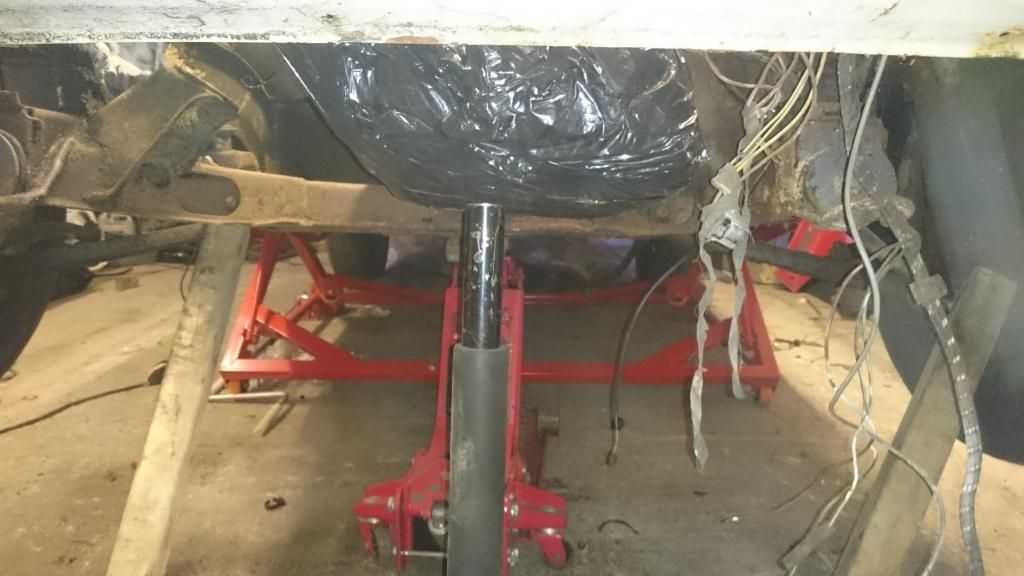
my garage is full of e3, the stuff removed takes up about as much space as the car itself
i bought one of these,
http://www.cjautos.eu/product_p/cl01.ht - makes life a lot more easy.
Stuck it under the car and then had a go at seeing if a 6 speed gearbox will fit the tunnel. Surprisingly it was actually nearly there.
but it wouldnt go high enough so was in the way of the steering bar
it seemed to be this bit causing some of my problem
decided to get my angle grinder out and cut around that bit and peeled it upward, dont worry itll get welded up and made to look like it never happened.
gearbox now has just about enough clearence around it self but will need a bit of manipulation with my hammer in certain places eg at the back cos im not happy with how close the mounts are too the sides.
it clears that steering bar now can go up a bit more if needs be.
gear stick is roughly in the right place although i can manipulate its position exactly later - box needs to come forward an inch or so in this pic..
got the sump out the box and then stuck it on the gearbox to see where the front of the engine will end up bags of clearence
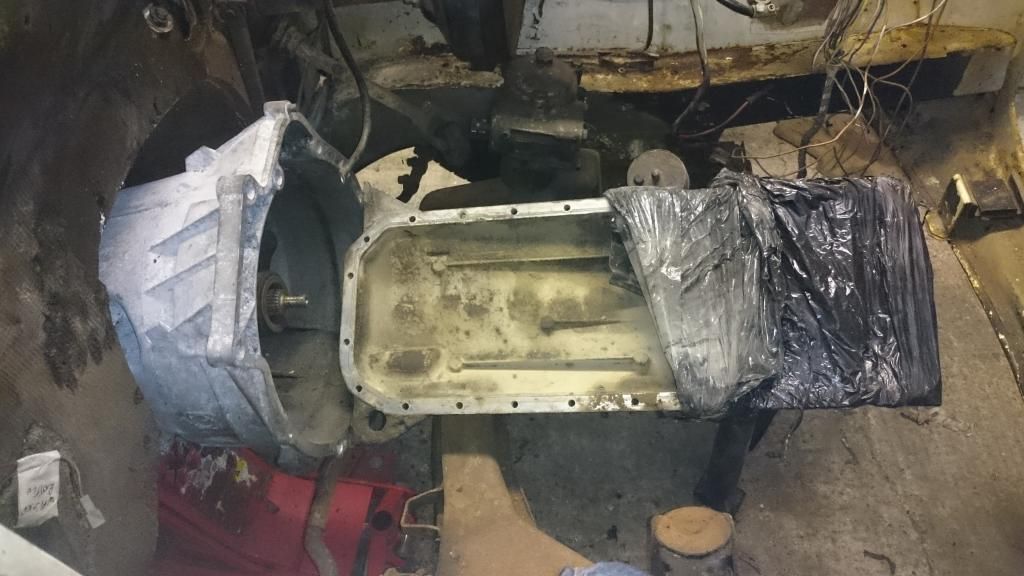
doesnt even need chopping down for ground clearence. although i need to double check this stuff as i have an anti roll bar off the e3 LI we broke, this lower spec car didnt come with a front anti roll bar