How "I" replaced my rear wheel bearings.
Posted: Mon Nov 04, 2013 12:06 am
Stripping the rear hubs is easy enough once you have done it,
I recommend breaking off the castle nuts while on the car.
a good quality impact socket and breaker bar or impact driver should get it. I measured it around 800Lb/ft to remove.
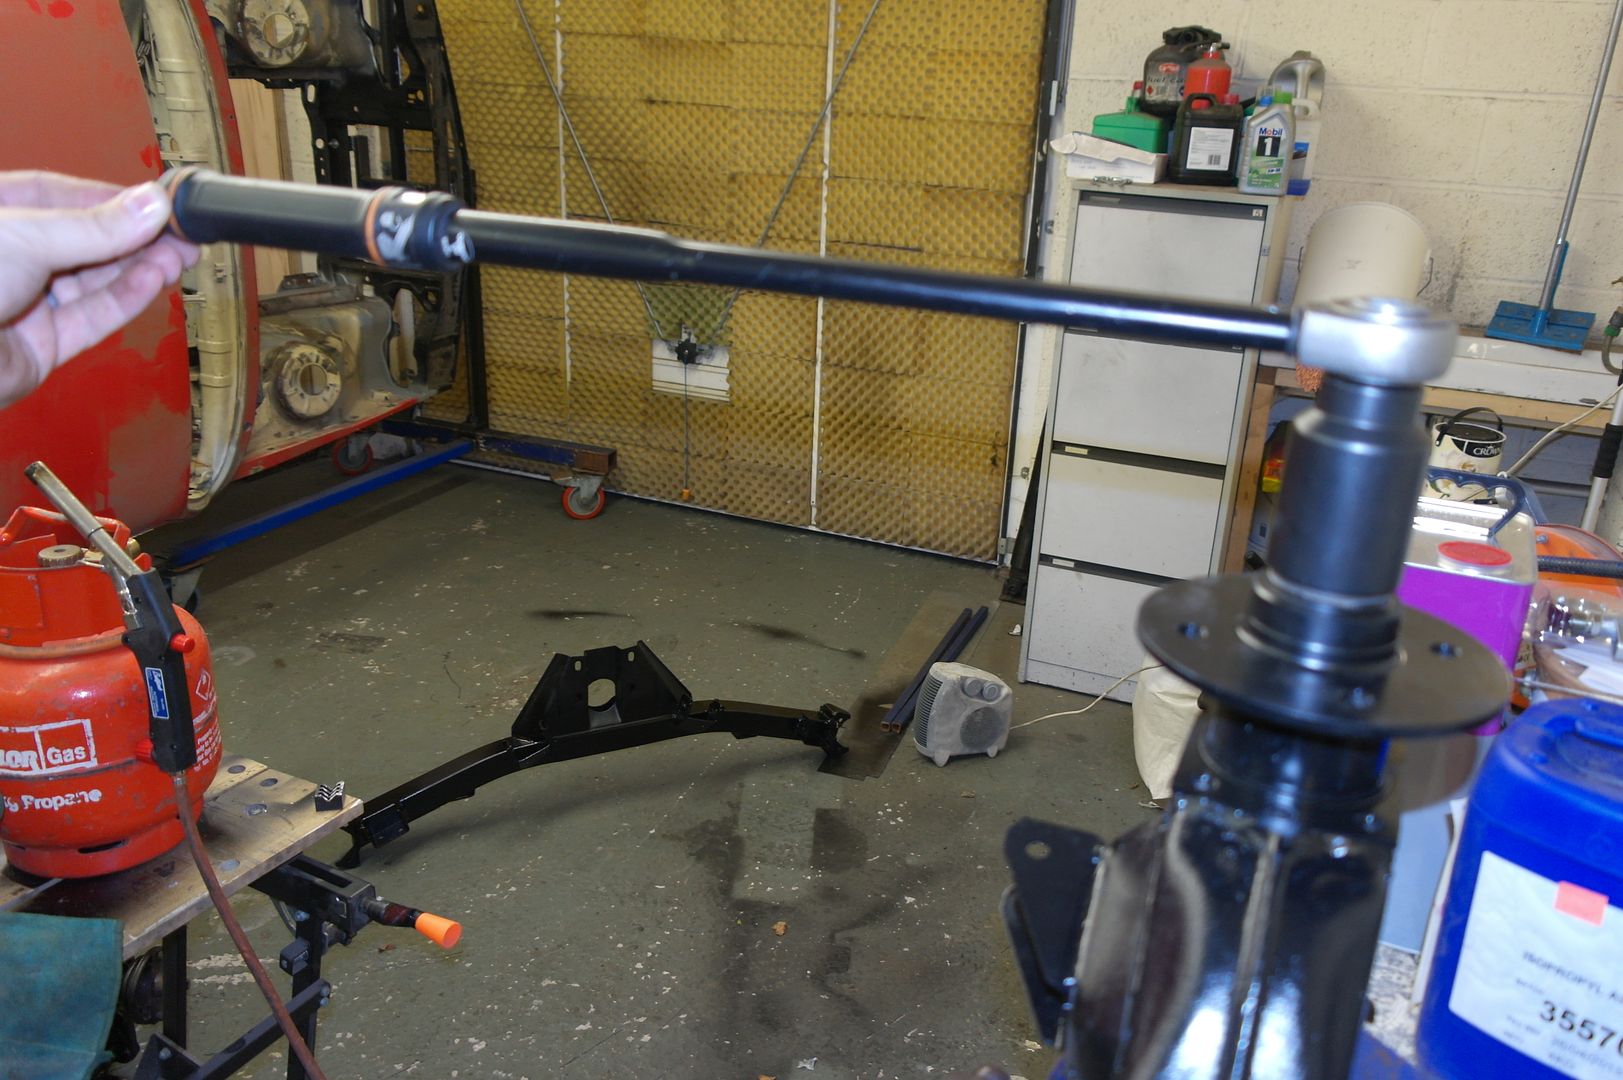
Remove the rear arm from the car
Heat is your Friend, propane gun or similar makes life a lot easier. and a vice is nice.
remove castle nut.
Heat the output flange (the one the wheel bolts to) and use a puller it will come straight off. dont try and hammer the shaft through!! the end will cave in and damage the threads. I learned the hard way, you will see in the pics later.
Now press or hammer(usung a sacrificial drift softer than the shaft) the shaft through the bearings.
remove the seals
Walk the bearings out the hub with a drift, you will need to move the spacer tube side to side to do this.
Do not loose the shim from behind the outer bearing
Keep all parts matched side to side the shims and spacer tubes may be different sizes
I measured mine and both shims where the same size so may just have been lucky.
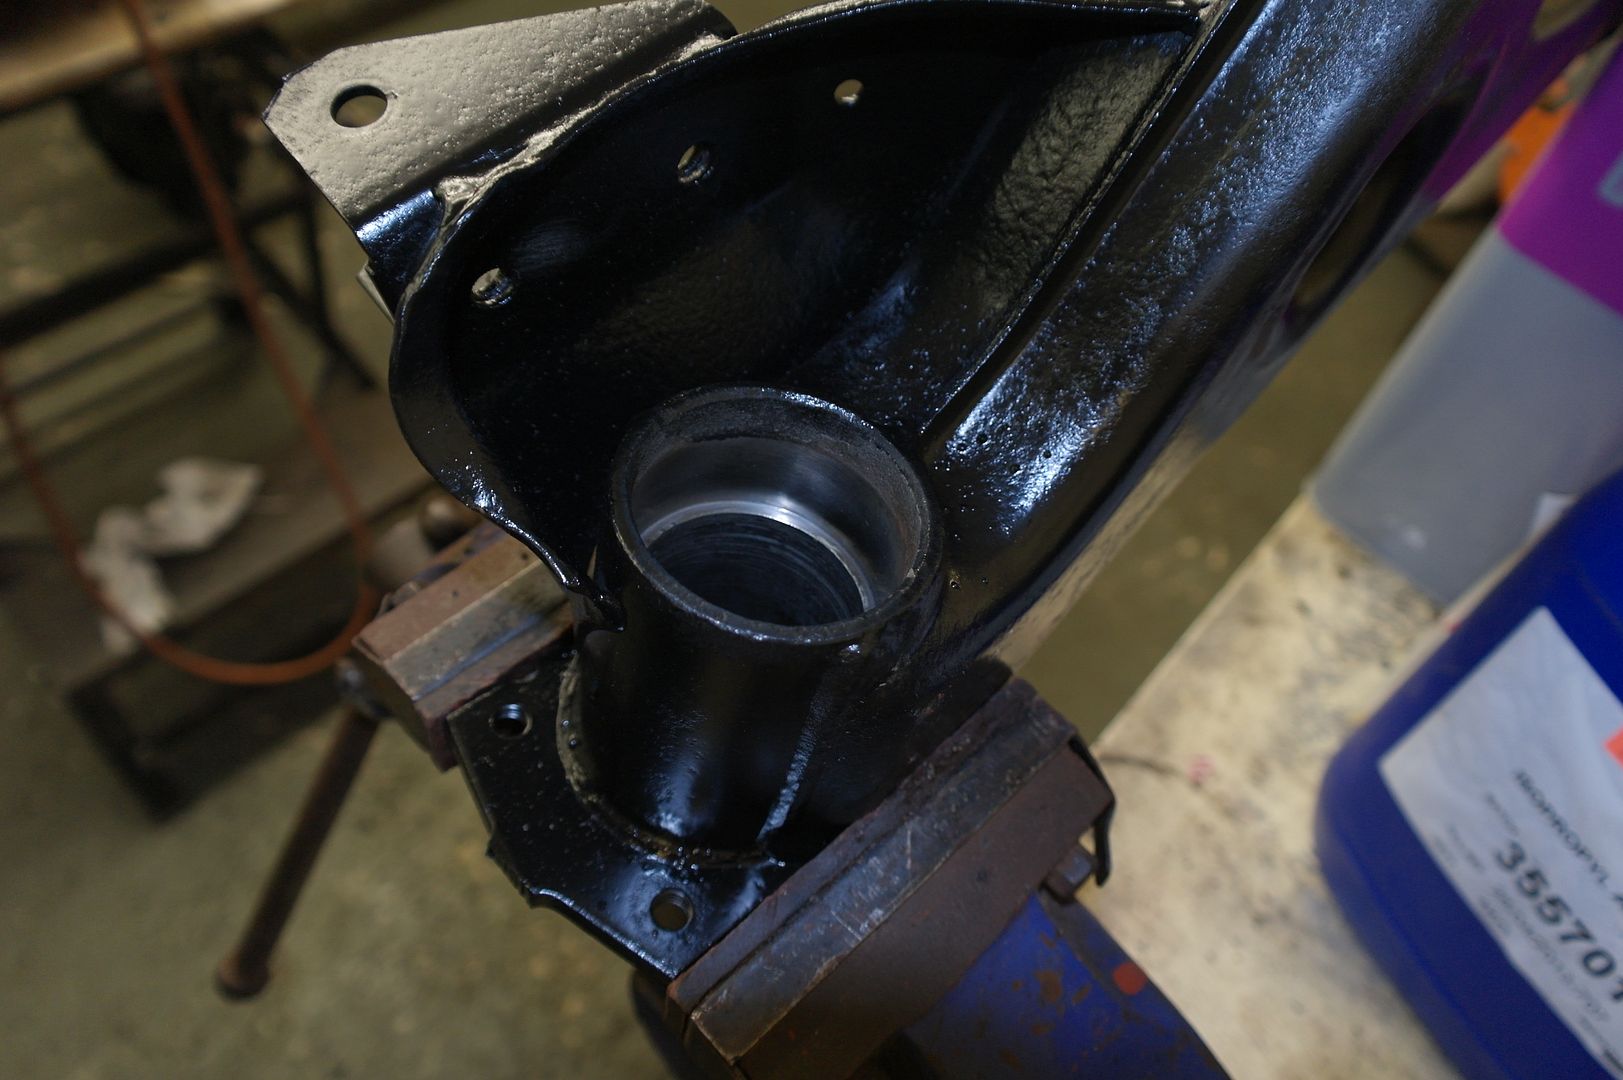
clean clean clean
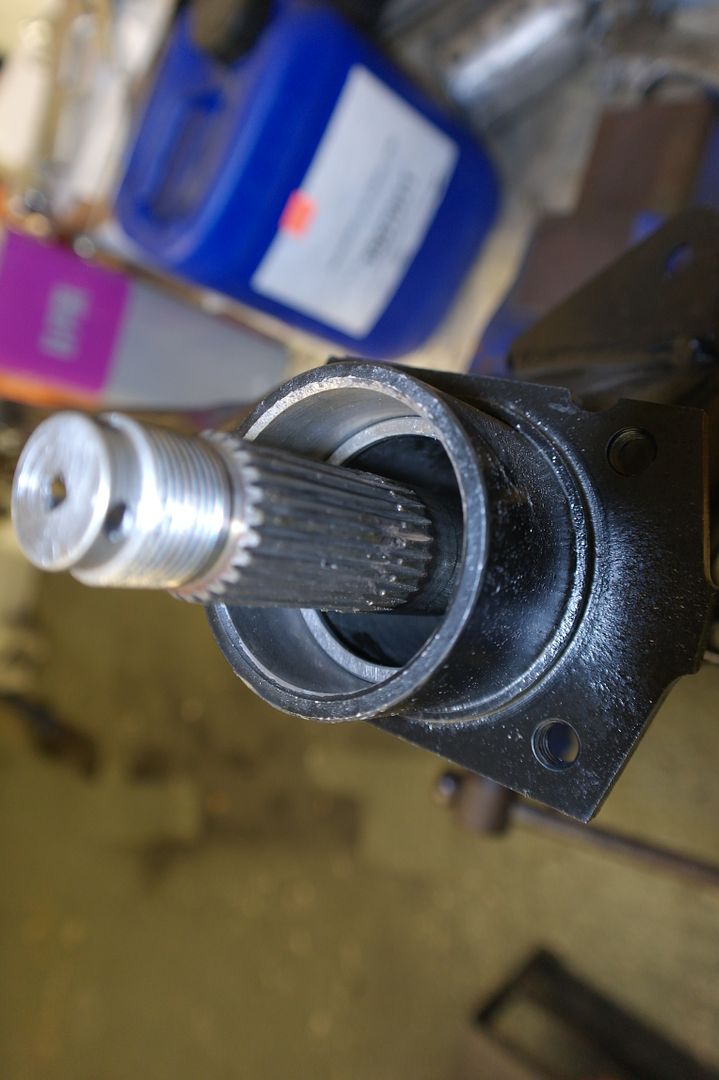
you should end up with this
Measure your new bearings they should be the same thickness as the ones removed to within 0.1mm or so
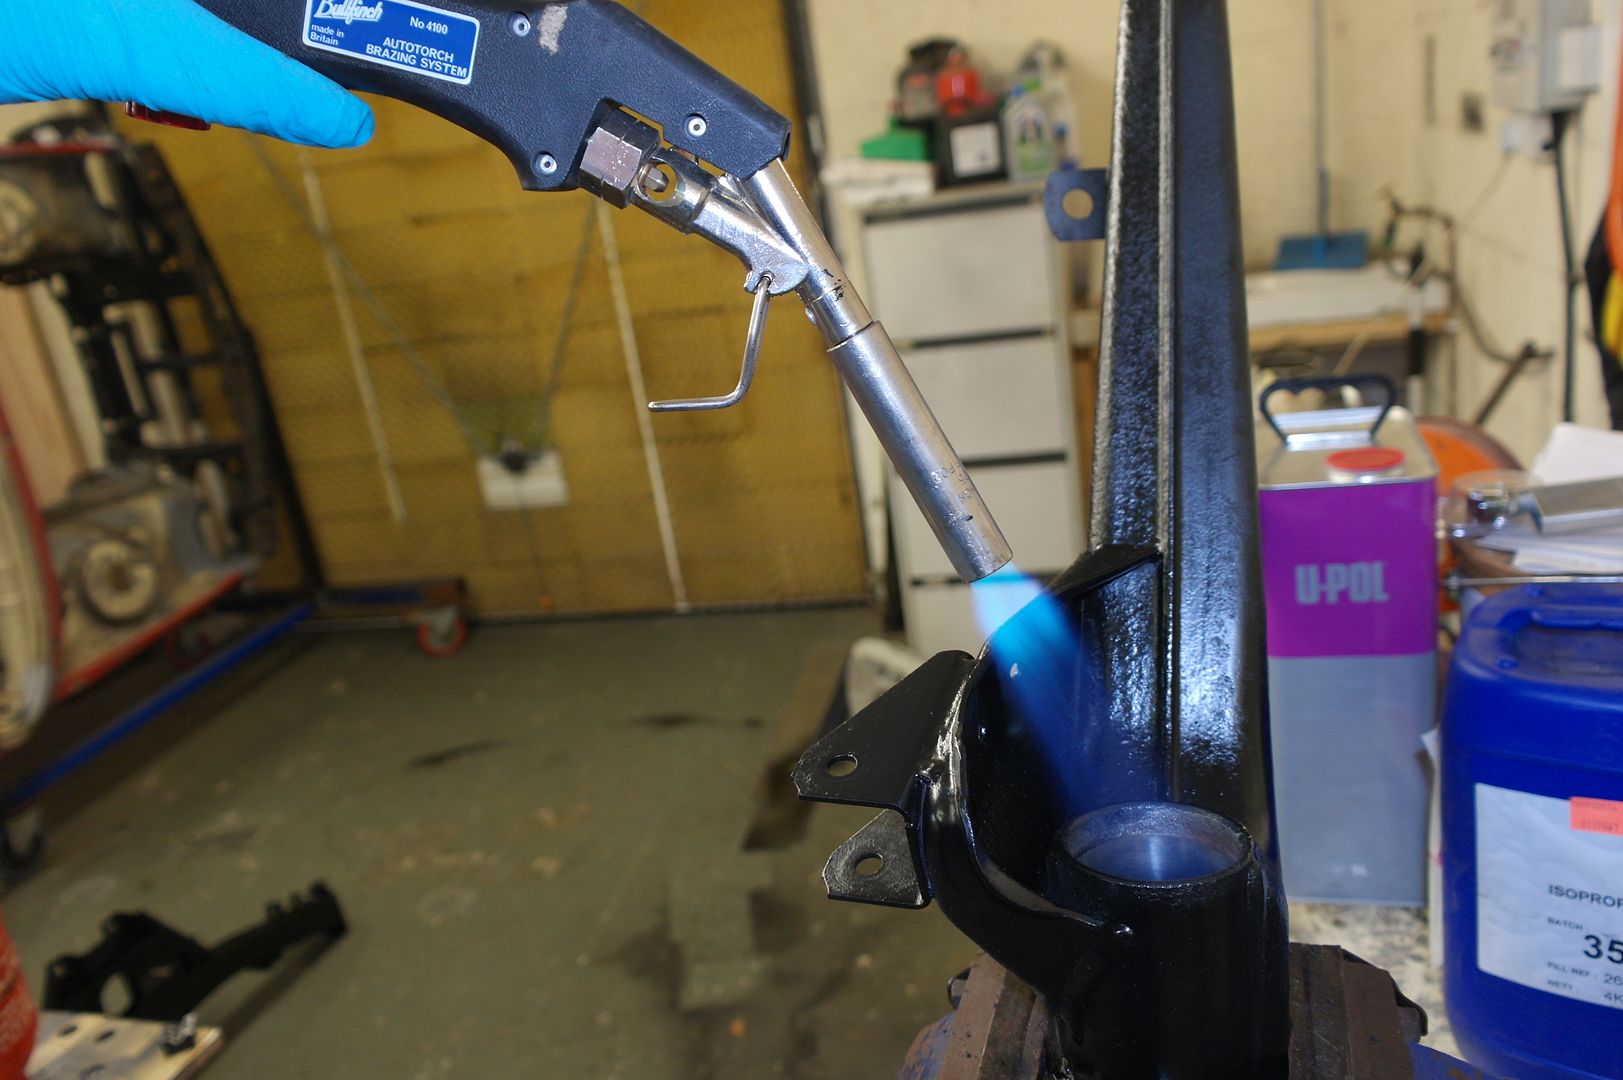
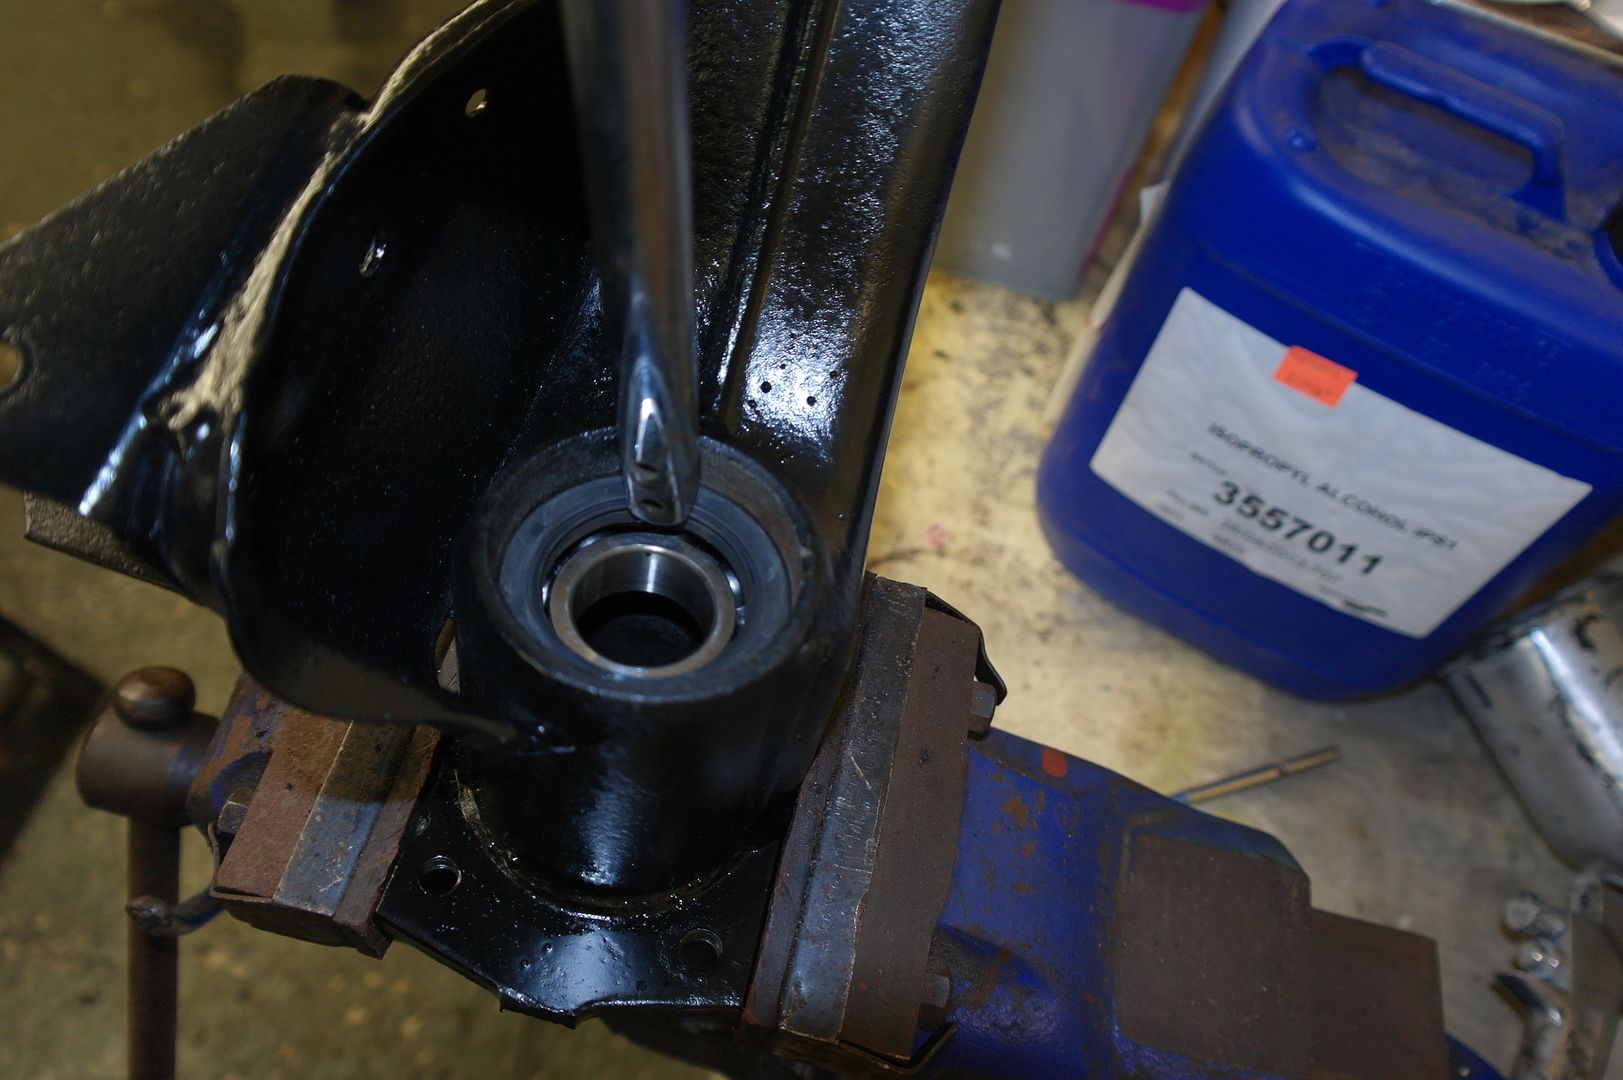
heat the bearing housing
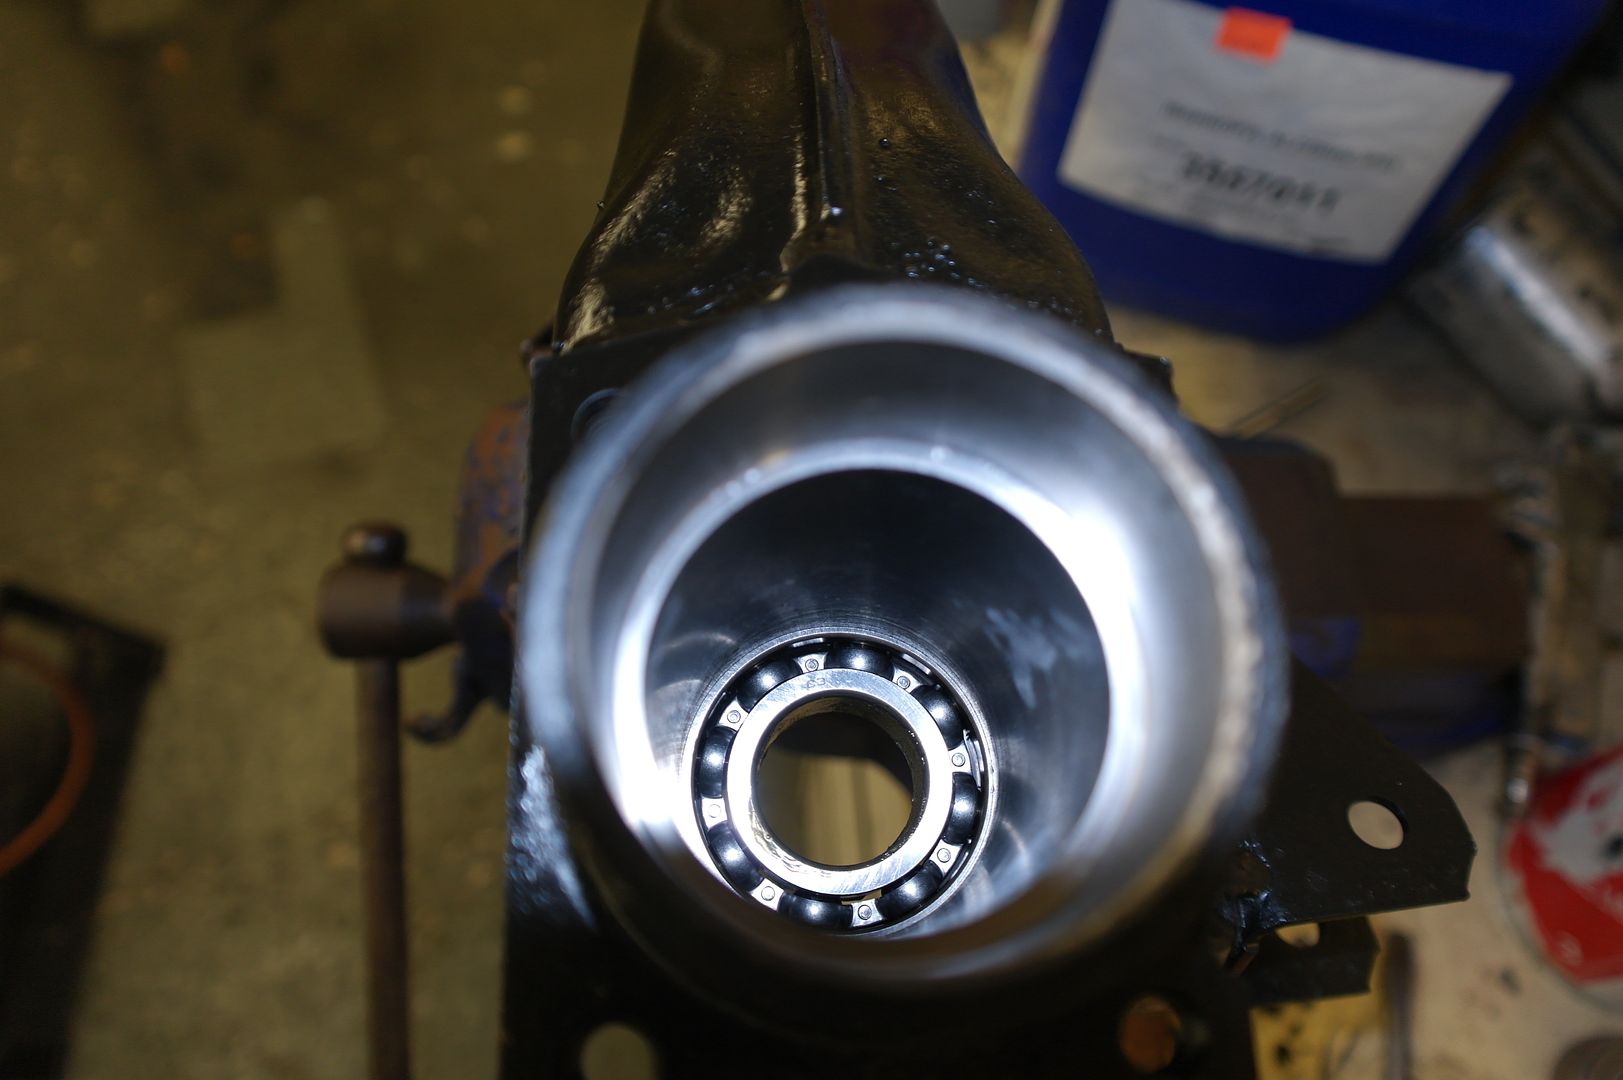
Insert the inner bearing it should drop most of the way in
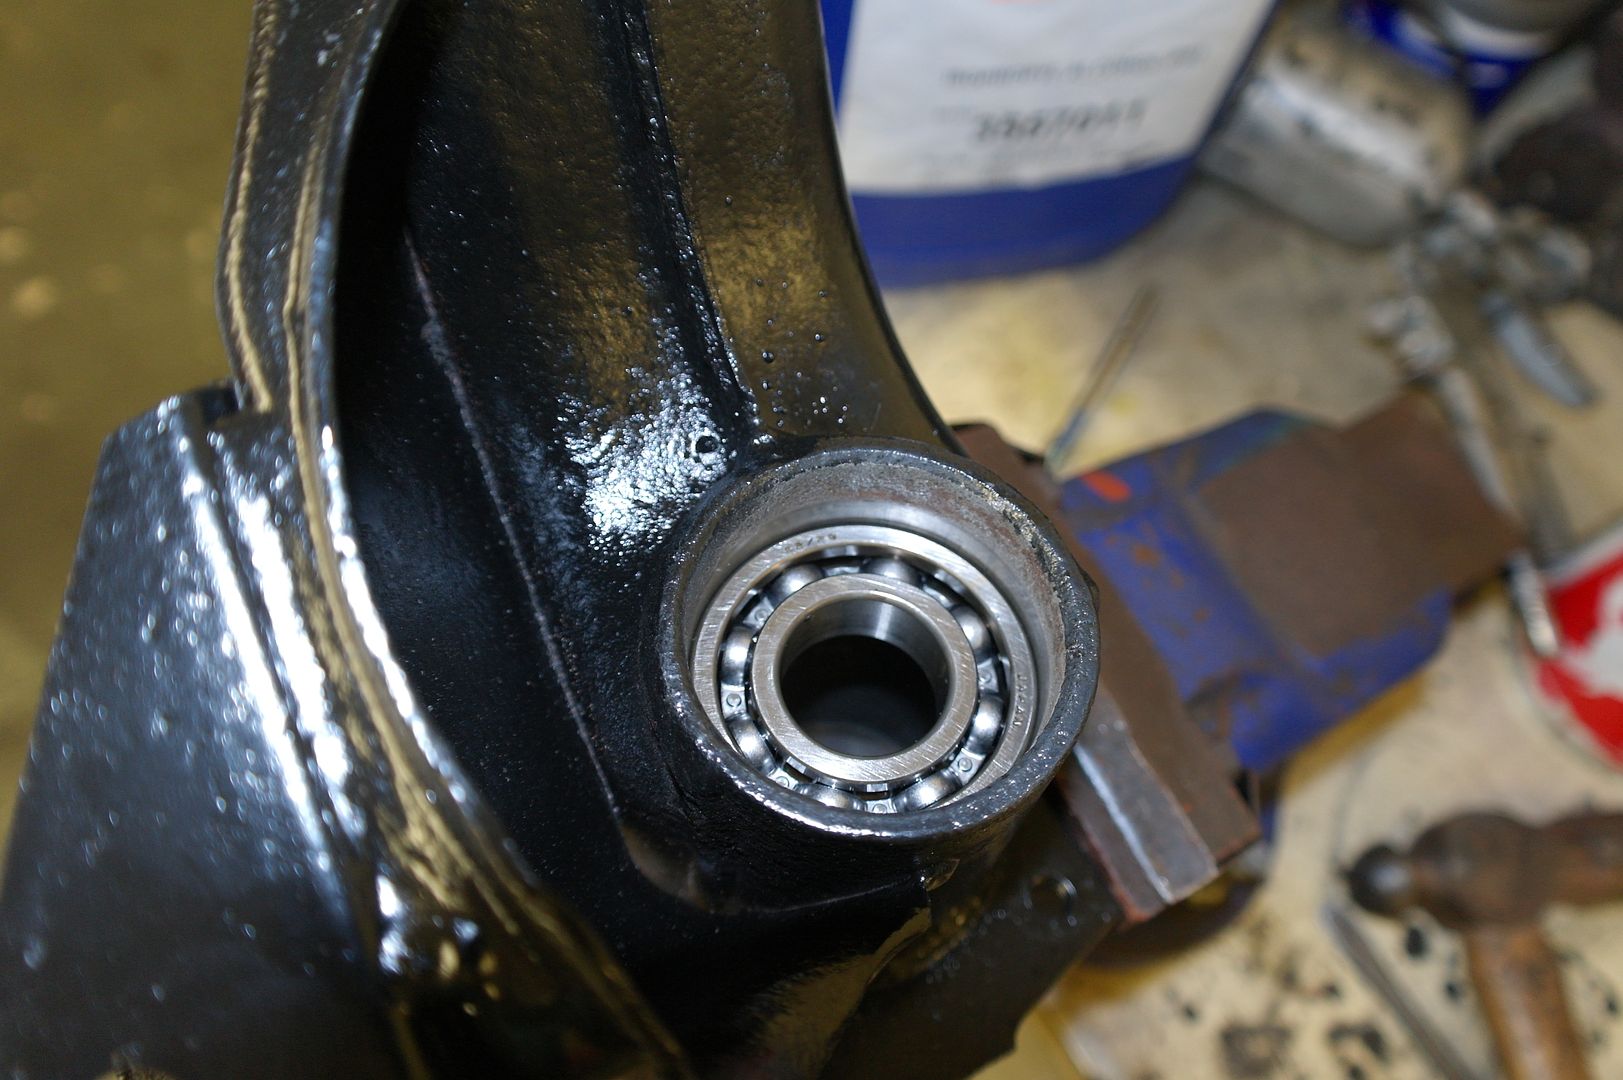
If needed drive it down hitting only the outer race of the bearing until seated on the shoulder
Insert the seal and push into place
apply a little grease the inner edge of the seal once installed
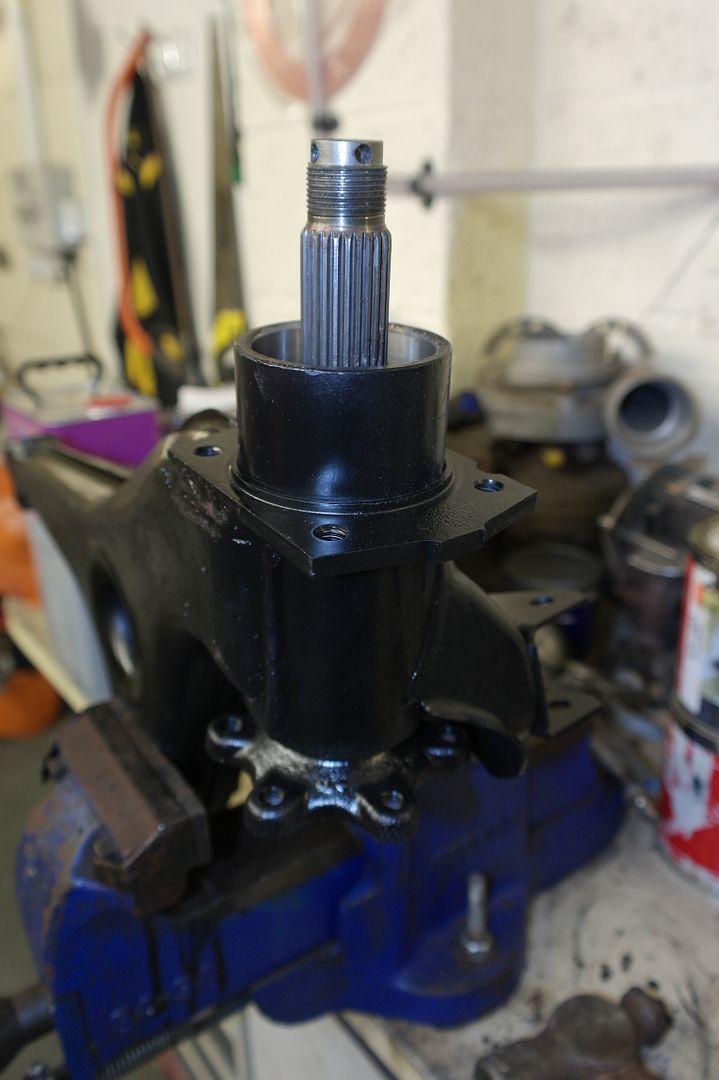
Now you are tring to heat the inner race of the bearing to install the shaft
heat down the center, the rubber seal stays fairly cool as its shielded by the bearing, the inner race take on a fair amount of heat and should be to hot to touch.
now slide the shaft up through the bearing and give a light tap if required. You will see i had to machine the damaged bit of thread off my stubs to save them.
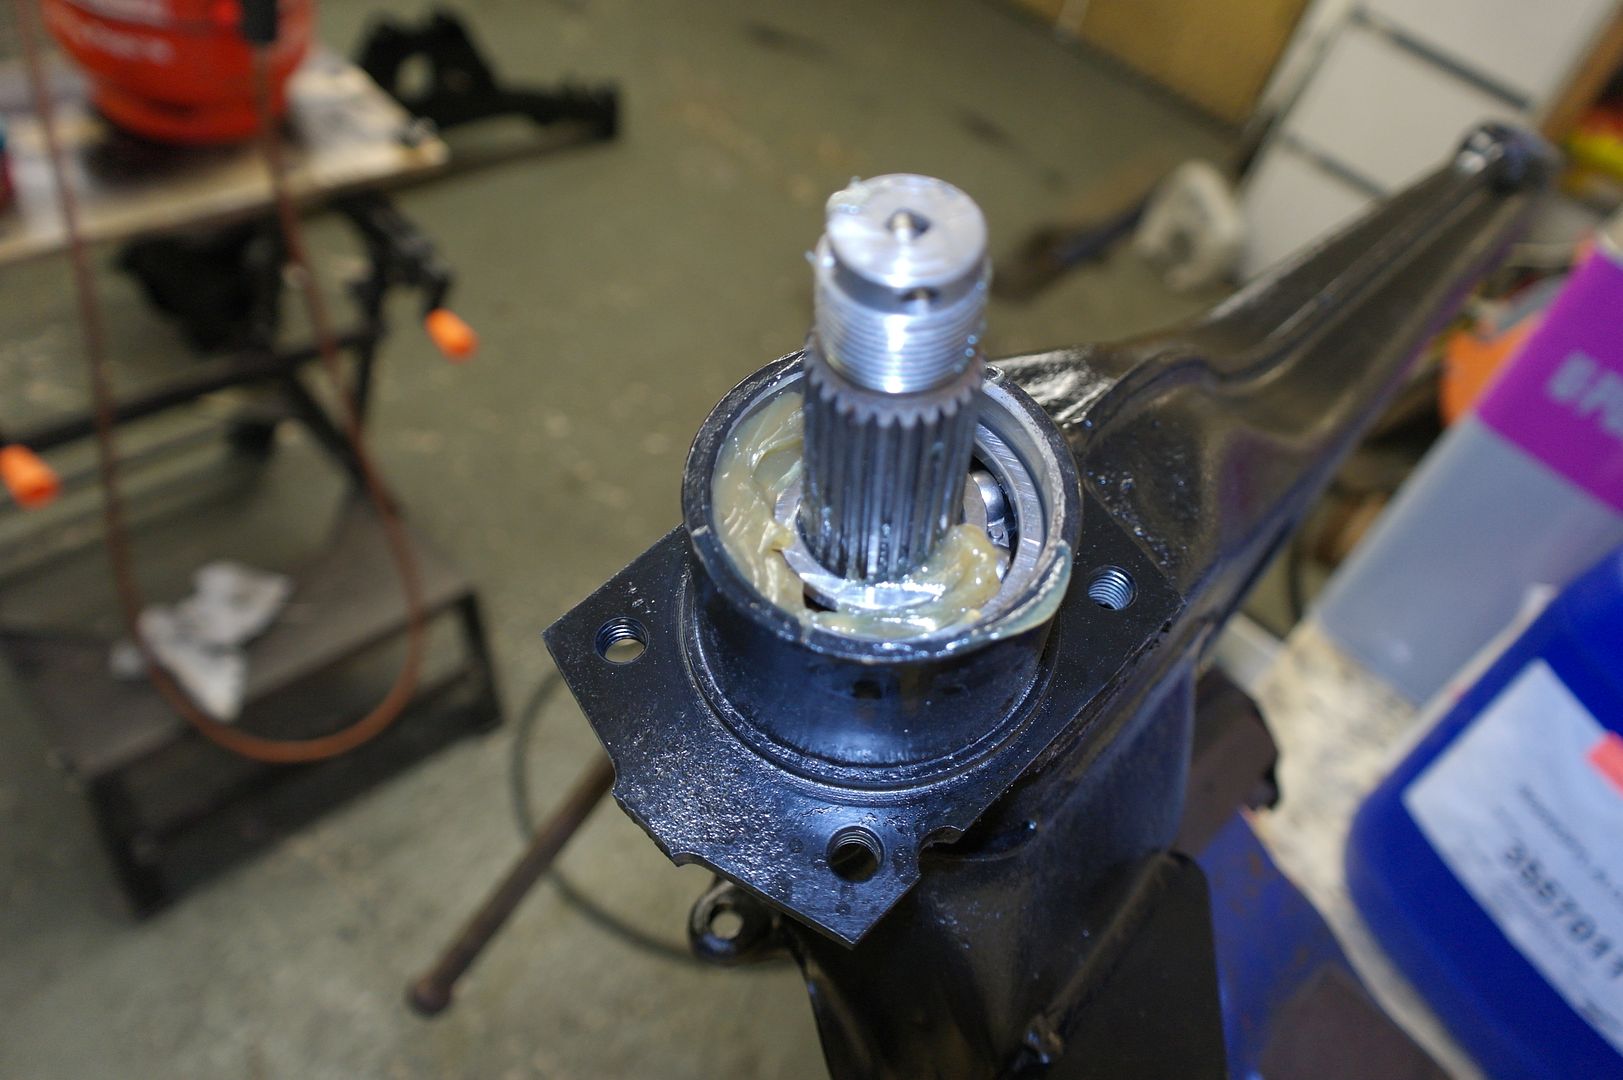
you need to fill the cavity with some grease, i found it easier to cover the spacer tube in it then slide it down.
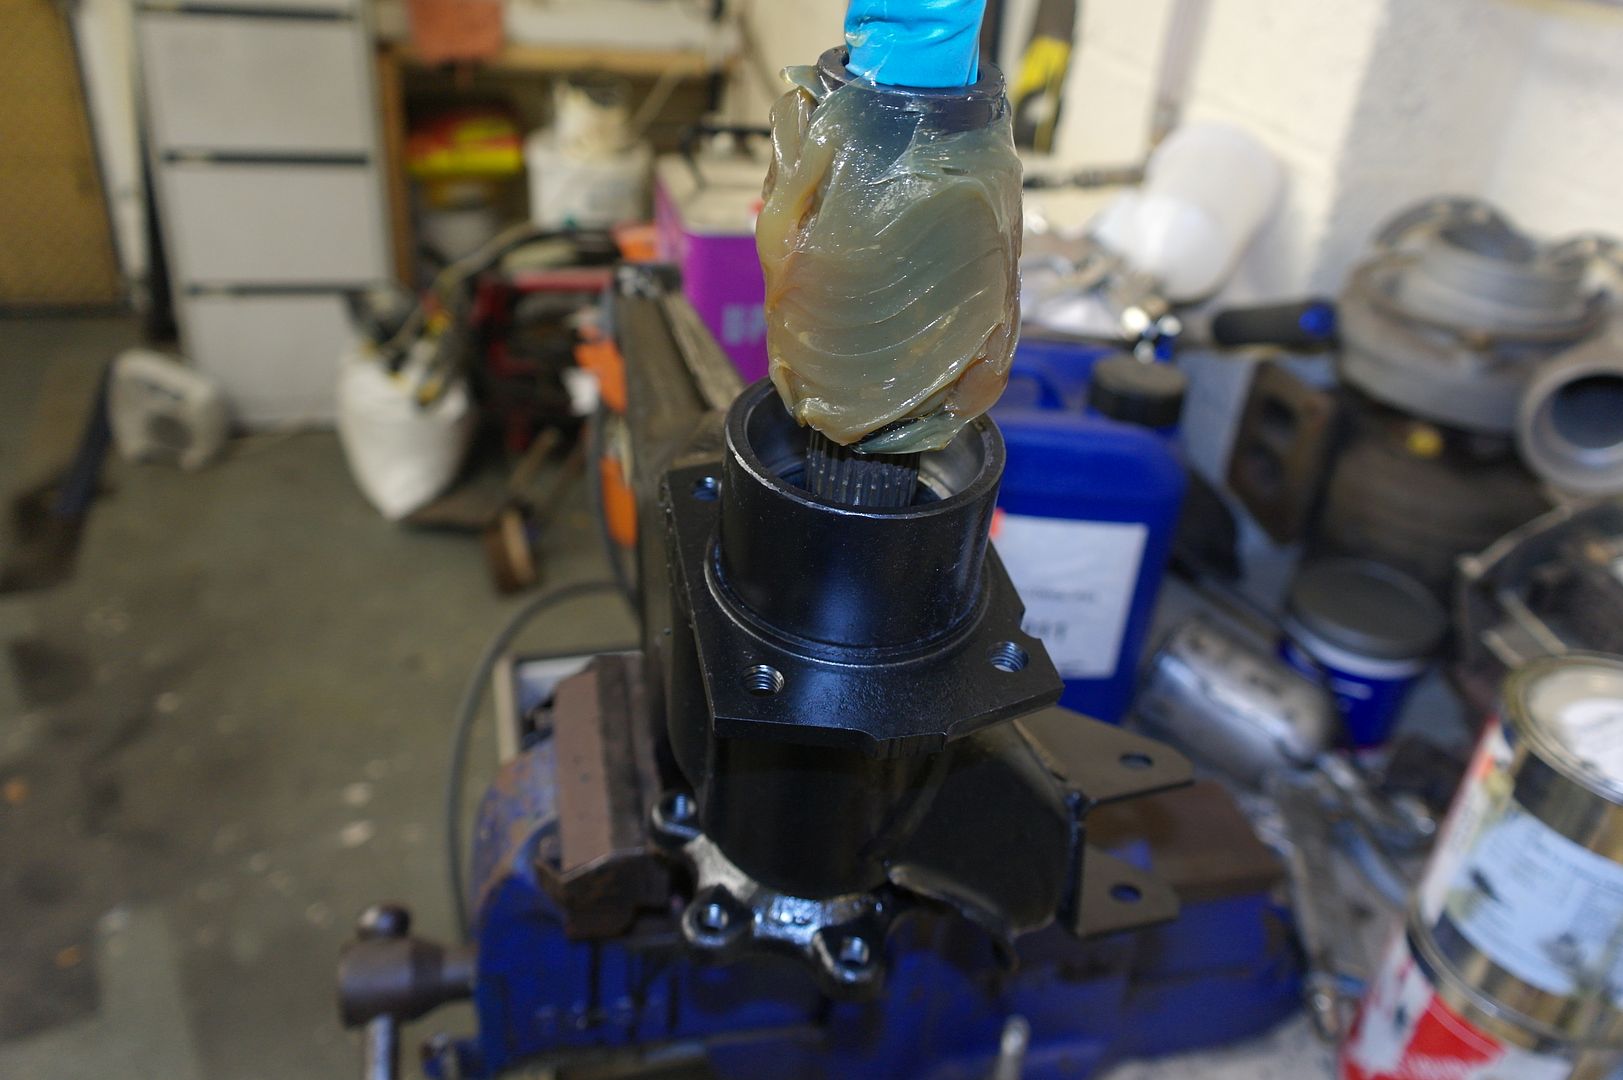
pack some more in
it doesent need to be completely full just enough to lube the bearings
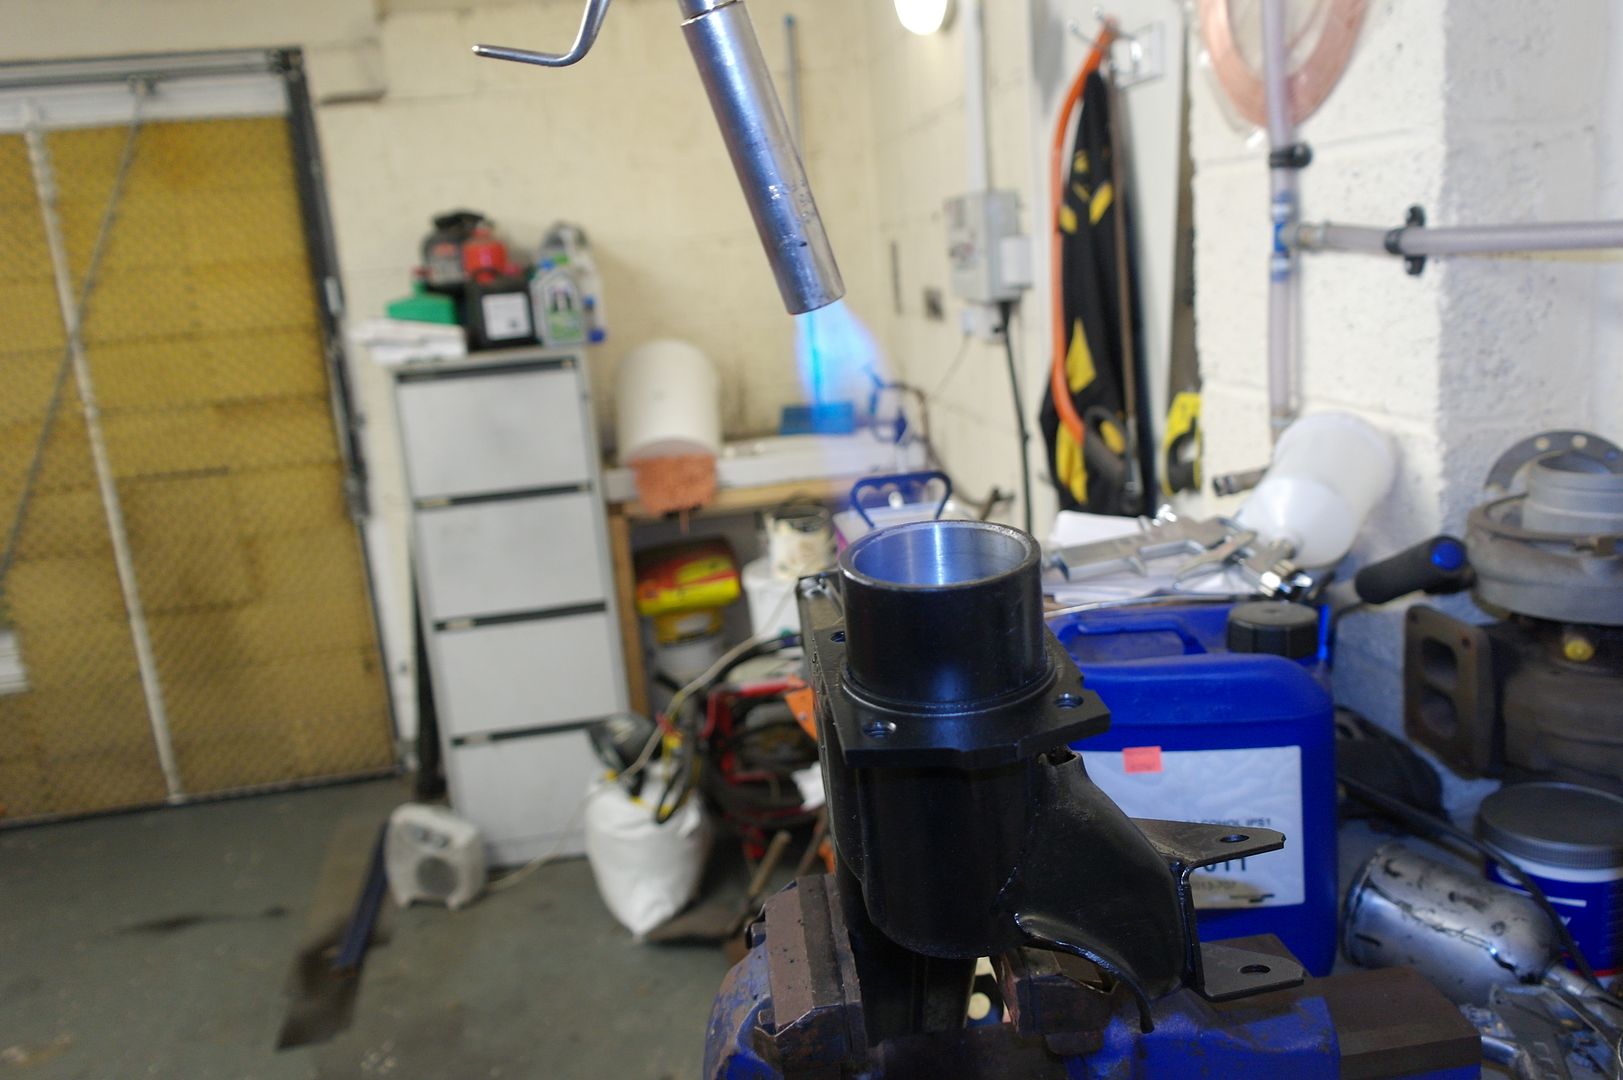
Now heat the housing again
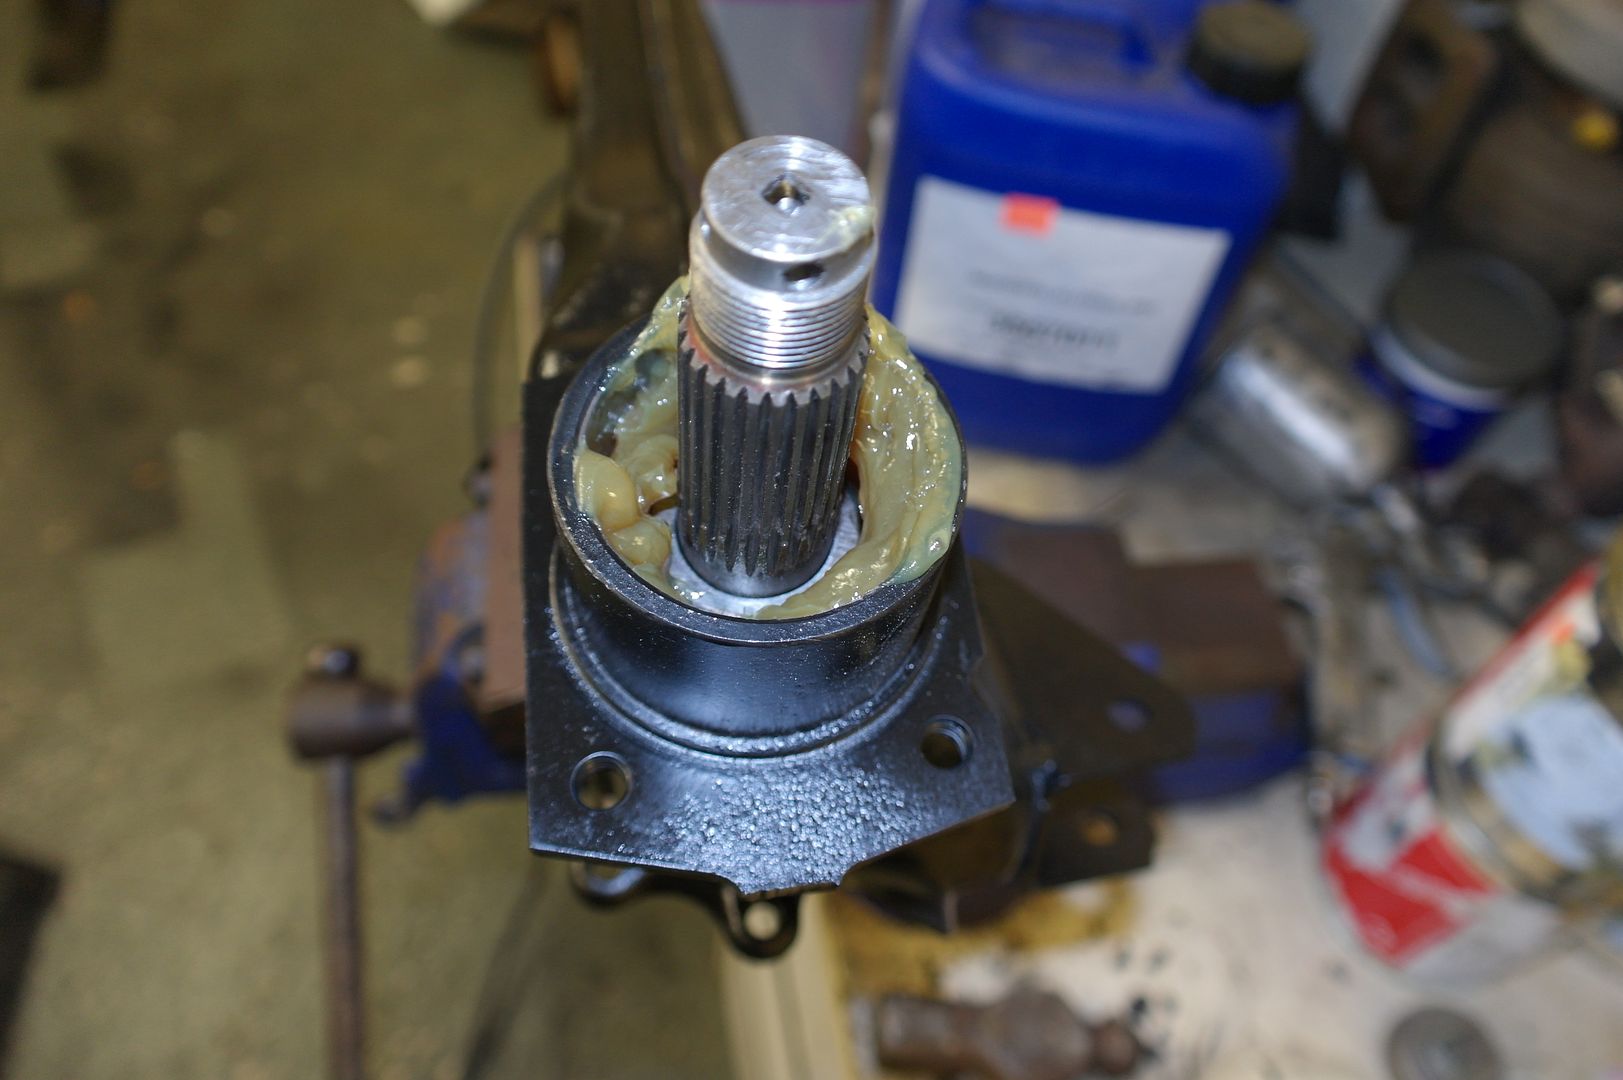
INSTALL THE SHIM
Ideally you want to either cool the stub shaft or heat just the inner race of the bearing so it slides down a bit easier.
I just heated the housing and slowly drove the bearing into place. Then pushed some more grease into the bearing.
INSTALL THE OUTER SEAL
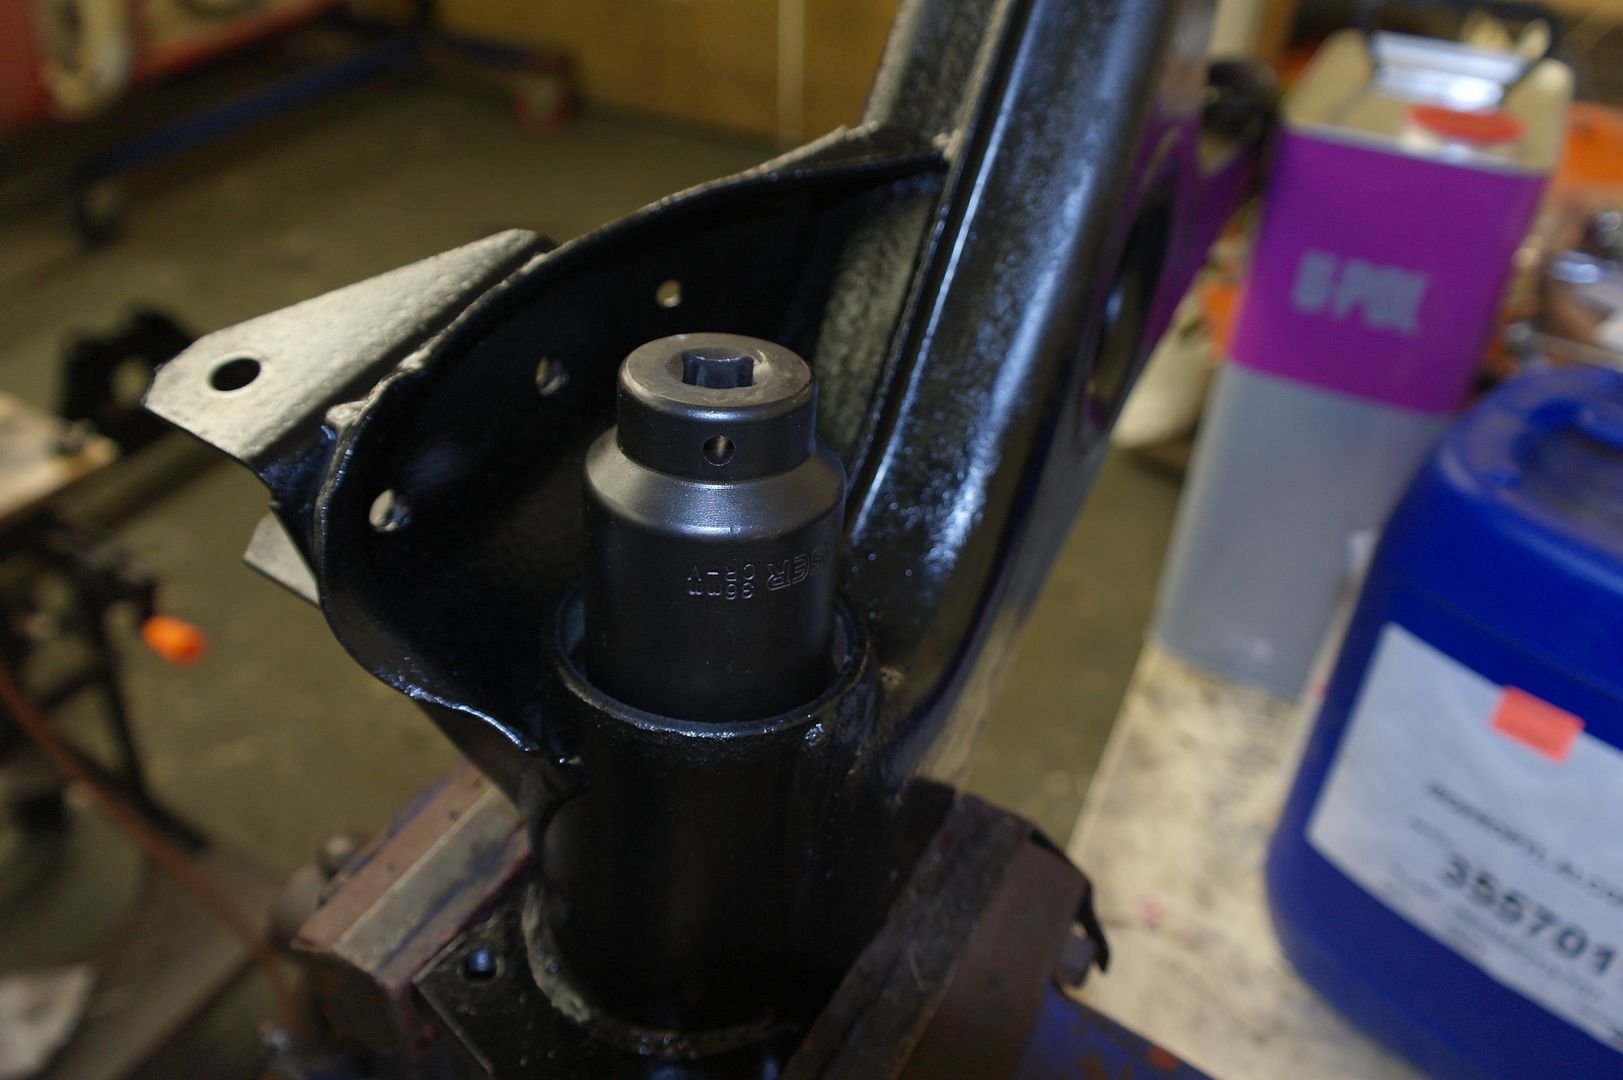
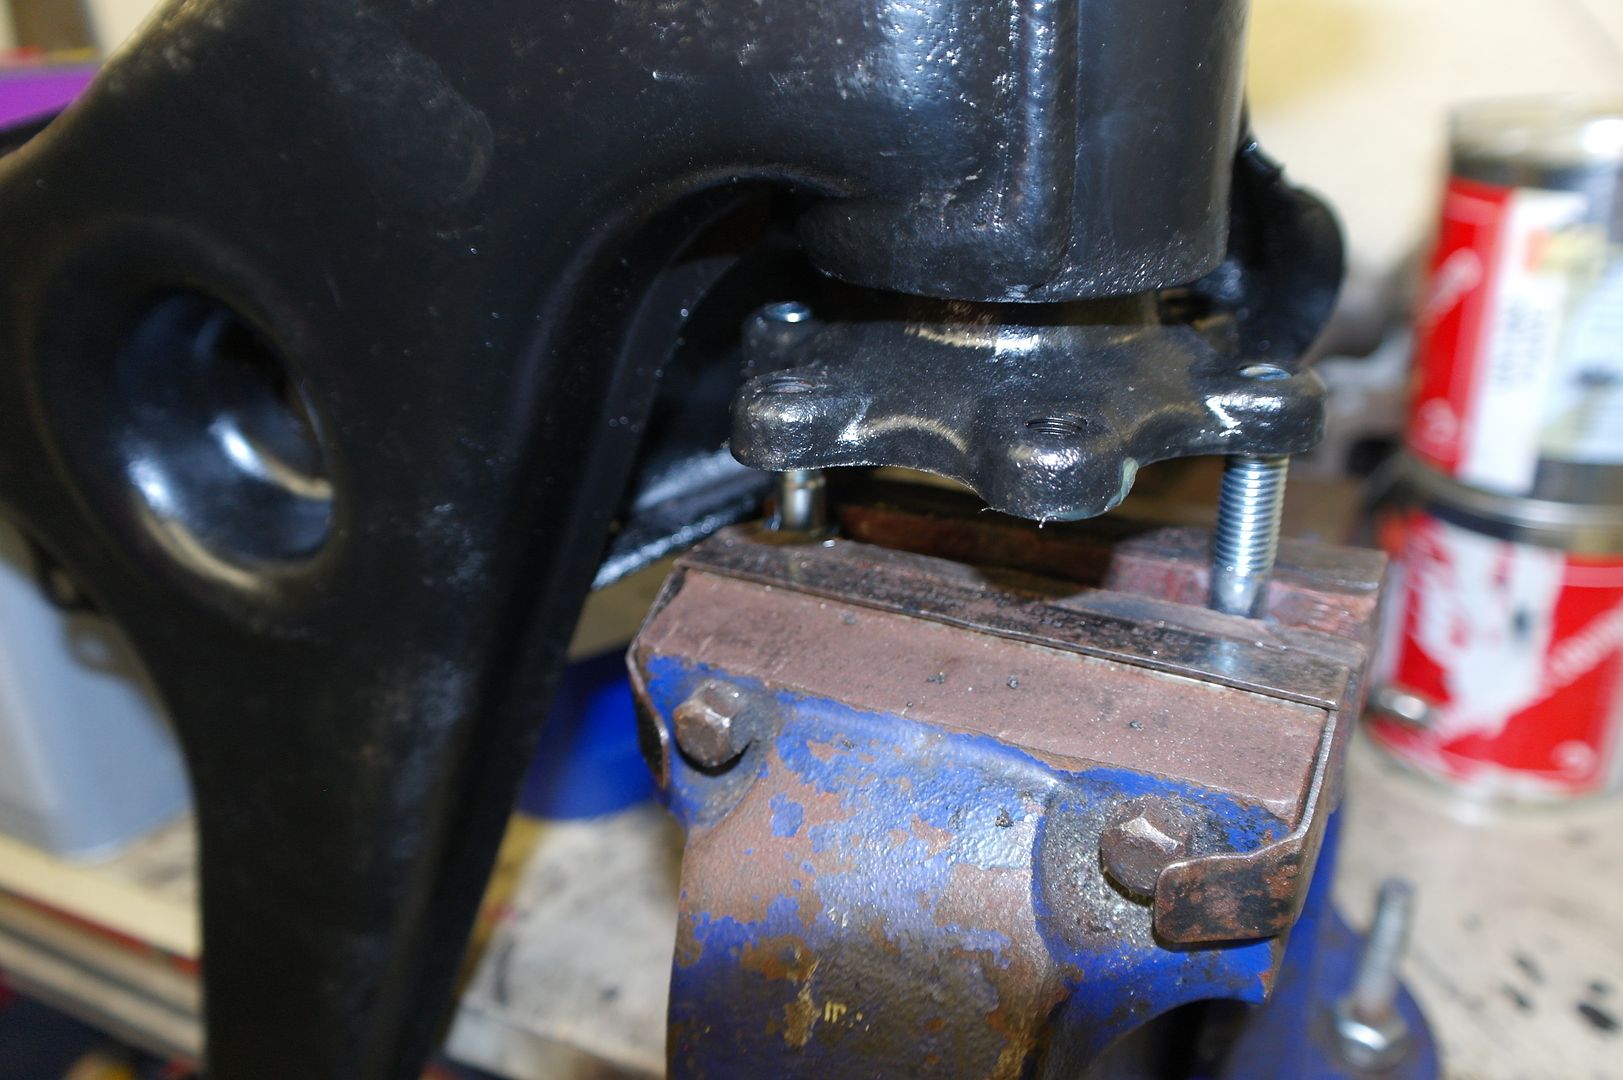
This is how i secured the shaft to the vice for tightening the nut.
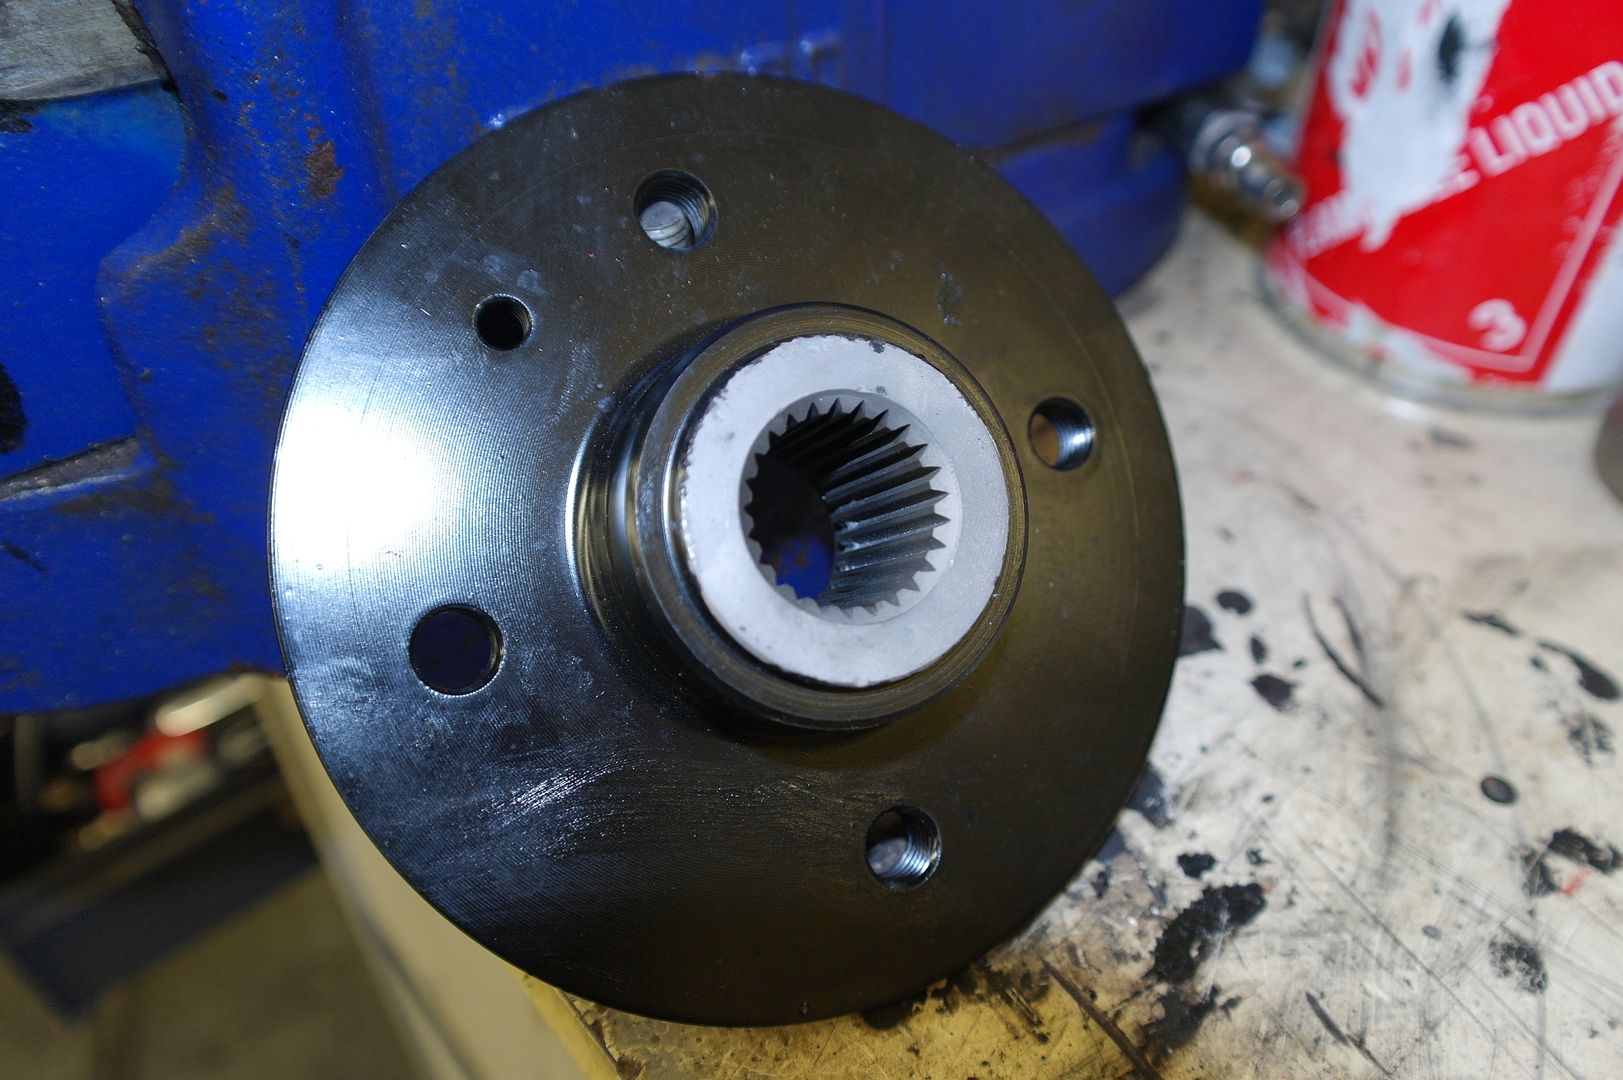
Ensure the splines are clean
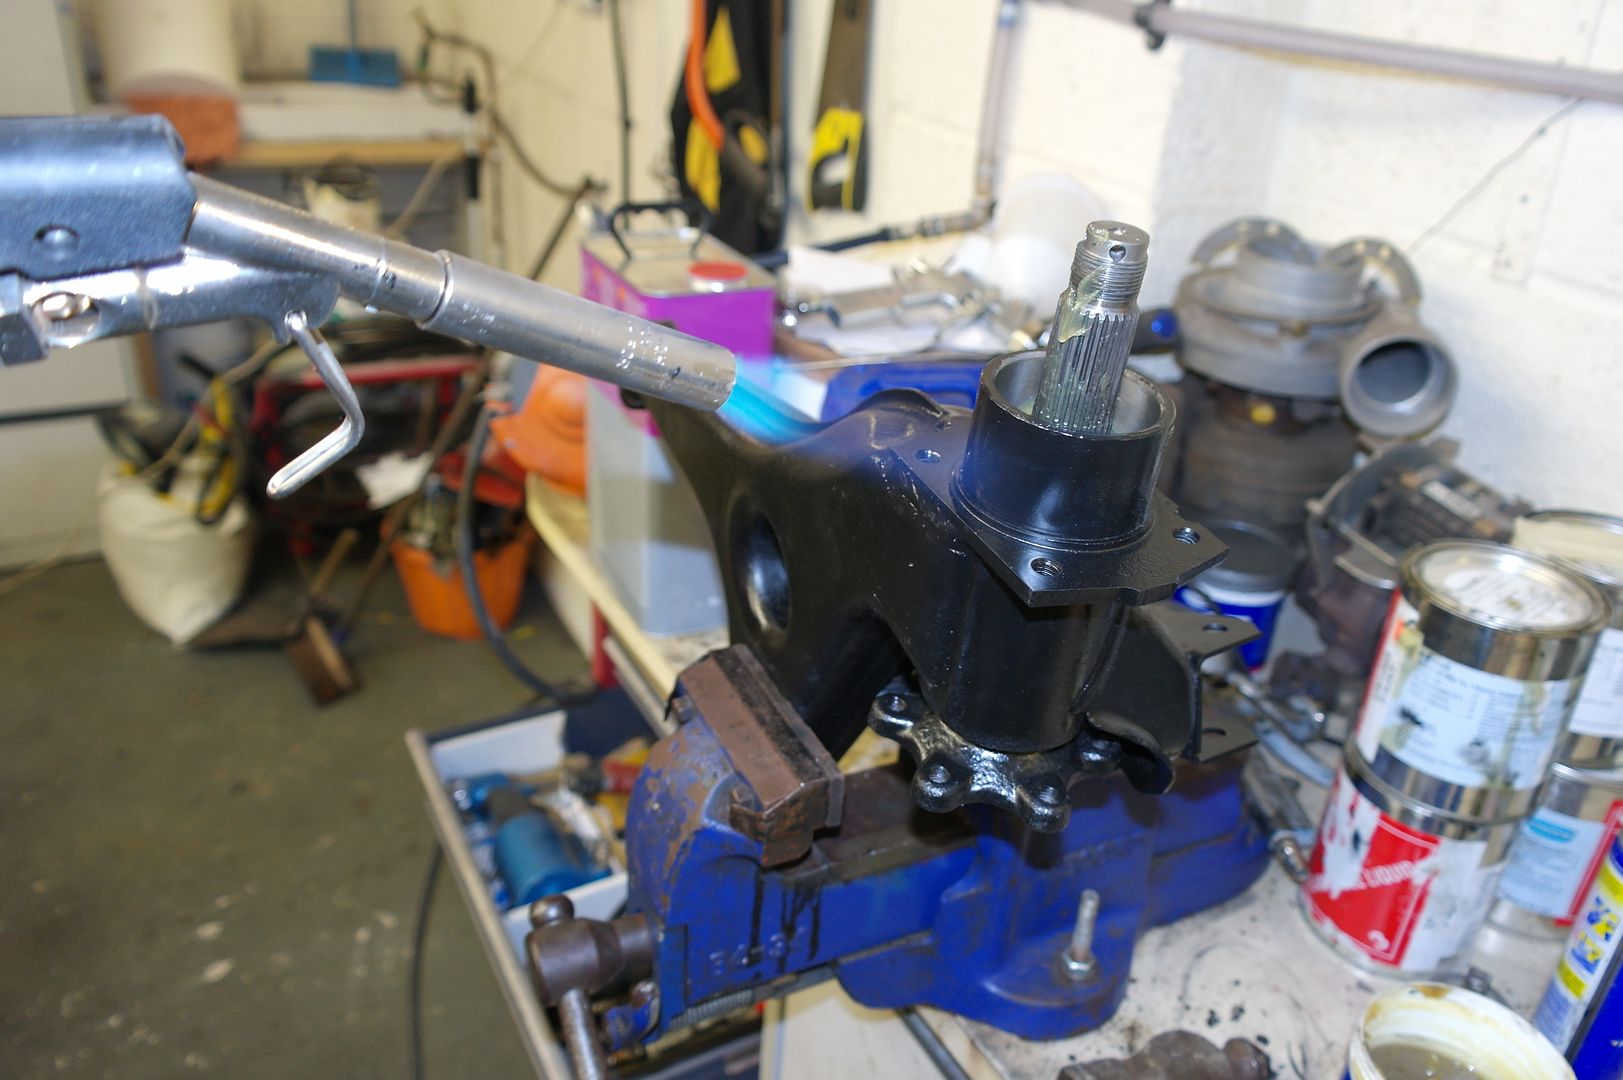
heat
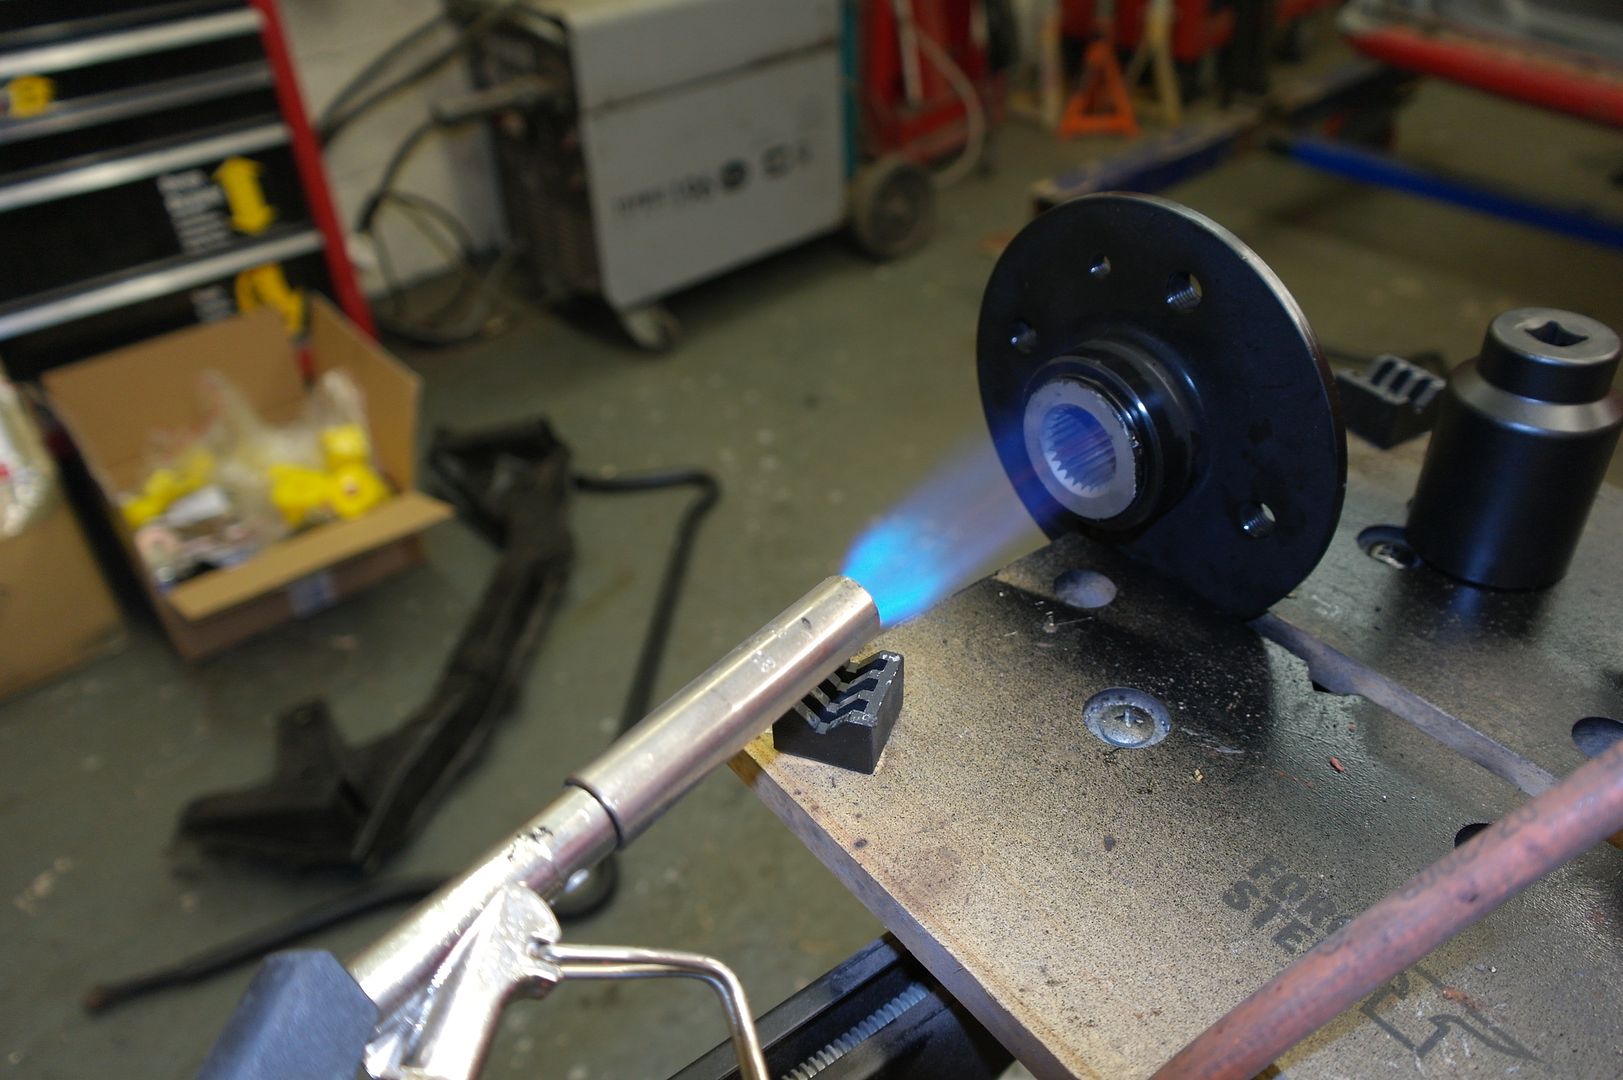
This time i went a little hotter "smoking" and the flange litterally dropped on.
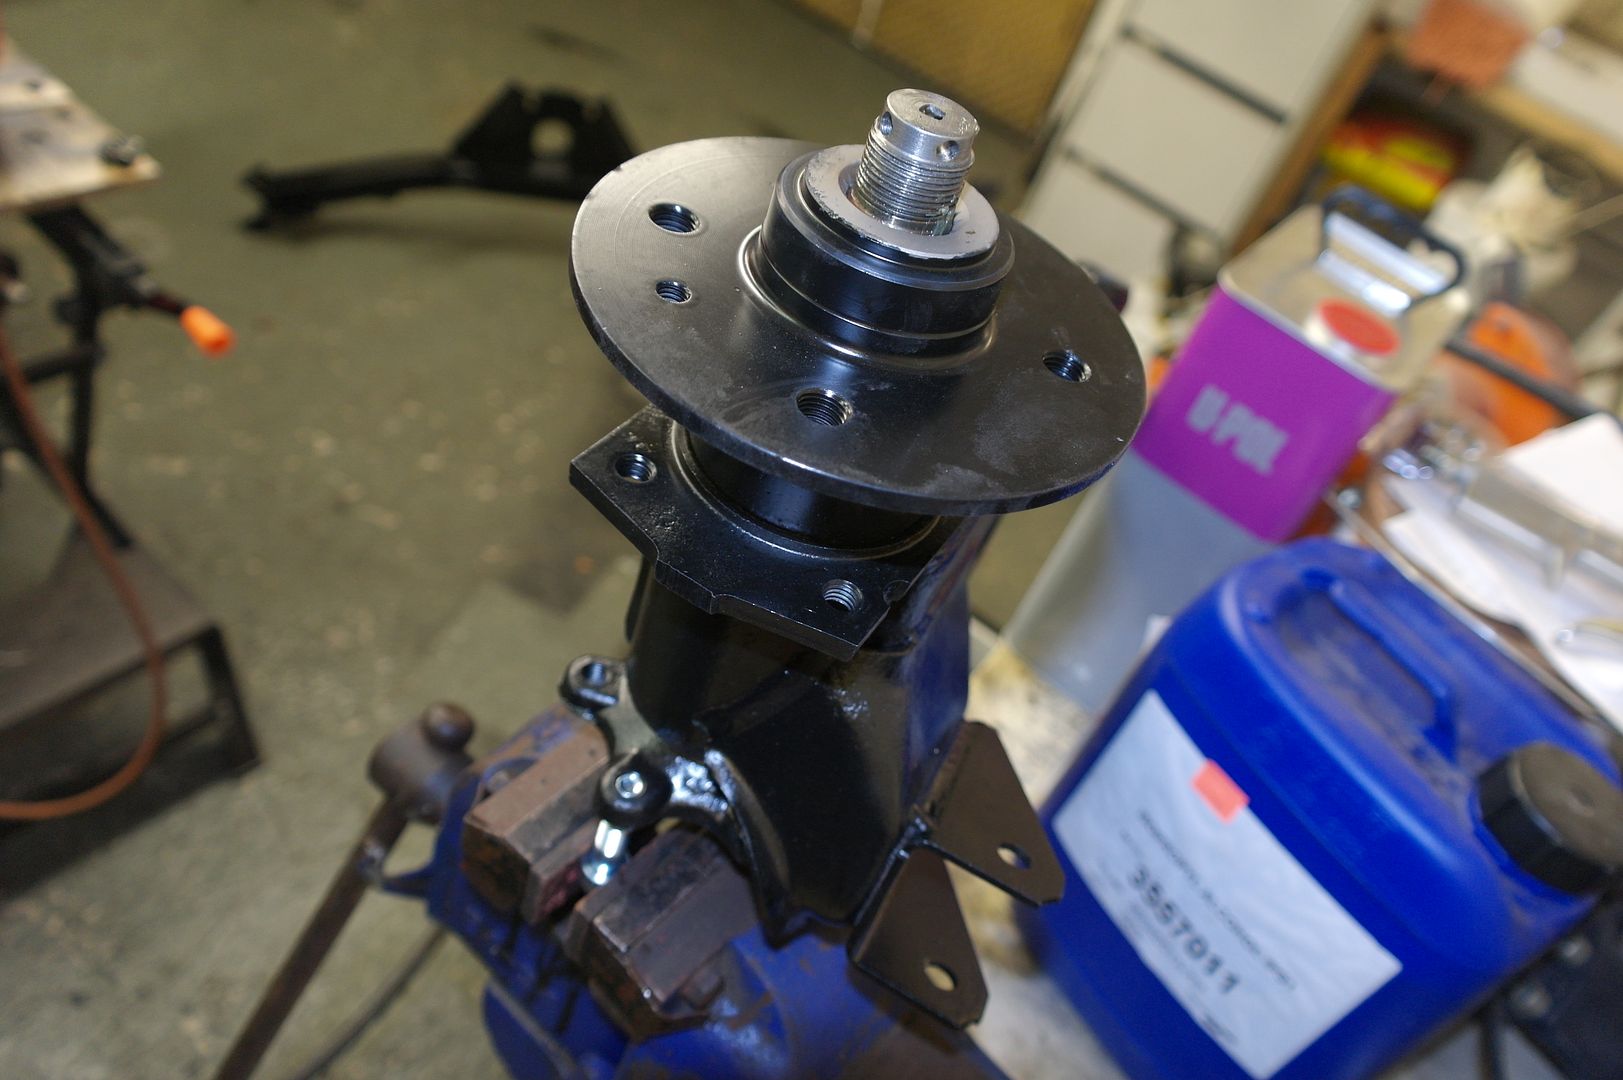
Run on nut and torque
I went to 220lb/ft Max for my wrench, then pushed on a little further to line up with the locking holes. so probably ended up at around 300lb/ft.
Hope this helps anyone that wants to try it, any other suggestions are welcome.
I recommend breaking off the castle nuts while on the car.
a good quality impact socket and breaker bar or impact driver should get it. I measured it around 800Lb/ft to remove.
Remove the rear arm from the car
Heat is your Friend, propane gun or similar makes life a lot easier. and a vice is nice.
remove castle nut.
Heat the output flange (the one the wheel bolts to) and use a puller it will come straight off. dont try and hammer the shaft through!! the end will cave in and damage the threads. I learned the hard way, you will see in the pics later.
Now press or hammer(usung a sacrificial drift softer than the shaft) the shaft through the bearings.
remove the seals
Walk the bearings out the hub with a drift, you will need to move the spacer tube side to side to do this.
Do not loose the shim from behind the outer bearing
Keep all parts matched side to side the shims and spacer tubes may be different sizes
I measured mine and both shims where the same size so may just have been lucky.
clean clean clean
you should end up with this

Measure your new bearings they should be the same thickness as the ones removed to within 0.1mm or so
heat the bearing housing

Insert the inner bearing it should drop most of the way in

If needed drive it down hitting only the outer race of the bearing until seated on the shoulder

Insert the seal and push into place

apply a little grease the inner edge of the seal once installed
Now you are tring to heat the inner race of the bearing to install the shaft

heat down the center, the rubber seal stays fairly cool as its shielded by the bearing, the inner race take on a fair amount of heat and should be to hot to touch.

now slide the shaft up through the bearing and give a light tap if required. You will see i had to machine the damaged bit of thread off my stubs to save them.


you need to fill the cavity with some grease, i found it easier to cover the spacer tube in it then slide it down.

pack some more in

it doesent need to be completely full just enough to lube the bearings
Now heat the housing again

INSTALL THE SHIM
Ideally you want to either cool the stub shaft or heat just the inner race of the bearing so it slides down a bit easier.
I just heated the housing and slowly drove the bearing into place. Then pushed some more grease into the bearing.

INSTALL THE OUTER SEAL
This is how i secured the shaft to the vice for tightening the nut.

Ensure the splines are clean

heat

This time i went a little hotter "smoking" and the flange litterally dropped on.

Run on nut and torque

I went to 220lb/ft Max for my wrench, then pushed on a little further to line up with the locking holes. so probably ended up at around 300lb/ft.
Hope this helps anyone that wants to try it, any other suggestions are welcome.