Re: 4 pinkers blijven gaan
Posted: Sat Apr 14, 2012 6:34 pm
ik heb het zelefde probleem met alarmlichtschakelaar maar kan niks vinden over reparatie, heeft er iemand een link?
Welcome to the E21 resource, the worldwide owners gallery, and get your answers, fast! ____ Scroll naar beneden voor het Nederlandse forum!
https://www.bmwe21.net/forum/
Grazie! mmm maar snap er niet veel van..
E21meister wrote:This is a copy of an article I have on my hard drive That I saved from Bimmerforums (thanks to Jester323):
Here are a few pics to go along with this... I've been meaning to recreate this ever since Fred's site went out of commission... Sorry for the crappy pics, my goo camera just died...
Pop the center grill in the dash out, a smaller flat head screw driver seems to help, then push the hazard switch out from the back side.
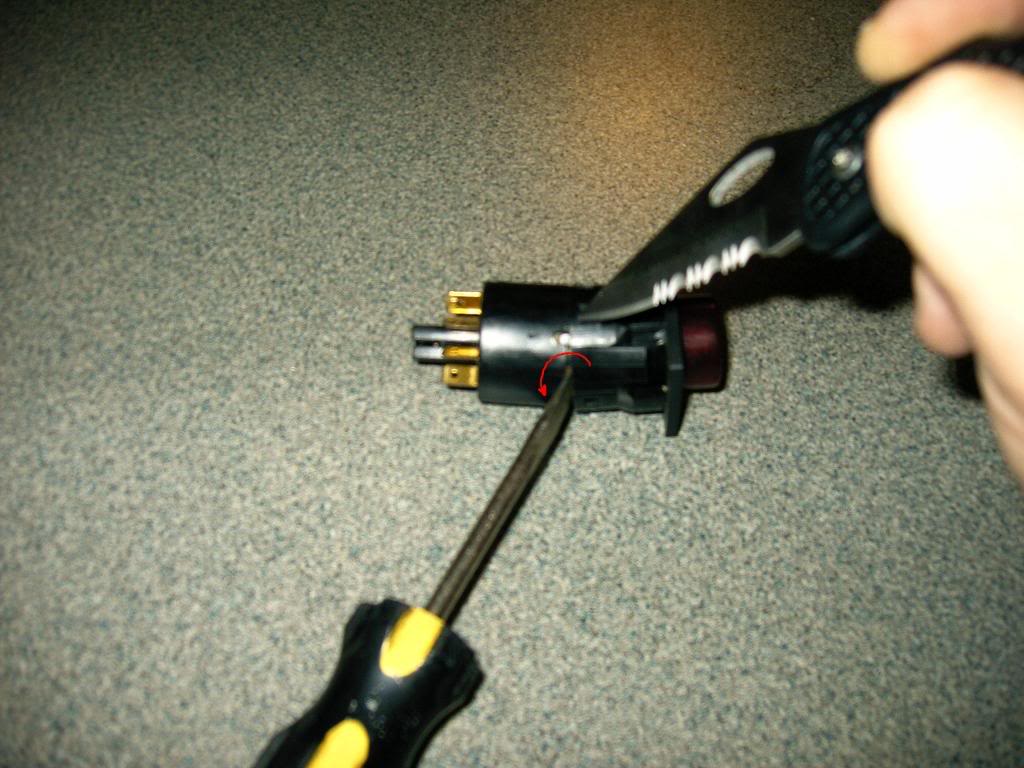
Use a pocket knife and a screwdriver to gently seperate the two halves.
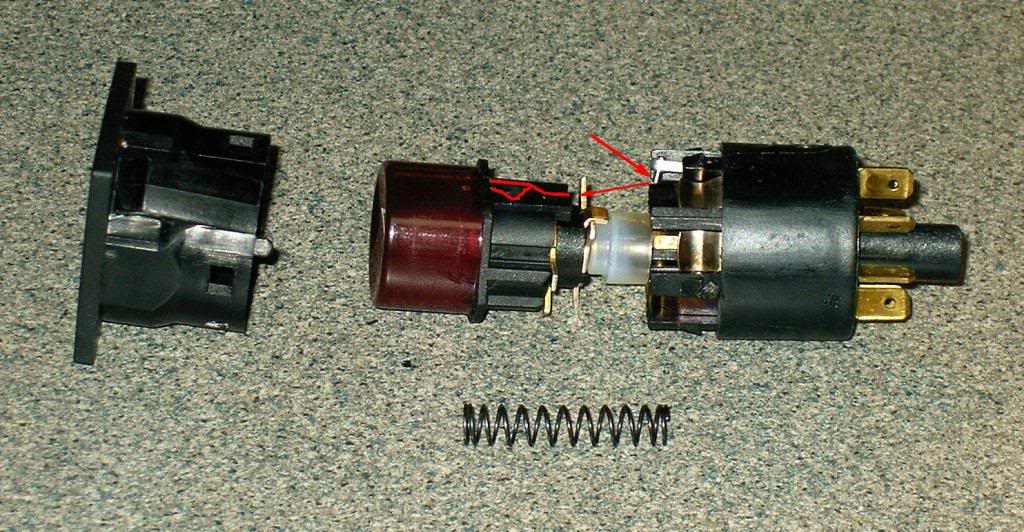
seperate slowly & the inner spring will stay near by.
You can see here where the pin on the little metal arm slides in the groove on the opposite half.
This is the pin/arm closer up:
Use a pair of needle nose pliars and bend the arm in a tiny bit so that the pin/arm stay engaged with the corresponding groove.
Then reassemble the pieces and test. No more Bic pen caps stuck in there to keep it turned off...
KIJK EENS!!!! TOP nu kan ik het zien, Dankjewel!!! maar dacht ook zoo iets morgen is kijken of ik wat er mee kan fixen!Wondermike wrote:E21meister wrote:This is a copy of an article I have on my hard drive That I saved from Bimmerforums (thanks to Jester323):
Here are a few pics to go along with this... I've been meaning to recreate this ever since Fred's site went out of commission... Sorry for the crappy pics, my goo camera just died...
Pop the center grill in the dash out, a smaller flat head screw driver seems to help, then push the hazard switch out from the back side.
Use a pocket knife and a screwdriver to gently seperate the two halves.
seperate slowly & the inner spring will stay near by.
You can see here where the pin on the little metal arm slides in the groove on the opposite half.
This is the pin/arm closer up:
Use a pair of needle nose pliars and bend the arm in a tiny bit so that the pin/arm stay engaged with the corresponding groove.
Then reassemble the pieces and test. No more Bic pen caps stuck in there to keep it turned off...